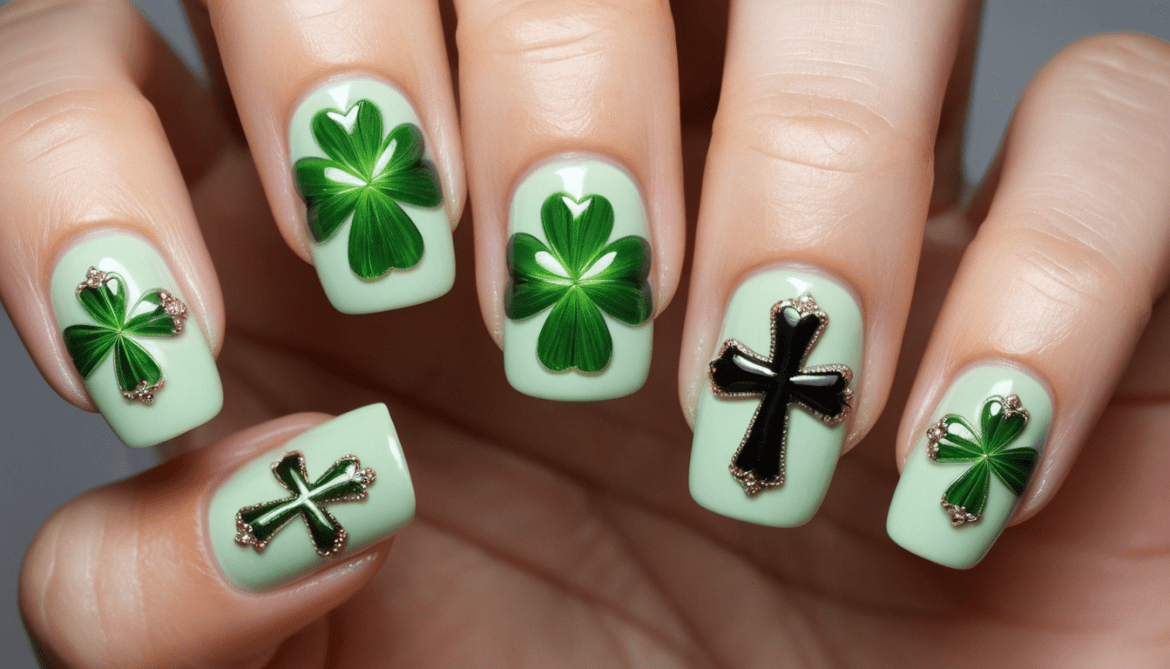
Unlock the Secret to Luck with This Jaw-Dropping Clover & Cross Nail Design!
If you’ve ever dreamed of flaunting nails that turn heads and invite compliments, this Clover and Cross Combo is your ticket to a show-stopping manicure. Combining whimsical charm with a touch of elegance, this nail art design is the perfect mix of cute and classy. Ready to try your hand (pun intended) at this masterpiece? Let’s dive in!
Why Choose the Clover and Cross Combo?
What’s so magical about combining clovers and crosses? Think good luck meets timeless sophistication. The Clover and Cross Combo blends the earthy vibes of nature with the bold symmetry of geometric patterns. It’s not just nail art; it’s a mini statement piece on your fingertips.
Here’s why you’ll love it:
Perfect for Any Occasion: Great for casual days or upscale evenings.
Trend-Forward Appeal: Lucky symbols are all the rage in nail art trends right now.
Customizable Colors: Whether you go for emerald greens or bold metallics, this design works with any palette.
What You’ll Need
Before you jump into the design, make sure you’ve got these tools handy. Trust me, preparation makes everything smoother (and smudge-free!).
Tools:
Nail buffer and file
Base coat and top coat
Green nail polish (or your chosen clover color)
Gold or silver nail polish for the crosses
Fine detail nail art brush
Dotting tool or toothpick
Nail polish remover and cotton swabs for cleanup
Optional Extras:
Rhinestones for added sparkle
Matte top coat for a velvety finish
Nail stickers if freehand isn’t your style
How to Create the Clover and Cross Combo
Get ready to transform your nails into a stunning masterpiece with our easy, step-by-step guide to the enchanting Clover and Cross Combo design!
Step 1: Prep Like a Pro
Start by filing your nails into your desired shape—oval, almond, or square all work beautifully with this design. Buff the surface lightly to create a smooth base, then apply a clear base coat to protect your nails and prevent chipping.
Pro Tip: Don’t skip the base coat! It’s like priming a canvas for flawless art.
Step 2: Lay Down the Background
Choose a neutral or pastel shade as your base color to let the design pop. Soft whites, blush pinks, or pale greens make excellent choices. Apply 1–2 coats and let it dry completely.
Step 3: Paint the Clover
Use your dotting tool to create four small dots in a cluster (like petals) with green polish.
Connect the dots with gentle brushstrokes to form the clover leaf shape.
Add a thin line for the stem.
If you’re feeling adventurous, go for multiple clovers on each nail or even an accent nail with a large clover surrounded by smaller ones.
Step 4: Add the Cross
Using your fine detail brush, paint a delicate cross in gold or silver. Aim for symmetry, but don’t stress if it’s not perfect—imperfections make it unique! For an extra dimension, outline the cross in black for a bold contrast.
Step 5: Elevate with Extras
Enhance the look with rhinestones at the center of the clover or at the cross intersection. You can also experiment with glitter accents or a gradient effect for added flair.
Step 6: Seal the Deal
Apply a high-shine top coat to protect your design and give it that professional finish. Or, go for a matte top coat for a modern twist.
Clover Meets Cross: Trending Color Combos
Here are some color pairings to inspire your palette:
Classic Elegance: Emerald green + gold
Playful Spring: Mint green + pastel pink
Edgy Glam: Black + metallic silver
Boho Chic: Olive green + bronze
Behind the Design: A Tale of Luck and Style
Did you know clovers have been symbols of luck for centuries? Meanwhile, the cross has represented balance and protection. Together, they’re the ultimate power couple in nail art—luck and strength at your fingertips.
When I first tried this design, I wasn’t sure if I could freehand the clovers. But with a little patience (and a few redo attempts), it became my go-to design for special occasions. Spoiler: compliments were non-stop!
Worried About Smudging?
Here’s the fix:
Use quick-dry top coats.
Give each layer ample drying time.
Keep nail art cleanup tools handy for touch-ups.
Bonus Hack: Dip your detail brush in acetone to sharpen lines and edges.
What Makes the Clover and Cross Combo Special?
This isn’t just a nail design—it’s an experience. Each stroke adds personality to your look. Whether you’re a beginner or a seasoned pro, this combo is adaptable and oh-so-fun to try.
Ready to Rock It?
If you’re itching to give this design a shot, gather your supplies and carve out some me-time. Try one nail at first, or go full set if you’re feeling confident. Once you’re done, don’t forget to show off your masterpiece!
Have You Tried This Design?
Drop your pics or tips in the comments! Let’s swap ideas and keep the creativity flowing.
