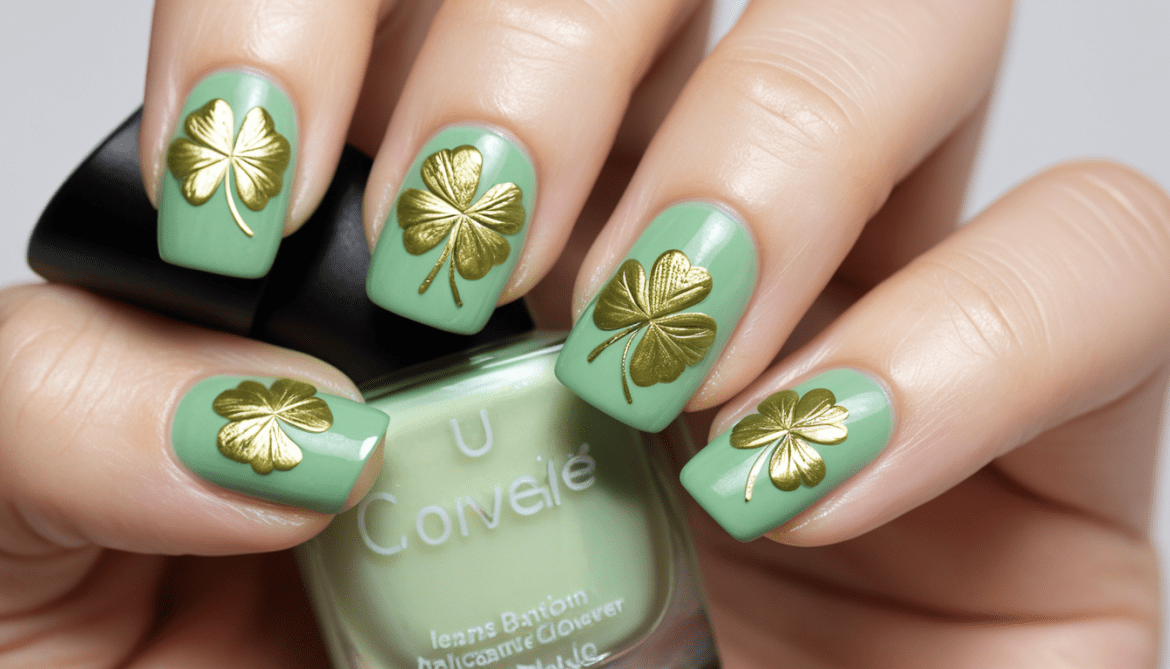
Four-Leaf Clover Stamping: Master the Luckiest Nail Art Trend Everyone’s Obsessed With!
Ever wondered how to bring a little luck to your fingertips? The Four-Leaf Clover Stamping design is the ultimate way to make your nails a lucky charm. Whether you’re gearing up for St. Patrick’s Day or just love adding a bit of whimsy to your nails, this design will make you feel like you’re carrying a little bit of luck everywhere you go.
Are You Ready to Try Your Hand at a Stamping Nail Design?
Nail art has exploded in popularity, and there’s one design that’s got people talking—Four-Leaf Clover Stamping. But how exactly do you create this luck-filled look, and is it as tricky as it sounds? The answer is no—this charming design is easier than you think, even if you’re a beginner!
The Basics of Four-Leaf Clover Stamping
First, let’s talk about what you need. Getting your Four-Leaf Clover stamping right isn’t about having a ton of fancy tools—it’s about using the right ones. Here’s a quick rundown:
Stamping Plate with a Four-Leaf Clover design
Stamping Polish (opt for a high-quality, fast-drying one)
Stamping Scraper to remove excess polish
Nail Stamper (clear for precision)
Base and Top Coat (you’ll want that polish to last)
Tip: You can find stamping plates with clovers in different sizes or patterns. Mix and match for a custom design!
Step-by-Step Guide to Stamping Your Lucky Four-Leaf Clover Nails
Ready to create lucky nails? Follow these simple steps to master the art of Four-Leaf Clover Stamping and elevate your nail game with ease!
1. Prep Your Nails
Clean and file your nails for the best results. Apply a base coat to protect your nails and create a smooth canvas.
2. Pick Your Stamping Plate
Choose a Four-Leaf Clover design. Don’t forget—you can create a full set with a single clover or use a scatter pattern.
3. Apply Stamping Polish
Apply a generous layer of polish over the clover design on your stamping plate. Be quick to ensure the polish doesn’t dry too fast.
4. Scrape Excess Polish
Use your scraper at a 45-degree angle to remove excess polish. The goal is to leave just enough polish on the plate for stamping.
5. Stamp It On
Press your stamper gently onto the plate, picking up the clover design. Immediately roll the stamper onto your nail, transferring the design.
6. Top Coat
Seal the design with a top coat to add shine and keep the clover in place.
Pro Tip: Be sure to clean your stamper and scraper regularly to avoid smudging on future nails!
Don’t Overlook the Details: Choosing the Right Colors
When it comes to Four-Leaf Clover Stamping, color matters. While classic green is always a hit, try experimenting with colors like gold, silver, or even pastel hues. The key is to make your design pop! Bold contrast can make the clovers stand out even more.
Feeling Lucky? My Personal Experience with Four-Leaf Clover Stamping
I remember trying this design for the first time. At first, I thought it might be difficult to transfer the design perfectly. But once I got the hang of it, I couldn’t stop! The clovers looked so cute, and I loved how the stamping gave my nails a professional finish. Plus, I got tons of compliments every time I wore them!
Why Four-Leaf Clover Stamping is a Must-Try
So, why should you try this design? It’s fun, fast, and surprisingly simple! Whether you’re an experienced nail artist or just starting out, Four-Leaf Clover Stamping is a great way to get creative without too much fuss.
Common Myths About Stamping: Let’s Bust Them
Think nail stamping is too tricky or only works on short nails? Let’s set the record straight and break down these common myths once and for all!
Myth: “Stamping is too hard!”
Truth: As long as you have the right tools and technique, it’s totally doable. Just give yourself some practice time!
Myth: “It only works on short nails.”
Truth: Whether you have long or short nails, stamping works on any nail shape. Get creative!
Pro Tips for Long-Lasting Results
Want your Four-Leaf Clover design to stay flawless for days? Check out these expert tips that will keep your nails looking fresh and chip-free!
Use a quick-dry top coat to seal in the design and prevent smudging.
Avoid putting pressure on the stamper to ensure clean transfers.
Lucky or Not: Is This Design Worth It?
Without a doubt! The Four-Leaf Clover Stamping design is perfect for those who love fun, festive nails. Plus, it’s versatile enough to wear on any occasion—whether you’re celebrating St. Patrick’s Day or just looking for a design to brighten up your week.
Ready to Try It?
The Four-Leaf Clover Stamping design isn’t just about adding a lucky symbol to your nails—it’s about embracing creativity, having fun, and enjoying the process. So, what do you say? Will you give it a try?
Let me know in the comments—have you tried stamping before, or is this your first time? And, how will you make your Four-Leaf Clover design your own? Let’s talk tips and tricks!
