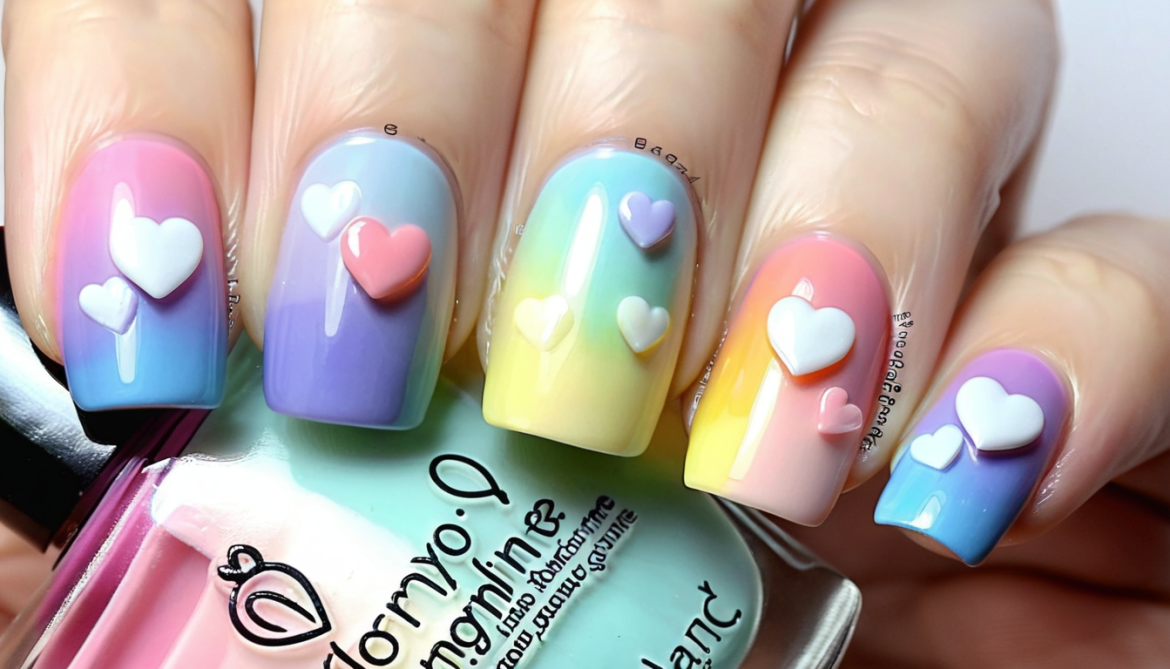
Pastel Rainbow Gradient with Hearts: A Nail Art Design That Will Steal Your Heart (Literally!)
When was the last time your nails made you feel like you could conquer the world? If you haven’t felt that lately, it’s time to meet the Pastel Rainbow Gradient with Hearts — the nail art trend that’s taking over social media and will leave you feeling like a literal rainbow on your fingertips!
Have You Ever Wanted to Wear a Rainbow on Your Nails?
Picture this: You’re strolling down the street, and every time you catch a glimpse of your nails, you’re grinning ear to ear. This Pastel Rainbow Gradient with Hearts design is not just another nail art trend—it’s a mood, a statement, and a burst of happiness in your day. But here’s the question: are you ready to take your nails to the next level and make a statement that screams fun and love? Stick with me, and I’ll show you exactly how to create this gorgeous, heart-filled masterpiece.
What You’ll Need to Get Started
Before you dive into the rainbow madness, let’s gather the essentials. Here’s your must-have list:
Pastel Nail Polishes: Think soft pinks, blues, purples, yellows, and greens. The more pastel, the better!
Nail Art Brushes or Sponges: For creating that gradient effect—brushes are for precision, sponges are for blending.
Heart Nail Stencils or Nail Stickers: For the perfect little heart shapes.
Top Coat: Seal the deal with a high-shine finish.
Base Coat: Protect your nails and ensure long-lasting results.
Got everything? Let’s jump into creating these dreamy nails!
Step-by-Step Guide to the Perfect Pastel Rainbow Gradient with Hearts
Creating this nail art design is easier than it sounds! Here’s how to get those flawless pastel rainbow nails with cute little hearts on top.
1. Prep Your Nails
Start with clean, filed nails. Apply a base coat to protect your natural nails and make the design last longer. Pro tip: A clean surface makes all the difference in how the colors pop!
2. Apply Your Base Colors
Start by applying the pastel colors on each nail. Choose 3-5 shades for the gradient—lighter colors like pastel pink, baby blue, and lavender work wonders together. Quick tip: Don’t worry about neatness just yet; we’re going to blend it all together.
3. Blend the Colors (The Magic Moment!)
Take a sponge (you can use a makeup sponge) and dip it into your pastel shades. Lightly dab the sponge onto your nails in a gradient motion, starting from the tips down to the base. Blend the colors so they smoothly transition from one to the next. Pro tip: Keep the sponge moving to avoid harsh lines.
4. Add the Heart Accents
Now for the fun part—hearts! You can use a heart-shaped stencil or stick-on decals for a neat, precise design. Pro tip: Position the hearts near the center of the nail for a balanced look. Want to go extra? Add a tiny heart near the cuticle for a playful touch!
5. Top Coat & Finish!
Seal your design with a top coat for that shiny, glossy finish. It will not only make your colors pop but also ensure your rainbow gradient stays intact for days. Quick tip: Make sure to wait for each layer to dry before applying the top coat to avoid smudging.
Common Mistakes to Avoid (And How to Fix Them)
Creating this rainbow gradient with hearts isn’t as hard as it seems, but there are a few things you should watch out for:
Messy Edges: Don’t let the gradient spill over your nail! If you find that happening, clean up with a small brush and some nail polish remover.
Too Much Sponge: Applying too much polish on the sponge can make the gradient look blotchy. Less is more when it comes to sponge-dabbing.
Skipping the Top Coat: Don’t skip the top coat! It’s the key to making your design look professional.
Why You Should Try the Pastel Rainbow Gradient with Hearts
This design is more than just a trend—it’s about bringing joy to your fingertips. Whether you’re heading to a party, celebrating a special occasion, or just want to brighten up your day, these nails will certainly turn heads and spark conversations.
Plus, the pastel hues are perfect for all seasons, and the cute heart shapes add a touch of sweetness that never goes out of style. Fun Fact: Rainbow designs are often associated with positivity and good vibes—what better way to channel those good vibes than through your nails?
Myth-Busting: “Isn’t This Too Difficult for a Beginner?”
You might be thinking, “This looks complicated!” But I promise, it’s easier than it appears. If you can sponge on a little polish and apply a sticker, you’re halfway there. Plus, the gradient effect naturally hides imperfections, so don’t stress about making it perfect. The hearts are a simple addition that elevate the design without adding too much difficulty.
Why You Need This Design in Your Nail Art Collection
In the world of nail art, the Pastel Rainbow Gradient with Hearts is the epitome of fun, fresh, and fabulous. Whether you’re a seasoned nail artist or just starting out, this design is worth adding to your nail art collection. It’s perfect for those who want to try something unique and eye-catching without being overwhelming. Plus, it’s a great way to experiment with colors while keeping it cute and chic.
So, what are you waiting for? Grab those pastel polishes, create your own rainbow masterpiece, and spread the love—one heart at a time!
Have you tried a rainbow gradient with hearts on your nails yet? Share your experience in the comments below—I’d love to hear how it went!
