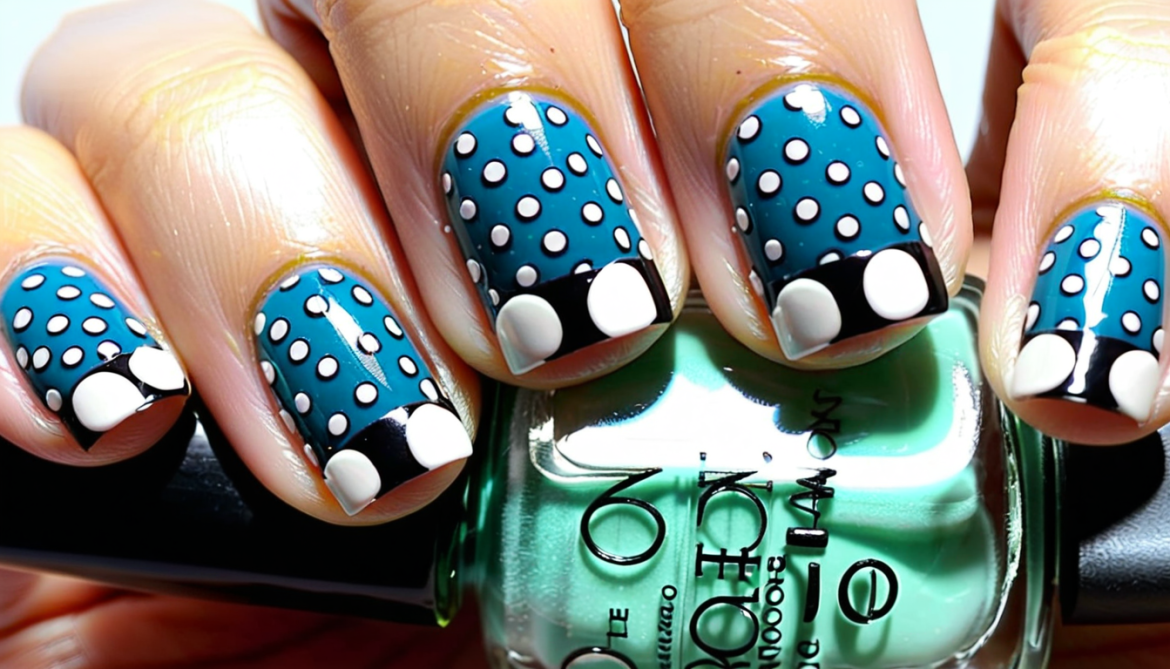
The Dotted Half-Moon Nail Art Design: The Chic, Bold Look You Need to Try Now!
Nail art isn’t just about adding color to your fingertips—it’s about making a statement. Have you ever wanted a nail design that’s not only stylish but also versatile enough to wear on any occasion? Enter the Dotted Half-Moon Nail Art. This design is bold, unique, and surprisingly easy to do at home. Plus, it’s become a favorite among influencers and fashion-forward individuals alike.
Let’s dive into the details and discover why this design is the ultimate trendsetter.
What Is the Dotted Half-Moon Nail Art Design?
If you’re new to the world of nail art, the “half-moon” part refers to the small, crescent-shaped space at the base of your nails—just above the cuticle. By adding a fun dotted detail around this area, you create a striking, geometric contrast that instantly elevates any manicure.
The design typically combines a solid color on the nail with contrasting dots in the half-moon space, giving your nails a modern, yet playful vibe.
Why You’ll Fall in Love With the Dotted Half-Moon Nail Art
This chic and versatile design combines elegance and playfulness, making it the perfect addition to any nail art enthusiast’s collection.
Simple Yet Statement-Making: The beauty of this design lies in its simplicity. The half-moon shape is timeless, while the dotted details add a playful twist. It’s the perfect combination of elegance and fun.
Great for All Skill Levels: Whether you’re a seasoned pro or a beginner, this design is easily adaptable to your skill set.
Versatile for Any Occasion: Whether it’s a classy work event or a weekend brunch, the Dotted Half-Moon Nail Art fits every vibe.
Tools You’ll Need to Create This Design
Before we dive into the step-by-step tutorial, gather these essentials:
Base coat (to protect your nails)
Two nail polish colors (one for the base color and one for the half-moon accent)
Dotting tool or toothpick (for those perfectly round dots)
Top coat (to seal in the design and make it last)
Nail tape or stencil (optional, for a clean, defined half-moon shape)
Now, you’re ready to give this design a go!
Step-by-Step Guide to Creating Dotted Half-Moon Nail Art
Ready to rock this trendy design? Follow these easy steps to create flawless Dotted Half-Moon Nails that will turn heads wherever you go.
Step 1: Prep Your Nails
Start by applying a base coat to protect your nails from staining. It also helps your manicure last longer. Let it dry completely before moving on to the next step.
Step 2: Apply the Base Color
Choose a color for the main part of your nails. Classic neutrals like white, black, or nude are always a good choice, but don’t be afraid to experiment with bold shades! Apply two coats for even coverage, allowing each coat to dry.
Step 3: Tape Off or Stencil the Half-Moon
For a precise half-moon shape, apply some nail tape at the base of your nails to create the crescent shape, or use a half-moon stencil. If you’re feeling confident, you can freehand this part for a more relaxed, artsy vibe.
Step 4: Add the Dots
Dip your dotting tool or toothpick into your contrasting nail polish and carefully place a dot around the half-moon area. Keep the dots evenly spaced for a symmetrical look. You can make them small or bold, depending on your personal style!
Step 5: Finish with a Top Coat
Seal everything with a clear top coat to make your design shine and last longer. This step also smooths out any bumps, giving your nails that salon-quality finish.
Quick Tips for Perfecting Your Dotted Half-Moon Nails
Want your design to stand out? Check out these pro tips to elevate your Dotted Half-Moon Nails and ensure they last longer with a perfect finish.
Pro Tip #1: If you want ultra-sharp lines, use nail tape for the half-moon shape.
Pro Tip #2: Don’t forget to let each layer dry completely to avoid smudging.
Pro Tip #3: Experiment with contrasting colors for a bolder look, or stick to subtle neutrals for a more understated design.
The Trending Vibe: Dotted Half-Moon Nails
It’s no surprise that dotted half-moon nails are gaining traction. They’ve been spotted all over Instagram, worn by influencers and celebrities alike. The design is trending for its retro-modern vibe, bringing back a classic look with a fresh twist.
Want to take it up a notch? Try adding a pop of glitter, metallic dots, or even mix-and-match colors for a quirky, personalized design.
Busting Myths: Is This Nail Art Design Hard to Do?
One of the most common misconceptions about nail art is that it requires professional skills or a lot of time. Not true! The Dotted Half-Moon Nail Art is surprisingly easy to recreate at home, even if you’ve never picked up a dotting tool before. With just a little practice, you’ll be rocking this design in no time.
Your Next Steps
So, what are you waiting for? Grab your tools, pick your colors, and get started on this chic, fun, and trendy nail art. Whether you’re heading to a special event or just want to spice up your day-to-day look, the Dotted Half-Moon Nail Art is guaranteed to turn heads.
Ready to give it a try? Let us know how it goes, and don’t forget to tag us in your stunning nail art photos!
Wrapping It Up
The Dotted Half-Moon Nail Art design is the perfect combination of simplicity and sophistication. Whether you’re a nail art newbie or a seasoned artist, this design will add a modern, edgy flair to your nails in minutes. And the best part? It’s completely customizable to fit your style!
So, what’s stopping you from trying this trend? Take the plunge and treat your nails to a makeover—they’ll thank you later!
Which color combination are you dying to try first with the Dotted Half-Moon Nail Art? Let us know in the comments!
