Clarified Butter Made Simple
Mastering Homemade Clarified Butter (Ghee) for Dairy-Free Cooking
For anyone navigating a dairy-restricted diet, whether it’s the strict guidelines of Whole30, the principles of Paleo, or simply managing lactose intolerance, the absence of butter can feel like a significant culinary sacrifice. But what if you could enjoy the rich, unmistakable flavor of butter without any of the dairy components? Enter **clarified butter**, a kitchen hero that allows you to keep that beloved buttery taste firmly *on* the menu. This comprehensive guide will walk you through the surprisingly simple process of making clarified butter at home, complete with detailed instructions and tips to ensure perfect results every time.
Clarified butter is not just a substitute; it’s a superior cooking fat with a higher smoke point and a wonderfully nutty flavor that elevates countless dishes. From sautéing vibrant vegetables and searing succulent meats to enriching sauces and adding a golden touch to your baked potatoes, its versatility is unmatched. Forget the misconception that it’s only for dipping lobster; once you discover the ease and benefits of homemade clarified butter, it will become an indispensable staple in your kitchen. Get ready to transform your cooking!
What Exactly Is Clarified Butter?
Clarified butter is pure butterfat, created by removing the milk solids and water from regular butter. When butter is gently melted, it naturally separates into three distinct layers: a foamy layer of milk solids that rises to the top, pure liquid butterfat in the middle, and heavier milk solids that sink to the bottom. The process of clarifying butter involves carefully separating and discarding these milk solids and water, leaving behind only the golden, translucent butterfat.
The result is a culinary fat that boasts several advantages over traditional butter. It’s essentially lactose-free and casein-free, making it suitable for many dairy-sensitive individuals and diets like Whole30 and Paleo. Furthermore, the removal of water and milk solids significantly increases its smoke point—the temperature at which fat begins to burn and produce smoke—from around 302-325°F (150-163°C) for regular butter to approximately 450-485°F (232-252°C) for clarified butter. This makes it an ideal choice for high-heat cooking methods like searing, frying, and sautéing without the risk of burning and imparting a bitter taste.
Why Make Clarified Butter? Benefits That Go Beyond Taste
The decision to make clarified butter extends beyond simply enjoying a familiar flavor on a dairy-free diet. It brings a host of practical and culinary benefits to your kitchen:
Dairy-Free and Lactose-Free: This is arguably the most significant benefit for many. By removing the milk solids, which contain lactose and casein, clarified butter becomes safe for individuals with lactose intolerance, dairy allergies, and those adhering to dairy-free dietary regimens like Whole30, Paleo, or Keto. It offers the rich taste of butter without the associated discomfort or dietary restrictions.
Higher Smoke Point: As mentioned, clarified butter can withstand much higher temperatures than regular butter. This is crucial for cooking techniques that require intense heat, preventing your fat from burning and your food from acquiring an unpleasant scorched flavor. It means perfect searing, crispy pan-fries, and beautifully roasted vegetables every time.
Extended Shelf Life: The water content in regular butter is a primary contributor to spoilage. By eliminating water and milk solids, clarified butter gains a remarkably extended shelf life. Stored properly, it can last for months at room temperature and even longer when refrigerated, reducing food waste and making it a convenient pantry staple.
Enhanced Flavor Profile: While still distinctly buttery, clarified butter often develops a slightly nuttier, richer, and more intense flavor due to the gentle cooking process. This concentrated essence adds depth to any dish it graces.
Versatile Culinary Uses: From everyday cooking to gourmet creations, clarified butter shines. Use it for sautéing eggs, cooking chicken, pan-frying fish, roasting vegetables, making delicate sauces like Hollandaise or Béarnaise, or even drizzling over popcorn or steamed greens for an extra layer of deliciousness.
Easier Digestion: For many with sensitive digestive systems, the absence of lactose and casein in clarified butter makes it much easier to digest compared to regular butter.
Clarified Butter vs. Ghee: What’s the Difference?
You might have heard the terms “clarified butter” and “ghee” used interchangeably, and while they are very similar, there’s a subtle but important distinction. Both involve removing milk solids and water from butter, but the process for making ghee goes a step further.
Clarified Butter: The butter is melted and simmered just long enough for the milk solids to separate and float to the top or sink to the bottom. The heat is then removed, and these solids are carefully skimmed and strained away. The resulting clarified butter is a clear, golden liquid with a mild, pure buttery flavor.
Ghee (Indian Clarified Butter): To make ghee, the butter is cooked for a longer period over low heat. During this extended cooking, the milk solids at the bottom begin to caramelize and turn a golden brown. This browning process imparts a deeper, nuttier, and more intense aroma and flavor to the butterfat. Ghee is revered in Indian cuisine for its distinct taste and aromatic qualities.
For most dairy-free cooking and for the purpose of a high smoke point fat, basic clarified butter is perfect. If you desire that extra layer of toasted, nutty flavor, simply extend the simmering time a bit longer until the solids at the bottom begin to brown slightly, then proceed with skimming and straining. Both options offer the same dairy-free benefits and versatility.
Step-by-Step Guide: How to Make Clarified Butter
Making clarified butter at home is an incredibly straightforward process that requires minimal equipment and just a few minutes of your time. Here’s everything you need to know:
Choosing Your Butter and Essential Tools
The foundation of great clarified butter is good quality unsalted butter. **It is crucial to use unsalted butter**, as the salt can interfere with the separation process and affect the flavor. While any unsalted butter will work, opting for grass-fed butter can enhance the flavor and nutritional profile of your final product. I typically clarify a half-pound to a full pound of butter at a time to ensure I always have some on hand.
Here are the few tools you’ll need:
A small saucepan: Choose one that comfortably fits your butter without being too large, which can cause the butter to spread out too thinly.
A spoon or ladle: For skimming the foam. A soup spoon or a small ladle works well.
Cheesecloth: This is essential for fine straining. I recommend using at least 4-5 layers, or even more, to ensure all fine milk solids are captured.
A fine-mesh sieve (optional, but helpful): To hold the cheesecloth.
Mason jar or other airtight glass container: For storing your finished clarified butter.
The Clarifying Process
Follow these simple steps for perfectly clarified butter:
Melt the Butter: Place your unsalted butter (I usually start with 8 ounces or 16 ounces) into the small saucepan. Heat the butter over very low heat. The goal is to melt the butter slowly and gently bring it to a simmer without stirring. Patience is key here; rushing the process with high heat can scorch the butter.
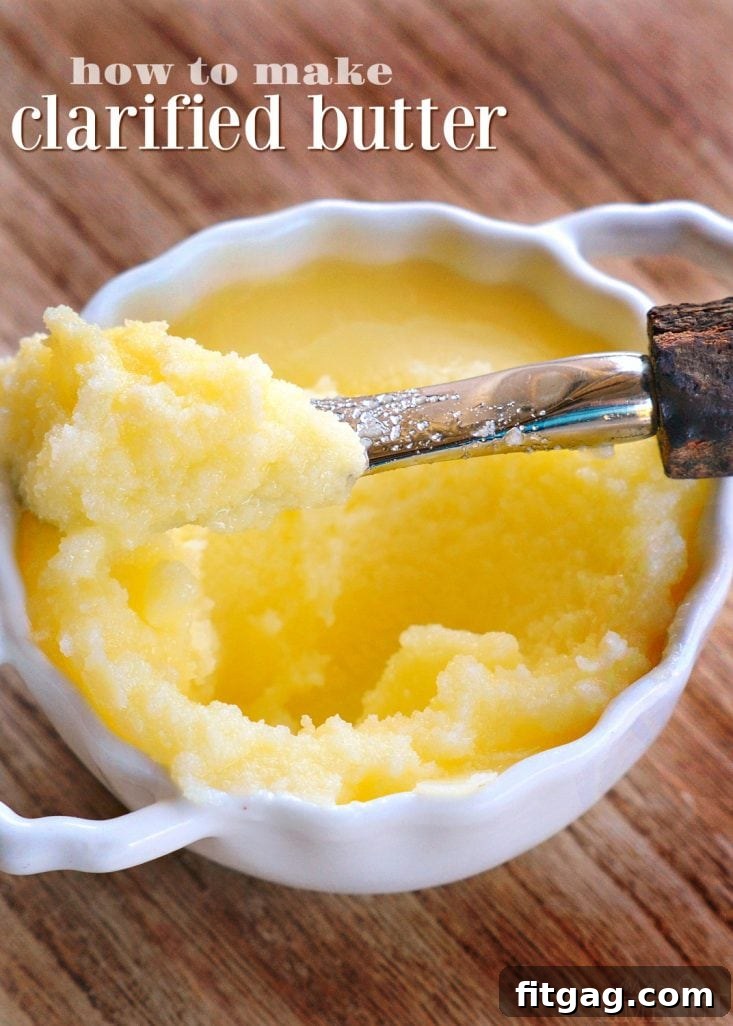
Observe Separation: As the butter melts, you’ll begin to notice distinct layers forming. A white, foamy layer will rise to the surface. This is composed of the milk solids. Below this foam, the butter will turn clear and golden, and some heavier milk solids might settle at the bottom of the pan. It will look like this:
Skim the Foam: Once the butter has been simmering gently for a few minutes and the layers are well-defined, it’s time to remove the top layer of milk solids. Carefully use a spoon (a soup spoon works perfectly) to skim off as much of this white, foamy residue from the surface as possible. Be gentle to avoid mixing the layers.
Prepare for Straining: Even after skimming, tiny milk solids will remain. To achieve truly clarified butter, straining is essential. Place your fine-mesh sieve (if using) over a clean glass bowl or Mason jar. Line the sieve with at least 5 layers of cheesecloth. The more layers, the finer the filtration, ensuring no milk solids pass through.
Strain the Butter: Carefully pour the hot, clear butterfat through the cheesecloth into your prepared container. Be mindful of the heavier milk solids at the bottom of the saucepan; try to leave these behind, especially the very last bit, as you pour.
Cool and Store: Once all the butterfat has been strained, discard the cheesecloth and any collected milk solids. Allow the clarified butter to cool completely to room temperature.
Look at that beautiful, bright golden color! Once cooled, the clarified butter will solidify into a pale yellow, semi-solid state. Transfer it to a covered, airtight glass container. You can store your homemade clarified butter at room temperature for up to three months in a cool, dark place, or refrigerate it for up to six months (or even longer, depending on how thoroughly clarified it is). Its stability makes it an excellent pantry staple.
Uses for Clarified Butter in Your Kitchen
Now that you’ve mastered the art of making clarified butter, it’s time to put it to good use! Its high smoke point and rich flavor make it incredibly versatile for a wide range of culinary applications:
High-Heat Cooking: Ideal for searing steaks, pan-frying chicken or fish, sautéing vegetables (like the Slow Cooker Green Beans with Bacon), or making crispy fried eggs without burning the butter.
Roasting: Toss potatoes, carrots, broccoli, or any root vegetables in clarified butter before roasting for a delicious golden finish.
Sauces: The classic choice for emulsified sauces like Hollandaise and Béarnaise, as it prevents the sauce from breaking due to milk solids.
Baking: Can be used in certain baking recipes where a pure butter flavor and fat consistency are desired, particularly in pastry making.
Popcorn and Vegetables: Drizzle over freshly popped popcorn or steamed vegetables for an instant flavor upgrade.
Grains and Legumes: Stir a spoonful into cooked rice, quinoa, or lentils for added richness.
Flavor Enhancer: A fantastic finishing fat for everything from scrambled eggs to grilled meats, adding a subtle depth.
Troubleshooting and Tips for Perfect Clarified Butter
Don’t Stir: Resist the urge to stir the butter as it melts and simmers. This allows the layers to separate cleanly, making skimming and straining much easier.
Low and Slow is Key: Keep the heat low. High heat will cause the milk solids to burn quickly, resulting in a dark, bitter flavor, and it can also cause splattering. Gentle simmering is all you need.
Don’t Overcook: While ghee requires browning of the milk solids, for basic clarified butter, you only need to cook until the foam separates and the butterfat is clear. Overcooking can lead to a burnt taste.
Multiple Layers of Cheesecloth: This cannot be stressed enough. Thin cheesecloth might let tiny solids through. If you only have thin cheesecloth, fold it into 4-6 layers to create a denser filter.
What to do with the milk solids? While most recipes advise discarding them, if you’re not on a strict dairy-free diet, the skimmed foam and bottom solids can sometimes be used quickly in baking (e.g., in scones or muffins) for a rich, buttery flavor. However, for true dairy-free purposes, always discard them.
Storage: Always use a clean, dry, airtight container for storage to maximize shelf life and prevent contamination.
Clarified Butter Recipe
Recipe: Homemade Clarified Butter
Learn how to easily make clarified butter at home with this simple step-by-step guide. Essential for dairy-free diets like Whole30, this high-smoke-point cooking fat will transform your culinary repertoire.
Course: Side
Cuisine: American
Keyword: clarified butter, condiment, ghee, dairy-free, Whole30
Prep Time: 5 minutes
Cook Time: 5 minutes
Total Time: 10 minutes
Servings: 16 (based on 8 oz butter)
Calories: 101 kcal per serving (for 8 oz butter, 16 servings)
Author: Trish – Mom On Timeout
Ingredients
8 oz (or 1 pound) unsalted butter
Instructions
Place the unsalted butter in a small saucepan. Heat the butter over very low heat, allowing it to melt completely and gently come to a simmer. Do not stir; allow the butter to separate naturally.
As the butter simmers, a white, foamy layer of milk solids will rise to the surface. Carefully use a spoon (such as a soup spoon) to skim off and discard all, or most, of this foamy layer.
Prepare a clean glass bowl or jar by placing a fine-mesh sieve over it and lining the sieve with at least 5 layers of cheesecloth.
Gently pour the clear, golden butterfat through the prepared cheesecloth and sieve into the glass container, being careful to leave behind any remaining heavier milk solids at the bottom of the saucepan.
Discard the used cheesecloth and any remaining milk solids. Allow the clarified butter to cool completely to room temperature.
Once cooled and solidified, store the clarified butter in a covered, airtight glass container. It can be stored at room temperature in a cool, dark place for up to three months, or refrigerated for up to six months.
Nutrition (Estimated per serving for 8 oz butter, 16 servings)
Calories: 101 kcal | Fat: 11g | Saturated Fat: 7g | Cholesterol: 30mg | Sodium: 1mg | Potassium: 3mg | Vitamin A: 355IU | Calcium: 3mg
For more delicious appetizer recipes, go HERE.
For delectable dessert recipes, go HERE.
Sign up to receive emails when new recipes are posted!
For even more great ideas, follow me on Facebook – Pinterest – Instagram – Twitter – Bloglovin’.
Happy Cooking, and Have a Great Day!
The post Clarified Butter Made Simple first appeared on Fitgag.