Craft Your Own Garden Planter Box
DIY Garden Planter Box: Build Your Dream Raised Bed This Weekend!
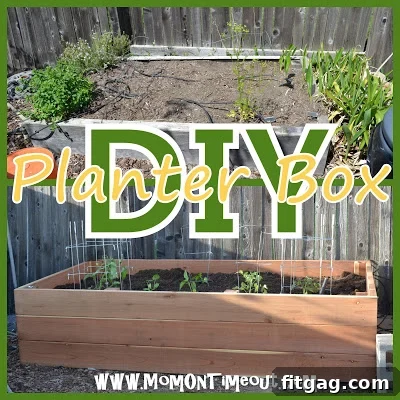
Anyone can make this DIY Garden Planter Box!
I am absolutely thrilled to share the creation of my fantastic new raised garden planter box with you! This project was incredibly straightforward, and I promise you, anyone can build this planter. What’s more, you can have it completed and ready for planting in just a couple of hours. Perhaps even quicker if you don’t have enthusiastic five and three-year-old “helpers” by your side!
Last year, my family and I decided it was time to upgrade our gardening setup. We consistently struggled to grow robust vegetables in our existing planter boxes, primarily because they simply weren’t deep enough. Our local soil is quite heavy clay, and once plant roots encountered that dense layer, growth became challenging, to say the least. After brainstorming several ideas, we landed on a design that promised both ample depth and durability. This comprehensive guide will walk you through building your very own sturdy, deep raised garden bed, perfect for thriving plants and an easier gardening experience.
Why Choose a Raised Garden Bed? Benefits for Every Gardener
Raised garden beds offer a multitude of advantages over traditional in-ground gardening, making them an excellent choice for both novice and experienced gardeners. For us, the primary motivation was battling our unforgiving clay soil. Raised beds allow you to control the soil composition entirely, filling them with a rich, well-draining mixture that’s ideal for plant growth. This prevents common issues like waterlogging or roots struggling to penetrate dense earth.
Beyond soil control, raised beds provide superior drainage, which is crucial for healthy root development and preventing root rot. They also elevate your gardening area, reducing strain on your back and knees, and making weeding and harvesting much more comfortable. Furthermore, raised beds can help deter pests, improve soil warmth for earlier planting, and even make your garden look tidier and more organized. They’re a game-changer for anyone looking to optimize their growing space.
Our Design: A Spacious 8ft x 4ft Redwood Planter
Essential Materials for Your DIY Planter Box
(6) 2″x8″x8′ Redwood Boards: These will form the long sides and the structure’s depth.
(2) 2″x8″x12′ Redwood Boards: These will be cut into 4-foot lengths to create the short sides of the planter. You will yield (6) 2″x8″x4′ pieces from these two boards.
(1) 4″x4″x8′ Redwood Post: This will be cut into four equal sections to create the sturdy corner posts that stabilize the planter in the ground.
3 1/2″ Exterior Self-Drilling Screws: Opt for high-quality exterior-grade screws that are designed for outdoor use and resist rust. Self-drilling screws can save time and effort.
Recommended Tools for Construction
Circular Saw: Essential for cutting lumber, especially the 4×4 posts.
Cordless Drill/Driver: For pre-drilling pilot holes and driving screws.
Tape Measure: For accurate measurements.
Pencil: For marking cuts.
Speed Square or Carpenter’s Square: Crucial for ensuring all corners are perfectly square.
Level (4-foot preferred): To ensure your planter sits evenly on the ground.
Safety Glasses and Gloves: Always prioritize safety when working with power tools and lumber.
Budget-Friendly Building: Cost & Customization
We purchased all our redwood lumber and screws from our local Lowes, and the total cost came in just under $170, including tax. For a planter box of this substantial size and durability, we consider that a very fair price. If an 8ft x 4ft planter is too large for your space, or if redwood lumber exceeds your budget, this design is incredibly adaptable! You can easily modify the dimensions to fit any area and choose alternative lumber types to suit your financial plan.
A 4 ft x 4 ft square planter would require a total of 48 linear feet of wood (16 ft for each of the three levels).
A 3 ft x 6 ft rectangular planter would require a total of 54 linear feet of wood (18 ft for each of the three levels).
Before making your purchase, take a trip to your local home improvement store. Price out different lengths and types of lumber (such as cedar, pressure-treated pine, or even untreated pine if you’re comfortable with a shorter lifespan). Calculate the linear footage needed for your desired dimensions to ensure you’re buying efficiently and minimizing waste. Smart planning ensures you get the most value for your money!
Step-by-Step Guide: Building Your Raised Planter Box
Step 1: Prepare Your Lumber for Assembly
The first step involves precise cutting of your lumber. At Lowes, we had a helpful associate cut our 12-foot boards into three equal 4-foot lengths right there in the store. This saved us time and ensured straight cuts for the shorter sides. However, they typically cannot cut the thicker 4×4 posts. For these, we used a circular saw at home, carefully cutting the 8-foot post in half, and then each of those halves in half again, resulting in four perfectly equal lengths for our corner posts. Always wear safety glasses when operating power tools!
Step 2: Assemble the Short Sides of the Planter
With all your lumber cut, it’s time to begin assembly. We started by constructing one of the short ends of the planter. Take two of your 4-foot 2×8 boards and two of your cut 4×4 posts. Lay one 4×4 post flat, and align the end of a 2×8 board flush with the post. It’s crucial to ensure the pieces are perfectly squared up on both sides using your speed square. We used two 3.5-inch exterior screws per board, per side, driving them directly into the 4×4 post. This means four screws for each 4-foot board attached to the posts. Repeat this process for all three 4-foot boards on one end, then do the same for the other short end of the planter.
Step 3: Relocate to the Final Site (Before Full Assembly)
Once both short sides are assembled, a crucial step for large planters like this 8ft x 4ft design is to move these sections to your desired backyard location. We quickly realized it would be exceedingly difficult to move the entire planter once it was fully built and heavy. So, we moved the two short ends and the 8-foot long boards to the garden area. A helpful hand (or two, thanks Reece!) makes this part much easier!
Step 4: Construct the Long Sides of the Planter
This next step definitely requires at least two people to ensure stability and accuracy. Stand the two assembled short sides upright, facing each other. Now, take an 8-foot board and lay it across to connect the two short sides, forming one of the long sides of the planter. It is absolutely crucial that each corner is perfectly squared up at this point. Use your speed square to check every angle. Getting the first long board perfectly aligned and secured makes the installation of the remaining two boards a breeze. Drive screws into the 4×4 posts at each end, just as you did for the short sides.
Continue by attaching the other two 8-foot boards on this same long side, stacking them directly on top of the first. Once one long side is complete, move to the opposite side and repeat the process, attaching all three 8-foot boards.
Step 5: Integrate Stabilizing Posts for Long-Term Durability
Flipping the nearly completed planter over and onto the ground provided a real sense of its impressive size – it was truly exciting! At this point, you’ll get a good view of the corner posts. Notice that they extend a couple of inches longer than the total height of the planter box. These extra inches are vital: they will be driven directly into the ground, securely stabilizing the entire planter box. Considering this planter will hold approximately 64 cubic feet of material, it’s going to be incredibly heavy and won’t be moving anywhere once filled. However, even for smaller boxes, these posts offer excellent anchoring and prevent shifting over time.
Step 6: Complete the Final Side
Next step – the final side! With three sides firmly in place, attaching the last long side is a straightforward process. Carefully align the three remaining 8-foot boards and secure them to the 4×4 posts on both ends, making sure all screws are driven in firmly. Double-check all connections for tightness and ensure no boards are bowing. Your sturdy planter box structure is now complete!
Preparing Your Garden Site & Filling Your New Planter
Step 7: Clear the Area and Level the Ground
Now that the planter box is fully assembled, it’s time to prepare its permanent home. First, we had to move our old, smaller planter. Emptying it was quite a task – thanks, Reece, for the help! Once the old planter was gone, we positioned the new one in its place. Our previous planter was 3 feet by 6 feet, so this new 8ft x 4ft structure is significantly larger, offering much more growing space. Before filling, it is absolutely essential to ensure the ground beneath the planter is perfectly level. Use your long level to check all sides and corners. A level planter ensures even water distribution and prevents undue stress on the structure over time.
Step 8: Fill Your Planter Box with Rich Soil
The next big task is filling your magnificent new planter! As mentioned, this box will hold approximately 64 cubic feet of material, which is a lot of soil. To minimize costs and maximize soil health, consider using a “Hugelkultur” inspired layering method for the bottom third or half. This involves adding organic matter like old logs, branches, leaves, grass clippings, and cardboard at the very bottom. These materials will slowly decompose, enriching the soil, improving drainage, and retaining moisture. Above this organic layer, fill the remainder of the planter with a high-quality raised bed soil mix, a blend of compost, topsoil, and other nutrient-rich amendments. This will provide your plants with the ideal environment for robust growth.
Step 9: Plant Your Dream Garden
After a week of diligent filling and preparation, the most exciting part finally arrived: planting! We eagerly began planting seeds and young plants, transforming the empty soil into a vibrant future garden. The deep soil in this new raised bed provides ample room for roots to grow strong and penetrate deeply, which is essential for healthy, productive plants, especially those that struggled in our shallow previous beds. We are looking forward to a bountiful harvest this season!
The Beautiful Outcome: A Thriving, Chemical-Free Garden
Join the Conversation!
Connect with me!
Linking up here, Home Stories A2Z, Savvy Southern Style, and My Repurposed Life.
The post Craft Your Own Garden Planter Box first appeared on Fitgag.