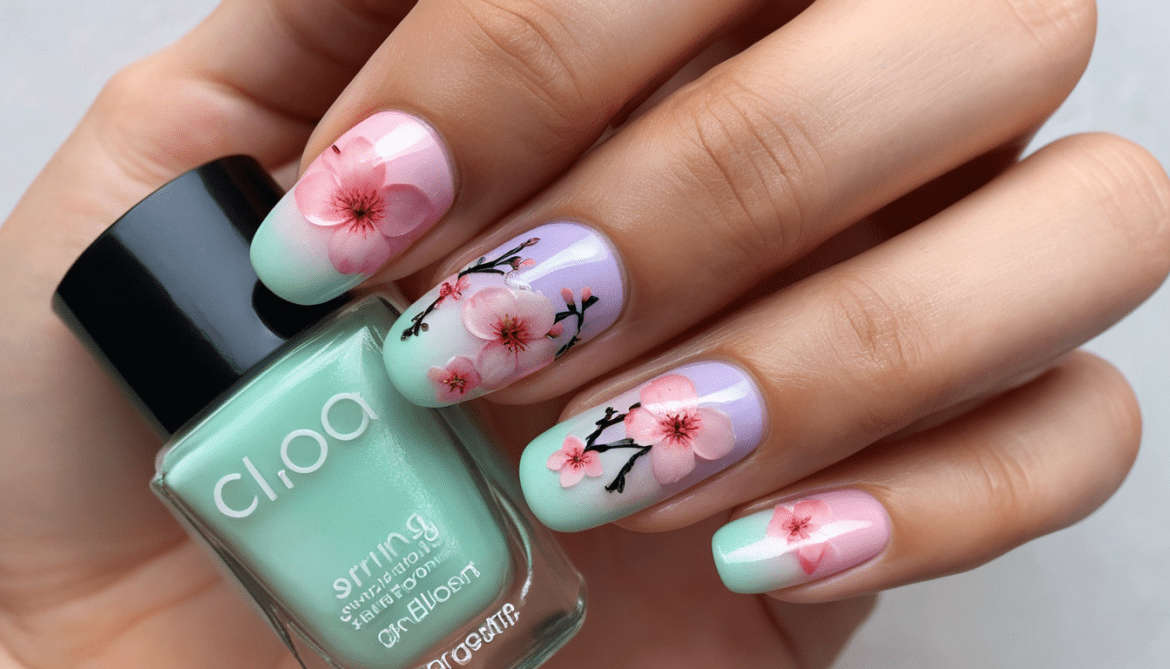
The Stunning Spring Nail Trend Everyone’s Obsessed With—Try It Now!
Spring’s Most Gorgeous Nail Art is Here! Are You Ready to Bloom?
When the first flowers of spring peek through the frost, don’t you just feel inspired? Now imagine that same magic on your nails! Introducing Spring Bloom Gradient, a fresh and fabulous design that blends soft pastels with intricate floral accents to give you the ultimate springtime vibe. Ready to blossom? Let’s dive in!
Why Just Paint When You Can Bloom?
Ever looked at your nails and thought, “They deserve better”? Us too. That’s why we’re swooning over the Spring Bloom Gradient—a design that screams elegance, fun, and creativity all at once. Here’s a question for you:
Wouldn’t you love nails that make people stop and say, “Wow, where did you get those done?”
Spoiler alert: You can DIY this look and wow them all without breaking the bank. Let’s talk tools, steps, and secrets!
What You’ll Need: Nail Art Essentials
Before we dive into the process, gather your tools like a pro. Here’s your checklist:
Base coat and top coat (because protection is key!)
Pastel nail polishes: Think soft pinks, lavender, baby blue, and mint green.
A makeup sponge: For blending the gradient to perfection.
Nail art brushes: Precision is everything for those floral details.
Dotting tool or toothpick: To create flower petals.
Nail stickers or stamps (optional): For those who want a shortcut to floral magic.
Nail polish remover and Q-tips: For cleaning up edges.
Pro Tip: Use quick-dry polish if you’re on the go—it’ll save you so much time!
Step-by-Step: Your Spring Bloom Gradient Tutorial
Ready to create a flawless, eye-catching design? Follow these simple steps to master the Spring Bloom Gradient and turn your nails into a masterpiece!
1. Prep Like a Pro
Start with clean nails. File and shape them into your desired style (oval nails pair beautifully with this design).
Don’t skip this! Apply a base coat to prevent staining and make your masterpiece last longer.
2. Lay the Foundation
Pick your lightest pastel shade (we recommend baby pink or lavender) and paint a base layer. Let it dry completely.
Think of this as your canvas—the smoother, the better.
3. Master the Gradient
Here comes the magic! On your makeup sponge, paint horizontal stripes of pastel colors, blending them slightly where they meet. Gently dab the sponge onto your nails, building up layers for a seamless gradient.
Tip: Use liquid latex or tape around your nails to minimize cleanup.
4. Add Floral Flair
Using your dotting tool or nail brush, create tiny flowers on the nail tips or sides. Choose complementary colors to make the blooms pop.
Example: White petals with yellow centers look chic against a pastel gradient.
5. Seal the Deal
Once everything is dry, apply a glossy top coat to lock in your design and add that salon-worthy shine.
6. Fix Imperfections
Dip a Q-tip in polish remover to clean up any stray polish. Trust us, neat edges make all the difference.
7. Flaunt Your Masterpiece
Snap a photo for Instagram (don’t forget the hashtags #SpringBloomGradient and #NailArtGoals). Then, wait for the compliments to roll in!
Why You’ll Love the Spring Bloom Gradient
This design isn’t just pretty—it’s practical! Here’s why it’s a must-try:
Beginner-Friendly: Easy for newbies but versatile enough for pros to experiment with.
Customizable: Swap out pastel shades or add glitter for a unique twist.
On-Trend: Pastels and florals are always a spring staple.
Did you know? Gradient nails are one of the top nail trends this year, with a 200% increase in Pinterest searches!
Common Nail Art Myths, Busted!
Think nail art is too hard or time-consuming? Let’s bust those myths and show you how easy and fun it really can be!
Myth: Gradient nails are too hard to DIY.
Reality: With a sponge and some patience, anyone can master this look.
Myth: Floral details require fancy tools.
Reality: A simple toothpick works wonders for creating delicate petals.
Feeling inspired yet? Let’s tackle one last misconception: Nail art is time-consuming. With this design, you’ll finish in under 30 minutes—faster than a salon trip!
The Influencer Connection
Did you know that this design was spotted on celebrity nail artist @TrendTipsByTina? She says, “Spring Bloom Gradient is my go-to for clients who want something soft yet stunning. It’s a timeless look!”
Ready to Nail It?
Spring Bloom Gradient isn’t just a nail design—it’s a statement. A celebration of spring, creativity, and your inner artist. So, what are you waiting for? Grab your tools, follow the steps, and let your nails bloom like never before.
What’s your favorite spring nail trend? Let us know in the comments or tag us in your creations. We can’t wait to see your masterpieces!
