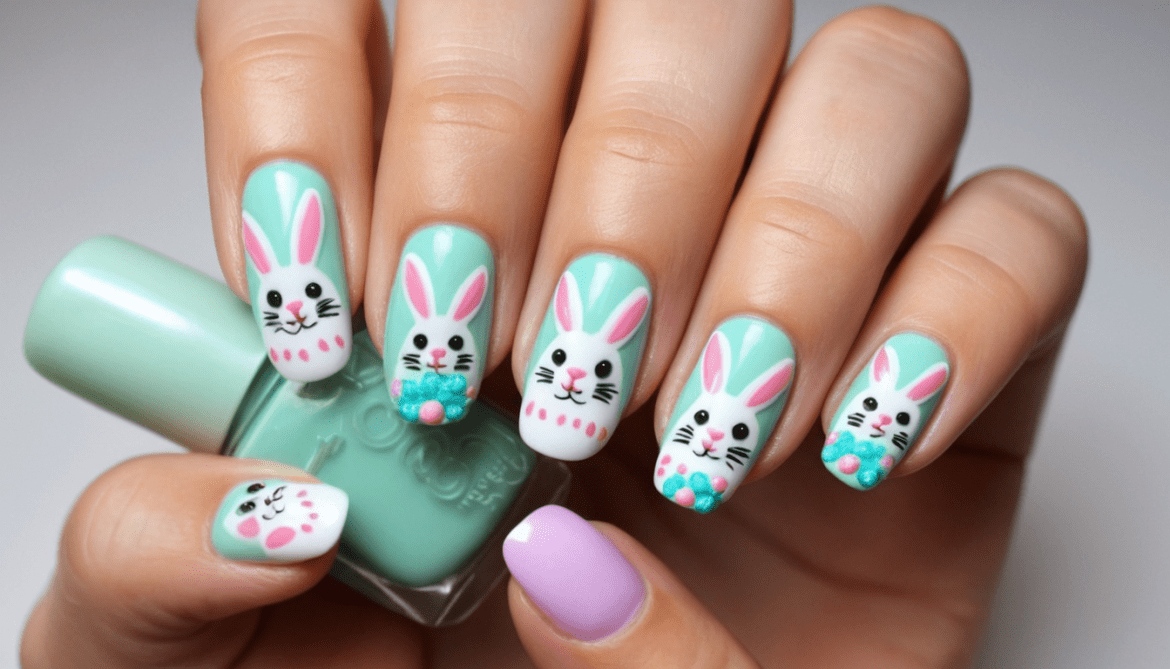
This Easter Bunny Nail Art Will Have Everyone Hopping to Copy Your Look!
Picture this: pastel hues, adorable bunny ears, and tiny carrots dancing on your fingertips. Sounds like something out of a springtime dream, right? Easter Bunny Nail Art is the trend you didn’t know you needed. But is it as hard as it looks? Spoiler alert: It’s easier than cracking open a chocolate egg (and twice as fun)!
What’s Easter Bunny Nail Art All About?
Let’s set the stage. This design combines whimsical charm and seasonal vibes, making it the perfect way to celebrate spring. Whether you’re hosting an Easter brunch or simply love creative nails, these cute bunny-themed nails will have everyone hopping with admiration.
Now, here’s the big question: Why settle for plain pastel nails when you can have bunnies, eggs, and carrots all in one chic design?
What You’ll Need: Your Bunny-Inspired Toolkit
Before diving in, gather these essentials:
Pastel nail polish (think baby pink, lavender, mint, or sky blue)
White nail polish for the bunny’s body
Orange and green polish for carrot accents
A fine-tipped nail brush for detailed work
Dotting tools (or a bobby pin if you’re improvising)
Topcoat for a glossy, long-lasting finish
Basecoat to protect your nails
Nail stickers or gems (optional for extra flair)
Pro Tip: Use gel polish for a smoother, professional finish.
Bunny Basics: A Step-by-Step Guide to Nail It!
Ready to transform your nails into adorable bunnies? Follow these simple steps to achieve the perfect Easter Bunny Nail Art with ease!
Prep Like a Pro
Clean and shape your nails. Apply a base coat to prevent staining and ensure your design lasts.
Pick Your Canvas
Choose a pastel polish for your base color. Paint each nail and let it dry completely. (Pastels scream spring!)
Draw the Bunny
Use the white polish to create a small oval at the tip of your nail—this is the bunny’s face.
Add two thin white lines for ears.
Dip a dotting tool into pink polish to create the inner ear and nose.
Carrot Accents
On a different nail, use orange polish to draw a tiny triangle. Add green polish at the top for the leafy part.
Polka Dot Fun
For extra flair, use your dotting tool to create white or pastel polka dots on the remaining nails.
Seal the Deal
Finish with a glossy topcoat to protect your masterpiece and add shine.
Pro Tip: If freehand isn’t your thing, invest in bunny nail decals or stamps.
Why You’ll Love It (and Everyone Else Will Too!)
This design isn’t just adorable; it’s versatile. Easter Bunny Nail Art can be customized endlessly. Feeling fancy? Add glitter accents or rhinestones. Prefer minimalist vibes? Stick to a single bunny and keep the rest neutral. Either way, you’ll be the talk of your next Zoom call or IRL hangout.
Common Questions Answered
Got questions about creating the perfect bunny design? We’ve got you covered with answers to all your Easter Bunny Nail Art queries!
Is this design beginner-friendly?
Absolutely! Start with simple bunnies and practice carrots on scrap paper first.
How long will it last?
With a good topcoat, you can enjoy your Easter Bunny nails for up to two weeks!
What if I smudge my design?
Don’t panic! Use a thin brush dipped in nail polish remover to fix small mistakes.
A Fun Fact to Impress Your Friends
Did you know? The Easter Bunny tradition dates back to the 1700s, brought to America by German immigrants. Now, it’s hopping its way into the world of nail art. You’re not just painting your nails; you’re honoring centuries of springtime celebrations!
Bunny Tales: My First Attempt (and How I Nailed It!)
The first time I tried this design, my bunny ears looked more like floppy pancakes. But after a little practice (and a lot of laughs), I finally got the hang of it. The trick? Patience, a steady hand, and knowing that even “imperfect” bunnies are adorable.
Ready to Hop On the Trend?
Get your polishes out and start creating your own Easter Bunny Nail Art masterpiece today. Post your designs on social media with #EasterBunnyNails, and don’t forget to tag your nail-obsessed friends.
What’s your favorite spring-inspired nail design? Let us know in the comments below!
This Easter, let your nails do the talking—and the hopping!
