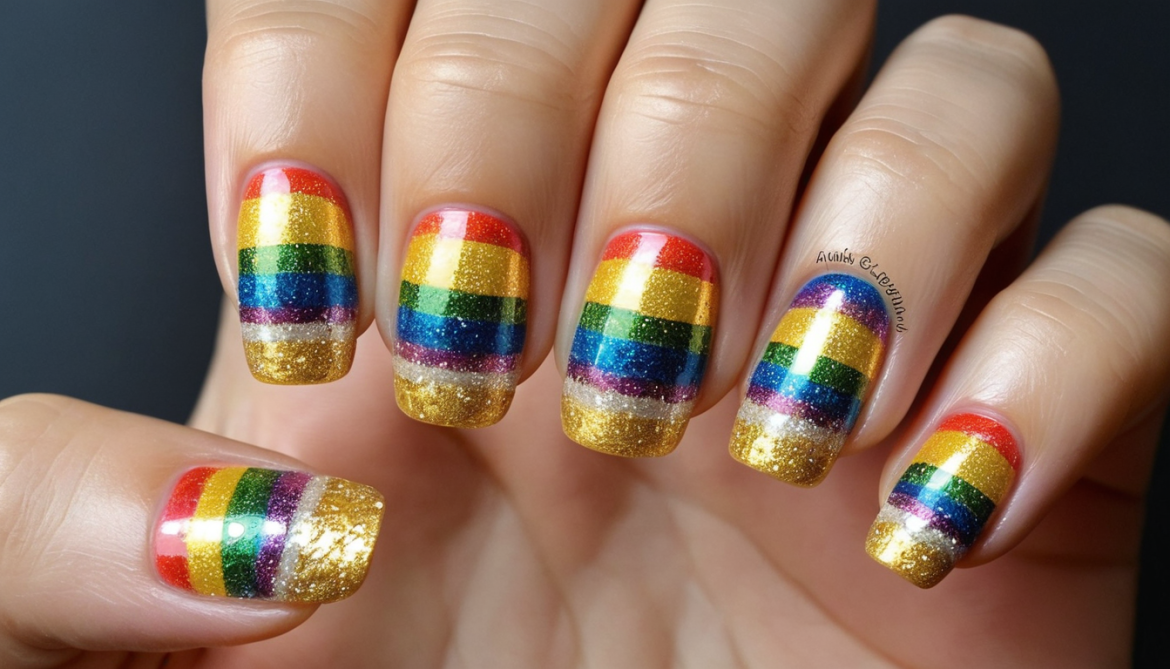
You Won’t Believe How Easy It Is to Create Pot of Gold Rainbow Nail Art That Turns Heads!
Imagine this: a rainy day turns to sunshine, and a glistening rainbow appears in the sky. Now picture that magic on your nails, complete with a pot of gold shimmering at the end. Yes, we’re talking about the Pot of Gold at the End of the Rainbow nail art, a design that’s as whimsical as it is jaw-dropping. Whether you’re a nail art newbie or a seasoned pro, this tutorial will have you feeling like a nail wizard. Let’s dive into this pot of gold!
What’s at the End of Your Rainbow?
Have you ever looked at your nails and thought, “What if these could tell a story?” That’s what makes this design so special—it’s not just nail art; it’s a vibe.
So, let me ask you this: Are you ready to create a masterpiece that’s guaranteed to turn heads and spark conversations?
Why You’ll Love This Design
Get ready to fall in love with this design because it’s bold, dazzling, and guaranteed to steal the spotlight wherever you go!
Eye-Catching: Rainbows and gold—what’s not to love?
Customizable: Adjust colors, add glitter, or even throw in some clouds.
Perfect for Any Occasion: St. Patrick’s Day? Pride Month? A random Tuesday? This design works everywhere.
What You’ll Need
Before you begin, gather these essentials:
Base coat: To protect your nails.
Rainbow-colored nail polishes: Red, orange, yellow, green, blue, and purple.
Gold glitter polish or metallic gold foil: For the “pot of gold” effect.
Black nail polish: For the pot.
Dotting tools: To create precise designs.
Fine nail art brush: For detailed work.
Top coat: To seal and protect your masterpiece.
Optional: Rhinestones or gems for extra bling.
Step-by-Step Guide to Your Pot of Gold
Creating your very own rainbow treasure is easier than you think with this simple, beginner-friendly guide that breaks it all down step by step.
Step 1: Prep Like a Pro
Clean and file your nails into your preferred shape. Apply a base coat to prevent staining and ensure your design lasts longer.
Pro tip: Buff your nails lightly for a smoother application.
Step 2: Paint Your Rainbow
Paint a curved stripe of each rainbow color across your nail.
Use a fine brush for precision and let each color dry before applying the next.
Don’t worry if it’s not perfect—imperfections add charm!
Shortcut: If freehanding feels daunting, use nail art tape to guide your lines.
Step 3: Add the Pot of Gold
With black polish, paint a small pot shape at one corner of your nail.
Once it’s dry, dab gold glitter polish or foil inside the pot to create a sparkling “gold” effect.
Hack: No glitter polish? Crush some gold eyeshadow and mix it with clear polish for a DIY glitter look.
Step 4: Seal the Deal
Finish with a high-gloss top coat to smooth out any bumps and lock in your design. Bonus tip: Add a matte top coat for a trendy, modern twist.
Pro Tips to Nail the Look
Take your nail art skills to the next level with these must-know hacks and insider secrets to perfect this magical design.
Steady Hands: Brace your pinky finger against a table for better control.
Quick Fix: Use a small brush dipped in nail polish remover to clean up mistakes.
Longer Wear: Avoid water for at least an hour after finishing to prevent smudging.
Why This Design is Trending
Rainbows have always been a symbol of hope, joy, and inclusivity. Combine that with a pot of gold, and you’ve got a design that feels modern yet timeless. This look is currently blowing up on social media, with influencers adding their own twists—think holographic rainbows or textured gold foil.
Is This Design as Hard as It Looks?
Not at all! Sure, it looks intricate, but with the right tools and a little patience, it’s totally doable. Think of it as a creative puzzle where every piece comes together to make something beautiful.
A Quick Story Behind the Magic
The Pot of Gold at the End of the Rainbow design was inspired by legends of leprechauns and their hidden treasures. But today, it’s more about celebrating personal wins. Because who doesn’t deserve a little gold in their life?
So, Are You Ready to Strike Gold?
Now that you’ve got the tools, tips, and inspiration, it’s time to bring this magical design to life. Whether you’re showing it off on Instagram or admiring it with every sip of coffee, one thing’s for sure: this design is pure gold.
What Will Your Rainbow Look Like?
Will you stick to classic colors, or add your unique twist? Share your ideas in the comments, and don’t forget to tag us in your nail art photos. We can’t wait to see your masterpieces!
