Crisp Peppermint Cloud
Step into a winter wonderland of flavor with this incredibly easy Peppermint Ice Cream recipe. It’s the quintessential holiday treat, bringing the joyful essence of the season right into your kitchen. Imagine the cool, crisp zest of your favorite Christmas candy canes perfectly blended with rich, sweet, and velvety ice cream – that’s the magic awaiting you. This no-churn delight promises the festive spirit without any complex equipment or lengthy preparation, making it the perfect dessert to share with loved ones or savor on a cozy evening by the fire. Forget the frosty store-bought options; homemade peppermint ice cream offers an unparalleled freshness and vibrant flavor that truly captures the essence of winter wonder.
Craving more delightful peppermint treats? Explore these fun and unique ice cream recipes and other festive sweets like my Peppermint Snowball Cookies, light and airy Peppermint Fluff, and decadent Peppermint Mocha Fudge! Each recipe is designed to infuse your celebrations with that unmistakable holiday cheer.
The Magic of Homemade Peppermint Ice Cream: A Simple Indulgence
Peppermint Ice Cream isn’t just a dessert; it’s an experience that lights up faces all season long. Whether you’re planning a grand holiday feast or simply seeking a comforting midwinter treat, this no-churn ice cream recipe is an absolute winner. Its charm lies in its deceptive simplicity. You don’t need an expensive ice cream maker taking up valuable counter space, nor do you need a culinary degree. With just four readily available ingredients and minimal active preparation time, you can whip up a batch that rivals any gourmet creamery.
The beauty of homemade ice cream, especially this peppermint version, is the control it gives you over the quality and intensity of flavors. You can adjust the peppermint notes to your liking, ensuring every scoop is perfectly balanced, offering a refreshing coolness without being overwhelmingly minty. While it does require a few hours in the freezer to set to creamy perfection, the anticipation only makes the final indulgence sweeter. Trust us, every moment of waiting is absolutely worth it for that first spoonful of frosty, minty bliss.
Why This Peppermint Ice Cream Will Be Your New Favorite
This Peppermint Ice Cream recipe isn’t just another dessert; it’s destined to become a staple in your holiday repertoire. Here’s why you’ll fall in love with it:
Effortless Preparation: Say goodbye to complicated steps and endless churning. This recipe boasts an impressive 10-minute active prep time. The longest part is simply waiting for it to freeze, allowing you to focus on other festive activities or simply relax. It’s the perfect solution for last-minute dessert cravings or when you need an impressive dish without the fuss.
Perfectly Balanced Flavor: We’ve meticulously crafted this recipe to achieve a delightful balance. It’s neither overwhelmingly minty nor excessively sweet. The refreshing peppermint cuts through the creamy base, creating a light and invigorating taste that beautifully complements hearty winter dinners, offering a palate cleanser rather than a heavy finish. Each spoonful is a harmonious blend of cool mint and sweet cream.
No Special Equipment Needed: One of the biggest advantages of this recipe is its accessibility. You won’t need a bulky ice cream machine taking up precious cabinet space. All you require are basic kitchen tools – a mixing bowl, a whisk, and a spoon or spatula. This makes homemade ice cream an achievable dream for anyone, regardless of their kitchen setup or expertise.
Incredible Versatility: While delicious on its own, this peppermint ice cream is a fantastic canvas for customization. Add chocolate chips, drizzles of fudge, or extra sprinkles to make it uniquely yours. It pairs wonderfully with pies, brownies, or simply enjoyed in a waffle cone.
Guaranteed Holiday Cheer: The vibrant red and white hues of the candy canes instantly evoke the festive spirit. Serving this ice cream is not just about dessert; it’s about creating joyful memories, bringing smiles to faces, and embracing the magic of the holiday season. It’s a treat that tastes like Christmas morning!
Elevate your dessert by topping it with my decadent hot fudge sauce for the ultimate chocolate and peppermint treat!
A Collection of Peppermint-Inspired Treats
Peppermint isn’t just for ice cream! Dive into these other wonderful recipes that celebrate the refreshing flavor of peppermint throughout the holiday season and beyond:
Candy Cane Reindeer
Slow Cooker Peppermint White Hot Chocolate
Peppermint Fudge
Peppermint Eggnog Milkshake
Dark Chocolate Peppermint Sugar Cookie Cups
Peppermint Mocha Fudge
White Chocolate Peppermint Sugar Cookie Bark
Essential Ingredients for Your Peppermint Dream
Crafting this peppermint ice cream is like bottling winter’s essence into a bowl! As always, you’ll find the full printable recipe with complete instructions in the dedicated recipe card further down this post. But first, let’s take a closer look at the simple yet crucial ingredients you’ll need to create this creamy masterpiece:
Sweetened Condensed Milk: This ingredient is the unsung hero of no-churn ice cream. It provides the essential sweetness and a thick, rich base that prevents large ice crystals from forming, ensuring your ice cream is wonderfully smooth and creamy. A crucial tip: make absolutely sure you grab sweetened condensed milk and not evaporated milk, as evaporated milk lacks the sugar and thickness vital for this recipe’s success.
Peppermint Extract: This is where the magic minty flavor comes in. Peppermint extract is potent, so use a light hand! A little goes a long way to achieve that bright, refreshing taste without overpowering the delicate creaminess. You can always add more to taste if you desire a stronger minty punch, but it’s harder to take it away.
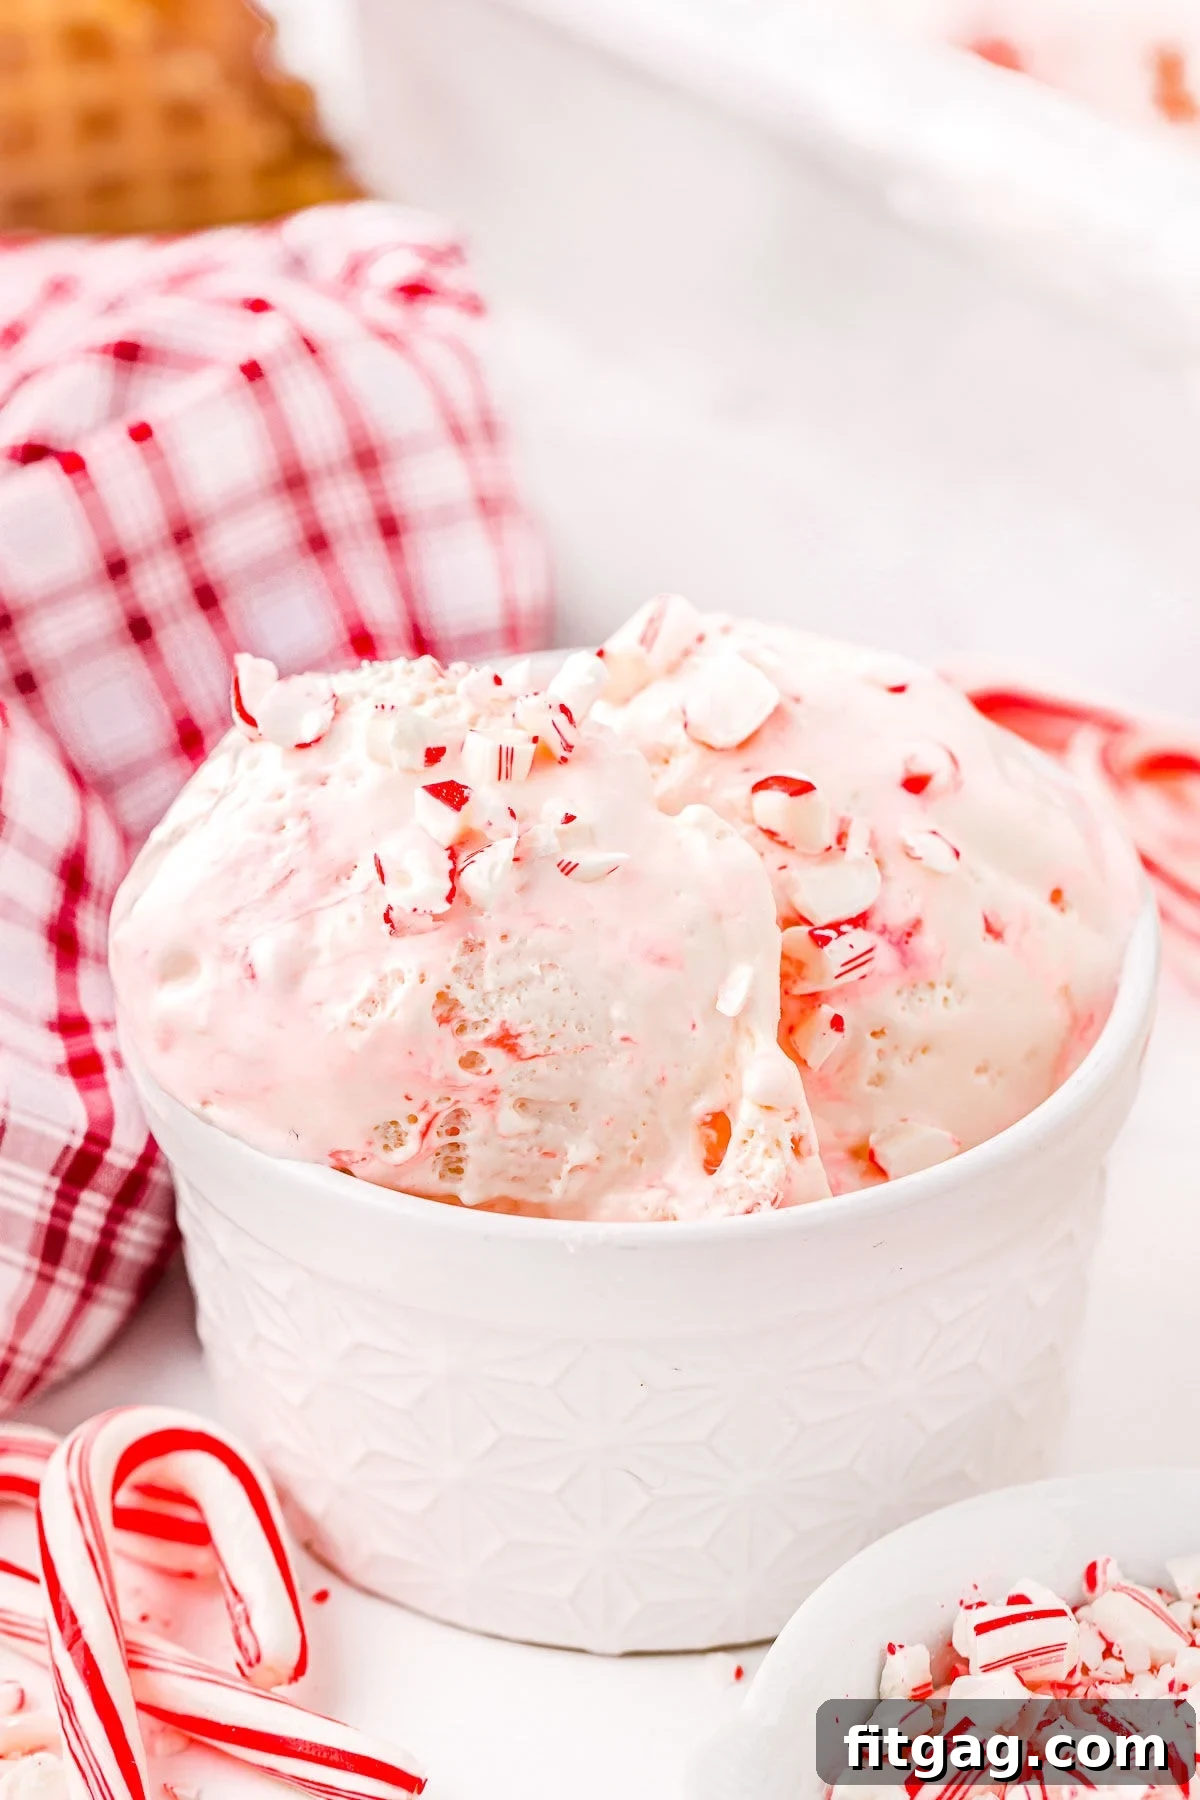
Crushed Candy Canes: These festive treats serve a dual purpose: they infuse the ice cream with their distinct peppermint flavor and add delightful crunchy bits of texture. We’ll be dividing them – some go into the ice cream mixture itself, while the rest are reserved for a beautiful topping when serving. Their red and white stripes also contribute to the ice cream’s holiday appeal.
Whipped Topping: For ultimate convenience, I prefer using a thawed whipped topping like Cool Whip. This ingredient introduces airiness and volume, contributing significantly to the light and fluffy texture of your no-churn ice cream. If you prefer a homemade touch, you can certainly whip up your own heavy cream with a touch of powdered sugar. Just remember to thaw your store-bought whipped topping before you begin for a smooth, lump-free mixture.
Step-by-Step Guide to Crafting Peppermint Ice Cream
Making this delightful Peppermint Ice Cream is surprisingly straightforward. Follow these steps for a perfectly creamy, minty treat:
Prepare Your Pan: Begin by lining a 9×5 inch (or an 8×4 inch) loaf pan with parchment paper. This simple step is crucial for easy removal of your frozen ice cream later, ensuring clean slices and preventing it from sticking to the pan. Allow some parchment paper to hang over the sides for easy lifting. Set the prepared pan aside.
Combine the Base Mixture: In a medium-sized mixing bowl, pour in the sweetened condensed milk and add the peppermint extract. Next, measure out 1/3 cup of your crushed candy cane pieces and add them to the bowl. Whisk these ingredients together thoroughly until they are well combined and the mixture looks uniform.
Allow Flavors to Mingle: Let this peppermint-infused condensed milk mixture sit for approximately 10 minutes. During this brief waiting period, stir the mixture gently every few minutes. This is a vital step: it allows the liquid to begin dissolving and soaking into the tiny candy cane fragments, softening them slightly, and more importantly, it gives the vibrant peppermint flavor ample time to truly meld and infuse deeply into the condensed milk base. This leads to a more pronounced and harmonious peppermint taste.
Fold in the Whipped Topping: Once the flavors have had a chance to marry, gently fold in the thawed whipped topping. Use a spatula or a large spoon and incorporate it carefully, using an upward motion. The goal is to mix it until just combined, ensuring no streaks remain, but without deflating the airiness of the whipped topping. This gentle folding technique is key to achieving that light and fluffy, yet creamy, no-churn ice cream texture.
Transfer and Top: Carefully spoon the light and airy ice cream mixture into your prepared loaf pan. Spread it evenly across the bottom, smoothing the top with your spatula. Now, take the remaining two tablespoons of crushed candy canes and generously sprinkle them over the entire surface of the ice cream mixture. This will provide a beautiful visual appeal and an extra crunch in every scoop.
Cover for Protection: To protect your ice cream from freezer burn and prevent any freezer odors from being absorbed, cover the pan tightly. Start with a layer of plastic wrap pressed directly onto the surface of the ice cream, ensuring minimal air exposure. Follow this with a layer of aluminum foil, sealing the pan completely. Place the covered pan on a flat, level surface inside your freezer.
Freeze to Perfection: Allow the ice cream to freeze for a minimum of 4-6 hours until it is completely set and firm. For the best possible texture and scoopability, it’s often ideal to leave it in the freezer overnight. Patience is a virtue when making no-churn ice cream!
Serve and Enjoy: Once your peppermint ice cream is perfectly frozen, remove it from the freezer. You can let it sit at room temperature for a few minutes to soften slightly for easier scooping. Serve it as is, or with an extra sprinkle of crushed candy canes, a drizzle of chocolate syrup, or your favorite toppings. Indulge in this festive and refreshing homemade delight!
Storage and Longevity: Keeping Your Ice Cream Fresh
To ensure your homemade Peppermint Ice Cream remains deliciously fresh and free from ice crystals for as long as possible, proper storage is paramount. Once the ice cream is fully set, remove the pan from the freezer. The best method for extended storage involves a double-layer wrapping technique. First, replace the plastic wrap, pressing it directly onto the surface of the ice cream to minimize air exposure. Then, tightly wrap the entire loaf pan with a layer of heavy-duty aluminum foil. This dual barrier effectively prevents freezer burn and protects the delicate flavors of your ice cream.
Stored correctly, your Peppermint Ice Cream will remain delightful for up to 2 months in the freezer. For ultimate convenience, especially if you plan to enjoy individual servings over time, consider scooping the ice cream into smaller, airtight freezer-safe containers before the final freeze. This makes it easy to grab a single portion whenever a craving strikes without disturbing the entire batch. Always ensure lids are tightly sealed to maintain freshness.
If you frequently make ice cream, or are planning to, consider investing in these reusable ice cream containers with lids. They are perfect for storing and serving homemade frozen treats!
Peppermint Ice Cream FAQs: Your Questions Answered
Absolutely! One of the greatest joys of making homemade ice cream is the freedom to customize it. This peppermint base is incredibly versatile. For chocolate lovers, dark chocolate chips, white chocolate chunks, or even finely chopped chocolate sandwich cookies would taste amazing with the refreshing peppermint. A dash of red or pink food coloring can give it an even more festive visual twist. For extra sparkle and fun, any variety of Christmas-themed sprinkles or edible glitter would make a nice touch, either mixed in or sprinkled on top during serving. Feel free to experiment with a drizzle of caramel or even a few crushed shortbread cookies for added texture.
For minimal mess and perfectly sized pieces, I highly recommend the double ziploc bag method. Place your candy canes inside a sturdy, freezer-safe ziploc bag in a single layer. Then, place that bag inside another ziploc bag for extra protection against tearing. Use a rolling pin, a soup can, or a meat mallet and gently but firmly pound the candy canes until they break into your desired small pieces. Avoid over-crushing them into a fine powder unless specifically desired, as you want some texture. A food processor can also work for speed, but pulse it in short bursts to avoid turning the candy canes into a sticky paste due to the heat generated.
While the original recipe relies on dairy, you can adapt it to be dairy-free. Look for dairy-free sweetened condensed coconut milk or oat milk condensed milk, and use a plant-based whipped topping (such as a coconut-based or almond-based whipped cream). Ensure your candy canes are also dairy-free, as some brands may contain trace amounts. The flavor and texture will be slightly different but still delicious!
No-churn ice cream can sometimes freeze quite hard. To help maintain a softer, scoopable texture, ensure you use full-fat sweetened condensed milk and whipped topping, as fat content helps with creaminess. You can also add a small amount (1-2 tablespoons) of clear alcohol, like vodka, to the mixture before freezing. Alcohol lowers the freezing point, resulting in a slightly softer scoop. Additionally, allowing the ice cream to sit out at room temperature for 5-10 minutes before serving will significantly improve its scoopability.
This Peppermint Ice Cream is versatile! Serve it in classic waffle cones or bowls, topped with extra crushed candy canes, chocolate syrup, or whipped cream. It’s also fantastic alongside warm brownies or chocolate lava cakes for a hot-and-cold dessert. Consider using it to create festive milkshakes or as a cool accompaniment to a slice of pumpkin pie. For a sophisticated touch, serve small scoops in shot glasses topped with chocolate shavings.
Expert Tips for the Best Peppermint Ice Cream
Achieve truly spectacular results with your homemade peppermint ice cream by incorporating these expert tips and tricks:
While you can use other peppermint candies instead of traditional candy canes, exercise caution. Peppermint hard candies often have a denser texture and don’t soften and dissolve quite as well as the more brittle candy canes. This can lead to harder, less pleasant bits in your ice cream. For the best creamy texture with tender peppermint pieces, stick to classic candy canes.
If you don’t have peppermint extract on hand, mint extract can be used as a substitute, but be aware that the flavor profile will be slightly different. Mint extract typically contains spearmint, which offers a milder, sweeter, and sometimes greener mint flavor compared to the sharper, more intense taste of peppermint. To enhance the visual appeal and really make the ice cream look “minty,” consider adding a drop or two of green food coloring to your mixture.
No Cool Whip? No problem at all! You can easily make your own whipped topping using heavy cream and powdered sugar. Simply whip 2 cups of very cold heavy cream with 1/4 to 1/2 cup of powdered sugar (adjust to your sweetness preference) and a splash of vanilla extract until stiff peaks form. This option gives you full control over the sweetness level of your whipped cream, and consequently, the overall sweetness of your peppermint stick ice cream.
Avoid overmixing the whipped topping when you fold it into the condensed milk mixture. The key to a light and fluffy no-churn ice cream is to preserve as much air as possible in the whipped cream. Overmixing will cause the air to escape, resulting in a denser, icier, and less creamy ice cream. Gently fold until just combined for optimal texture.
Do not skip the crucial step of letting the crushed candy canes sit and soften in the sweetened condensed milk. This brief 5 to 10-minute resting period is incredibly important. Not only does it allow the condensed milk to absorb all that wonderful, vibrant peppermint flavor from the candy canes, but it also helps to soften the candy pieces. This ensures that no one bites into surprisingly hard, unyielding chunks of candy cane while enjoying their otherwise creamy and delightful peppermint ice cream. It’s a small step with a big impact on both flavor and texture.
Serve at the Right Temperature: For the most enjoyable experience, allow your ice cream to temper at room temperature for 5-10 minutes before scooping. This makes it easier to scoop and enhances its creamy texture and flavor.
Creative Garnishes: Beyond crushed candy canes, consider garnishing with chocolate curls, a sprig of fresh mint, or a dusting of cocoa powder for an elegant presentation.
Explore More Festive Peppermint Creations
If you’re still in the mood for the delightful and invigorating taste of peppermint, here are even more fantastic recipes to inspire your culinary adventures and add a touch of minty magic to your day:
Peppermint Snowball Cookies
Peppermint Fudge
Chocolate Peppermint 4 Layer Dessert
Peppermint Shortbread Cookies
Peppermint Patties
Peppermint Ice Cream: The Full Recipe
Print Recipe
Pin Recipe
Peppermint Ice Cream
Ingredients
14 ounces sweetened condensed milk not evaporated milk
½ teaspoon peppermint extract
⅓ cup crushed candy canes
8 ounces whipped topping Cool Whip, thawed
Topping
2 tablespoons crushed candy canes
Instructions
Video
(Video content not available in this format, please refer to the original source.)
Notes
Keep the Peppermint Ice Cream well wrapped in the freezer for up to 2 months. Double plastic wrap followed by a layer of foil will prevent freezer burn and keep the ice cream delicious for up to 2 months! You can also store it as individual servings for a quick dessert option in smaller freezer safe containers.
If you make a lot of ice cream, or plan to, consider investing in these reusable ice cream containers with lids. They are great for storing ice cream in!
Nutrition
Carbohydrates: 34g |
Protein: 5g |
Fat: 8g |
Saturated Fat: 6g |
Polyunsaturated Fat: 0.2g |
Monounsaturated Fat: 1g |
Cholesterol: 17mg |
Sodium: 83mg |
Potassium: 213mg |
Sugar: 34g |
Vitamin A: 153IU |
Vitamin C: 1mg |
Calcium: 161mg |
Iron: 0.1mg
The post Crisp Peppermint Cloud first appeared on Fitgag.