Whimsical Easter Magic Bars
Experience the Joy of Easter with Irresistible Magic Cookie Bars! As the spring air brings promises of new beginnings and cheerful gatherings, our kitchens fill with the sweet aroma of Easter treats. This year, elevate your holiday celebrations with a delightful twist on a beloved classic: Easter Magic Cookie Bars. Also affectionately known as 7 Layer Bars, these decadent, easy-to-make dessert bars are a guaranteed crowd-pleaser, perfect for sharing with family and friends or as a special indulgence. Imagine a buttery crust, topped with layers of sweet coconut, rich chocolate, crunchy nuts (or oats!), and finally, vibrant Easter candies – a true symphony of flavors and textures in every bite. This special Easter rendition, adorned with festive Cadbury eggs or colorful M&Ms, is not just a dessert; it’s a centerpiece that brings smiles and a touch of holiday magic to any Easter table. Prepare to delight everyone with this incredibly simple yet utterly delicious recipe that captures the spirit of the season.
Looking for more enchanting Easter treats to complete your holiday spread? Discover some of our most popular recipes that are sure to charm: Bunny Bait Easter Snack Mix, a beautifully moist Carrot Cake, and fun, whimsical Peeps Rice Krispie Treats! Each offers a unique way to add sweetness to your Easter festivities.
The Enduring Appeal of Classic 7 Layer Bars
There’s a reason why Magic Cookie Bars, or 7 Layer Bars, have captivated hearts for generations. These wondrous dessert bars are celebrated for their unbeatable combination of simplicity and indulgence. Each layer contributes to a harmonious blend of chewy, crunchy, and gooey textures, creating an experience that’s truly “magic.” What makes them so universally adored? It’s their incredible versatility and the ease with which you can whip up a batch. From a golden graham cracker or vanilla wafer crust to a medley of sweet mix-ins bound together by luscious sweetened condensed milk, these bars promise pure dessert bliss with minimal effort. They require no fancy baking skills, just a desire for a truly satisfying sweet treat. Over the years, countless variations have emerged, allowing bakers to customize them for any occasion or preference. But this Easter version, thoughtfully designed with a festive touch, stands out as one of our most cherished adaptations, bringing seasonal cheer to every bite.
Elevating Your Easter Celebrations with a Festive Touch
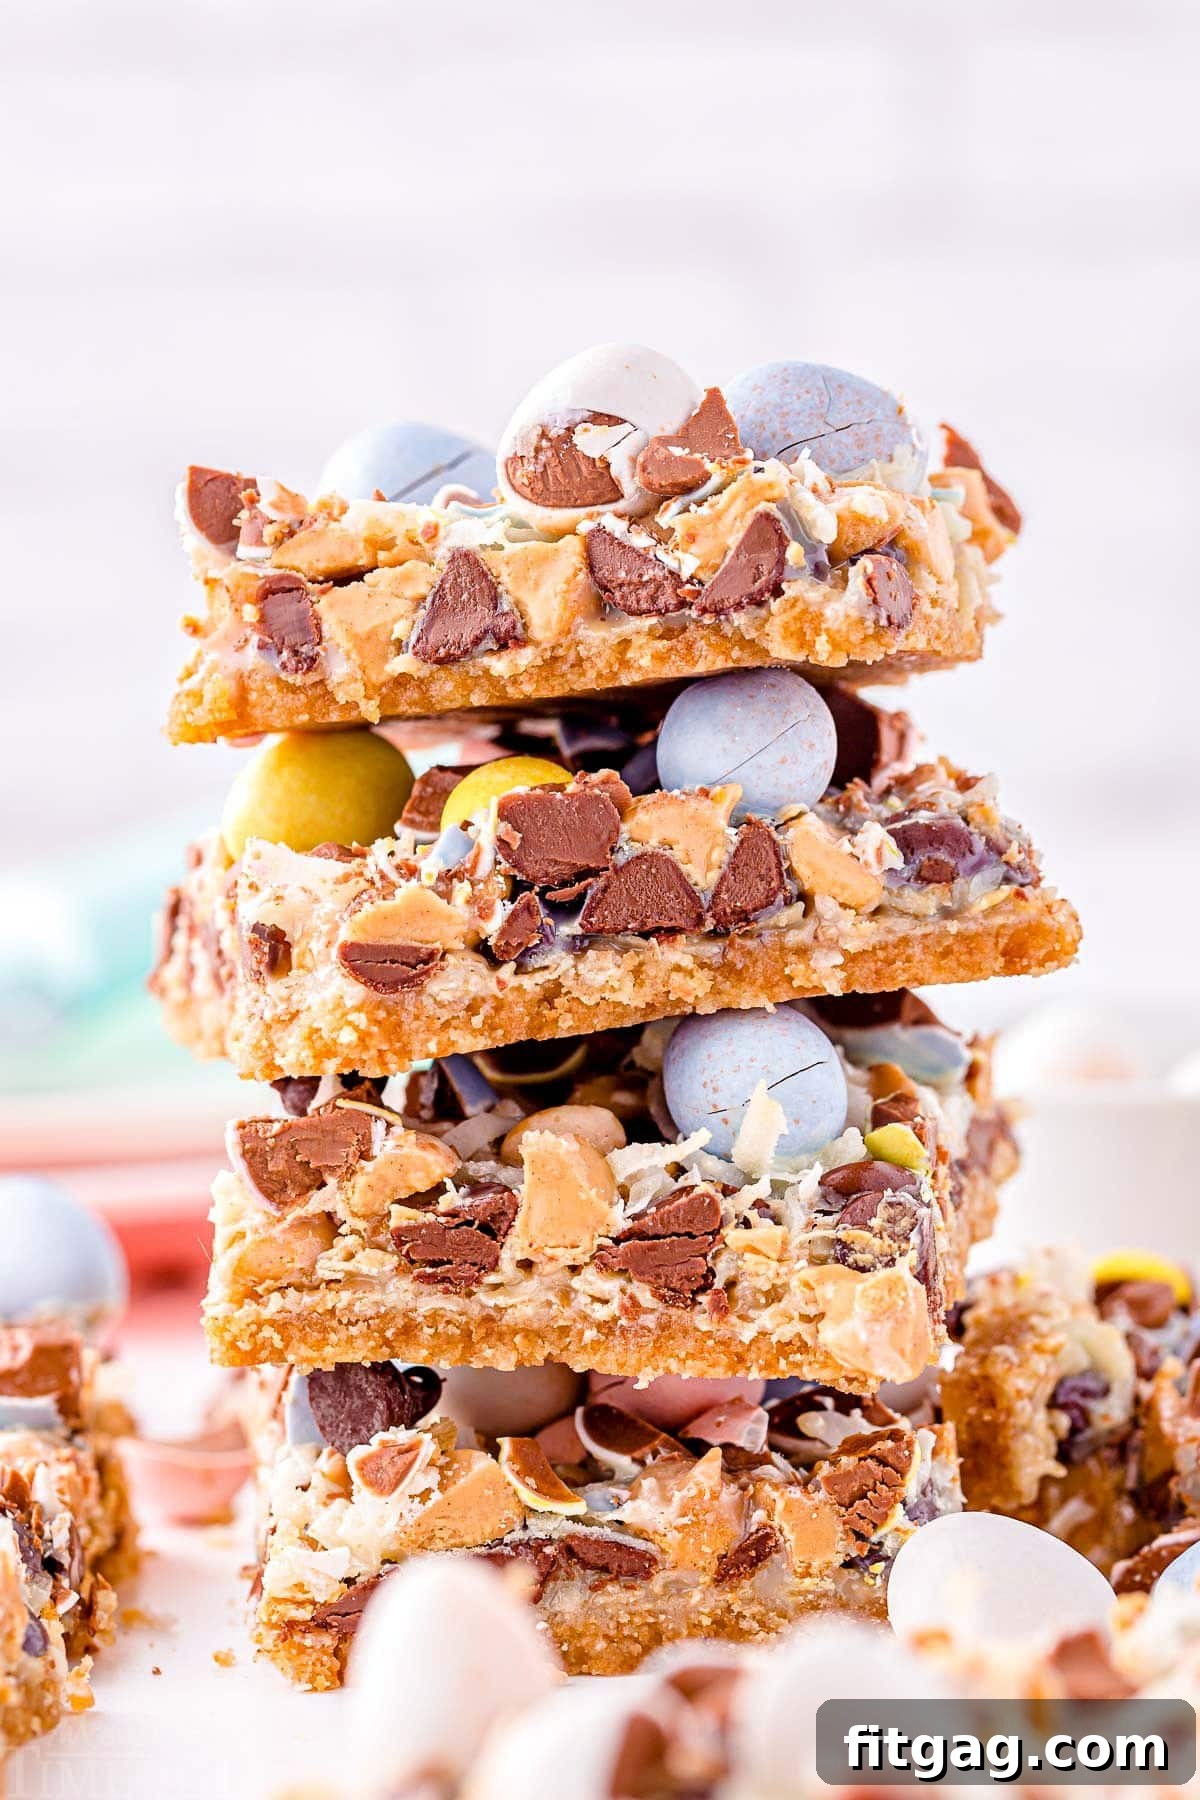
Transforming the classic Magic Cookie Bar recipe into a stunning Easter dessert is simpler than you might imagine, and the results are absolutely enchanting! We’ve infused these beloved bars with the vibrant spirit of spring by incorporating colorful Cadbury Mini Eggs. These delightful chocolate eggs not only add a burst of color and a satisfying crunch but also scream “Easter!” in the most delicious way. As they bake, some of the chocolate eggs will beautifully split open, revealing their creamy centers and creating an even more inviting appearance. If Cadbury eggs aren’t your preference, or you’re looking for another equally festive option, a bag of pastel-colored Easter M&M’s makes a fantastic substitute. Whichever you choose, the inclusion of these holiday-themed candies instantly elevates the bars from an everyday treat to a special occasion dessert. The beauty of these Easter Magic Cookie Bars lies in their adaptability, ensuring that your holiday baking is both stress-free and spectacular. You truly can’t go wrong, offering a delightful and eye-catching treat that everyone will remember.
Can’t get enough of Magic Bar recipes? Explore these other delightful variations for every craving: Piña Colada Magic Bars for a taste of the tropics, sweet Cherry Magic Bars, and tart yet delightful Raspberry Magic Bars!
Expand Your Dessert Repertoire: More Irresistible Bar Recipes
Dessert bars are the unsung heroes of the baking world – always a brilliant idea for any gathering! They boast an undeniable advantage over cookies, often being much easier to prepare, requiring less hands-on time for shaping, and yielding perfectly portioned treats. Bars can be effortlessly made in advance, then simply cut into small bites or generous squares, catering to any preference or occasion. Their portability and stackability also make them ideal for potlucks, picnics, or gifting. If you’ve fallen in love with the ease and deliciousness of our Easter Magic Cookie Bars, you’ll definitely want to add these must-make bar recipes to your baking rotation. Each offers a unique flavor profile and satisfying texture, ensuring there’s a bar for every palate:
Decadent Carrot Cake Bars with Cream Cheese Frosting
Zesty Key Lime Pie Bars
No-Bake Snickers Crunch Bars
Classic Lemon Bars
Tropical Piña Colada Magic Bars
Essential Ingredients for Your Easter Magic Cookie Bars
Crafting these extraordinary Easter Magic Cookie Bars begins with a foundation of classic 7 Layer Bar ingredients, thoughtfully enhanced with a few special additions that make them perfectly suited for the Easter holiday. Each component plays a vital role in achieving that signature “magic” texture and flavor. Below, we’ll take a closer look at what you’ll need, along with useful tips and substitution ideas to help you create your perfect batch. Remember, the full, printable recipe card with precise measurements can be found at the end of this comprehensive guide.
Vanilla Wafers: These form the sweet, buttery base of our bars. Their delicate flavor provides a wonderful complement to the richer layers above. If vanilla wafers aren’t available, or you prefer a different flavor, feel free to substitute with honey graham crackers for a classic taste, chocolate graham crackers for a deeper cocoa note, or even shortbread cookies for an extra buttery crust. Ensure they are finely crushed to create a cohesive base.
Salted Butter: Melted butter is crucial for binding the crust crumbs together, creating a firm and flavorful foundation. Using salted butter here helps to subtly balance the overall sweetness of the bars. If you only have unsalted butter on hand, simply add a small pinch (about 1/4 teaspoon) of fine salt to the crust mixture to achieve that essential flavor balance.
Sweetened Condensed Milk: This is truly the “magic” ingredient that acts as the irresistible glue, holding all the delightful layers together. It caramelizes beautifully during baking, creating a wonderfully chewy texture and contributing a rich, milky sweetness that is characteristic of every authentic magic cookie bar recipe. Do not confuse this with evaporated milk, as they are not interchangeable in this recipe.
Quick Oats: Adding quick oats introduces a delightful chewiness and a subtle nutty flavor to the bars. They create a pleasing textural contrast against the other soft and crunchy layers. If you don’t have quick oats, old-fashioned rolled oats can be used; simply give them a few pulses in a food processor to break them down into a finer consistency, similar to quick oats. Alternatively, if oats aren’t your preference or you’re avoiding them, they can be omitted entirely, or you can replace them with a layer of chopped nuts for added crunch.
Milk Chocolate Chips: These classic chocolate chips melt into pockets of creamy sweetness, providing a comforting and familiar flavor. For a different profile, swap them out for semi-sweet chocolate chips for a less intense sweetness, or dark chocolate chips for a more sophisticated, slightly bitter note that beautifully contrasts the other sweet ingredients.
Peanut Butter Chips: These offer a wonderfully rich, salty-sweet dimension that pairs perfectly with chocolate and coconut. If you’re not a fan of peanut butter, or have allergy concerns, butterscotch chips make a fantastic, caramel-like alternative, or white chocolate chips can provide a creamy, vanilla-infused sweetness.
Coconut Flakes: Sweetened coconut flakes contribute a tropical hint and a lovely chewiness. Their delicate texture becomes slightly toasted and aromatic during baking. If you prefer a less sweet dessert, unsweetened coconut flakes can be used. For those who dislike coconut, this layer can be replaced with more nuts or other mix-ins.
Easter Chocolate Eggs: The star of our Easter theme! We love using roughly chopped Cadbury Mini Eggs for their vibrant colors and smooth chocolate and candy shell texture. As mentioned, Easter M&M’s are an excellent alternative, offering similar festive appeal and ease of use. You can also experiment with other small, festive chocolate candies that catch your eye.
Unlock endless customization! Easily adapt this recipe for any holiday or special occasion simply by changing the color or type of M&M’s or other candies. Imagine vibrant red and green for Christmas, patriotic red, white, and blue for the 4th of July, or even sprinkles and themed candies for birthdays! These bars are truly a blank canvas for festive creativity.
Crafting Your Decadent Easter Magic Cookie Bars: A Step-by-Step Guide
Making these delightful Easter Magic Cookie Bars is surprisingly straightforward, guaranteeing a successful and delicious outcome even for novice bakers. Follow these clear steps to achieve perfectly layered, irresistibly gooey, and beautifully festive dessert bars:
Prepare Your Workspace: Begin by preheating your oven to 350°F (175°C). This ensures the oven is at the correct temperature for even baking from the start. Next, prepare a 9×13 inch baking dish. Lightly grease the dish with non-stick cooking spray, then line it with parchment paper, leaving an overhang on the sides. This parchment paper “sling” will be your secret weapon for easy removal and clean cuts later on.
Assemble the Crust: In a medium-sized bowl, combine the finely crushed vanilla wafer crumbs with the melted salted butter. Mix these ingredients thoroughly until the crumbs are evenly moistened and resemble wet sand. This ensures a uniform and sturdy crust.
Form the Base: Transfer the vanilla wafer mixture to the bottom of your prepared baking dish. Using the back of a spoon or your fingertips, press the mixture firmly and evenly across the entire bottom of the pan. The goal is to create a compact, consistent crust; there’s no need to extend it up the sides of the dish.
Layer the Oats: Evenly sprinkle the quick oats over the pressed crust. Aim for an even distribution so that every slice of bar gets a taste of that delightful chewiness.
Add the Chips: Next, create layers of sweetness by scattering the milk chocolate chips over the oats, followed by the peanut butter chips. Distribute both types of chips as uniformly as possible to ensure a balanced flavor in every bite.
Introduce the Coconut: Sprinkle the sweetened coconut flakes generously and evenly over the chocolate and peanut butter chips. This layer adds a wonderful texture and tropical essence that is quintessential to magic bars.
Pour the “Magic”: Gently and evenly pour the sweetened condensed milk over all the layers. This thick, sweet liquid will bind everything together as it bakes. Finally, scatter the roughly chopped Easter chocolate eggs over the top. Press them down slightly into the condensed milk to ensure they adhere well.
Bake to Perfection: Place the baking dish into your preheated oven and bake for 18 to 20 minutes. Keep an eye on the bars; they are ready when the coconut flakes turn a beautiful golden brown, and the chocolate eggs on top begin to split open slightly, indicating they are warmed through and the bars are set.
Cool Completely: This step is crucial for perfect bars! Once baked, remove the dish from the oven and allow the bars to cool completely on a wire rack at room temperature. Resist the urge to cut them while warm, as they will be too gooey and fall apart. Patience here will be rewarded with neat, firm bars.
Cut and Serve: Once fully cooled, use the parchment paper overhang to carefully lift the entire slab of bars out of the baking dish. Transfer them to a cutting board and use a sharp knife (wiping it clean between cuts for the neatest edges) to cut them into desired squares or rectangles. Serve and enjoy your homemade Easter Magic Cookie Bars!
Storage and Freshness: Keeping Your Magic Cookie Bars Delicious
Proper storage is key to extending the deliciousness and maintaining the perfect texture of your Easter Magic Cookie Bars. Whether you plan to enjoy them over a few days or save some for later, here’s how to keep them fresh and delightful:
For short-term storage, once the bars have cooled completely, cover them tightly with plastic wrap or transfer them to an airtight container. They can be stored at room temperature for 2 to 3 days. This method keeps them wonderfully chewy and moist. After this period, to maintain their freshness and prevent them from drying out or spoiling, it’s best to transfer them to the refrigerator, where they will last for approximately 7 days. Chilled bars can be enjoyed directly from the fridge or allowed to come to room temperature for a softer texture.
To Freeze for Long-Term Enjoyment: Magic Cookie Bars freeze exceptionally well, making them perfect for meal prep or saving for unexpected guests. First, cut the cooled bars into individual servings. Wrap each bar tightly in plastic wrap, ensuring no air exposure, then place the wrapped bars into a freezer-safe ziploc bag or an airtight freezer container. They can be frozen for up to 3 months without compromising flavor or texture. When you’re ready to enjoy them, simply thaw the desired number of bars at room temperature for an hour or two, or overnight in the refrigerator. Freezing these bars means you can always have a festive, ready-to-eat treat on hand!
Common Questions About Easter Magic Cookie Bars (FAQs)
To preserve their delightful chewiness, cover these bars tightly with plastic wrap or store them in an airtight container at room temperature for up to 2-3 days. For longer freshness, transfer them to the refrigerator after that, where they will remain delicious for about 7 days. If you plan to freeze them, cut the bars into individual portions, wrap them well in plastic wrap, and then store them in a freezer-safe bag. They will keep for up to 3 months and can be thawed at room temperature whenever a craving strikes.
Doubling this recipe can be a bit challenging primarily because it requires a larger baking surface than a single 9×13 inch pan can typically accommodate. For best results when doubling, we recommend using two separate 9×13 inch baking dishes rather than trying to fit all ingredients into one oversized pan. This ensures even baking and proper caramelization of all the layers.
Quick oats are recommended because their finer texture bakes up nicely, contributing to the bars’ characteristic chewiness. Old-fashioned rolled oats are thicker and might not integrate as smoothly, resulting in a slightly different texture. If you only have old-fashioned oats, you can easily turn them into quick oats by pulsing them a few times in a food processor until they are more finely broken down. Alternatively, if you prefer to omit oats entirely, consider replacing them with a layer of chopped nuts (like walnuts or pecans) for a delightful crunch. The oats create a chewier bar, while nuts will yield a crunchier texture.
If your bars are excessively soft or gooey even after ample cooling time, it could be due to underbaking or adding too much sweetened condensed milk. Ensure you bake them until the edges are golden and the center is set, and the coconut on top is lightly browned. Allowing them to cool completely, even chilling them in the refrigerator for an hour or two, can significantly firm them up, making them easier to cut and handle.
Yes, you can absolutely make these Magic Cookie Bars gluten-free! Simply substitute the vanilla wafer crumbs with gluten-free graham cracker crumbs or another gluten-free cookie crumb of your choice. Ensure all other ingredients, especially the oats if using, are certified gluten-free (some oats may be cross-contaminated during processing). All other ingredients in this recipe are typically gluten-free, but always check labels for hidden gluten.
Trish’s Pro Tips for the Best Magic Cookie Bars
While this recipe for Easter Magic Cookie Bars is wonderfully straightforward, incorporating a few expert tips can elevate your baking experience and ensure truly spectacular results every time. Follow these recommendations from Trish to achieve perfection:
Effortless Crust Creation: For the quickest and most uniform crust, utilize a food processor. Simply add your vanilla wafers (or chosen crackers) and pulse until fine crumbs form. Then, pour in the melted butter and pulse a few more times until the mixture is evenly moistened. If a food processor isn’t available, place the wafers in a sturdy zipper plastic bag, press out the air, and use a rolling pin to crush them into fine crumbs. This method works beautifully, though it requires a little more elbow grease!
The Parchment Paper Advantage: Lining your baking pan with parchment paper is a game-changer! Not only does it make removing the entire slab of bars incredibly easy once cooled, but it also aids in cutting them cleanly. If you don’t have parchment paper, a generous application of non-stick cooking spray is essential. Ensure the entire pan, especially the corners, is liberally greased to prevent sticking and make serving much simpler.
Boost Texture with Nuts: For an added layer of satisfying crunch and nutty flavor, consider sprinkling a layer of crushed walnuts or pecans over the chocolate chips before adding the coconut. This introduces another dimension of texture that complements the chewy and gooey elements beautifully.
Perfecting the Easter Topping: If you prefer your chocolate Easter eggs to remain intact and visible without splitting, or if you want to avoid them potentially sinking too much, you can add them after the bars have finished baking. Remove the bars from the oven after about 15 minutes (when the coconut is golden and the base is set), then gently press the chocolate eggs onto the warm surface. This allows them to adhere without fully melting or splitting, creating a pristine presentation.
Cooling is Non-Negotiable: We can’t stress this enough – allow your Magic Cookie Bars to cool completely before attempting to cut them. Warm bars will be too soft and sticky, leading to a messy outcome. For the cleanest cuts, you can even chill the fully cooled bars in the refrigerator for 30 minutes to an hour. A sharp, warm knife (wiped clean between each cut) will also help create perfect squares.
Endless Customization: Creative Recipe Variations for Any Occasion
One of the most delightful aspects of Magic Cookie Bars is their incredible adaptability. This core recipe serves as a perfect canvas for your culinary creativity, allowing you to easily switch ingredients and flavors to suit your taste, cater to dietary needs, or match any holiday theme beyond Easter. Here are some fantastic ways to customize your next batch:
Experiment with Diverse Flavor Chips: Beyond milk and peanut butter, the world of baking chips offers endless possibilities! Try dark chocolate chips for a richer, more intense cocoa flavor, butterscotch chips for a warm, caramel-like sweetness, or white chocolate chips for a creamy, vanilla-forward twist. You could even combine different types for a unique flavor blend.
Introduce a Nutty Crunch: Instead of (or in addition to) the quick oats, add a generous layer of chopped nuts. Pecans and walnuts are classic choices, offering a buttery, earthy flavor and satisfying crunch. Remember, oats contribute a delightful chewiness, while nuts will introduce a distinct crispness, so choose based on your desired texture. Almonds, cashews, or even a mix of nuts could also be wonderful.
Swap Out the Candy Topping: While Cadbury Eggs are perfect for Easter, any small, festive candy can take their place! Use classic M&M’s for a variety of colors and a familiar crunch. For Halloween, try candy corn or spooky sprinkles; for Valentine’s Day, use red and pink candies or heart-shaped sprinkles; for Christmas, opt for crushed candy canes or holiday-colored M&M’s. The possibilities are truly endless, allowing you to tailor these bars to any celebration.
Explore Different Crust Options: Don’t limit yourself to vanilla wafers! Graham crackers provide a classic, slightly honeyed base. Chocolate graham crackers offer a deep, rich cocoa crust. For a more sophisticated base, shortbread cookies or even crushed gingersnaps could be delightful, adding their unique flavor profiles to the bars. Pretzel crumbs mixed with butter create a wonderful salty-sweet contrast.
Add a Fruity Tang: For a burst of freshness, consider adding a sprinkle of dried cranberries, chopped dried apricots, or even mini dehydrated apple pieces over the chocolate chips. These can add a lovely tartness that cuts through the sweetness and introduces another layer of texture.
Reinvent your magic cookie bars for ANY occasion! Simply by swapping out the color or type of M&M’s or other candies on top, you can transform these treats. Think festive themes for Christmas, spooky designs for Halloween, romantic pinks and reds for Valentine’s Day, or even personalized colors and sprinkles for birthdays. These delicious, customizable bars are perfect for celebrating every milestone and holiday!
More Delicious Desserts to Complete Your Easter Feast
Easter is a time for celebration, and no celebration is complete without a spread of delightful desserts! Beyond our incredible Easter Magic Cookie Bars, there’s a world of sweet treats that perfectly capture the essence of spring and the joy of the holiday. From classic comforting bakes to light and airy confections, these recipes are sure to add an extra layer of sweetness to your Easter table. Explore some of our top picks that are beloved by families year after year:
Classic Carrot Cake
Best Ever Coconut Cream Pie
No-Fail Jell-O Divinity
Festive Easter Chocolate Chip Cookies
Quick Three Minute Easter Fluff
Beautiful Speckled Egg Easter Cake
Creamy Dream Cheese Mints
Fun Bunny Bait Snack Mix
Printable Recipe: Easter Magic Cookie Bars
Print Recipe
Easter Magic Cookie Bars
Easter Magic Cookie Bars are sure to be a hit! Everyone loves decadent 7 Layer Bars and this fun Easter version is the perfect addition to your Easter festivities! A terrific treat to make and enjoy with the whole family!
Ingredients
2 ½ cups vanilla wafer crumbs ~ 70 cookies
12 tablespoons salted butter 1 ½ sticks, melted
¾ cup quick oats optional
1 ¼ cups milk chocolate chips or semi-sweet chocolate chips
1 ¼ cups peanut butter chips
½ cup sweetened coconut flakes
14 ounces sweetened condensed milk
¾ cups Chocolate Easter Eggs roughly chopped (I used Cadbury Eggs)
Instructions
Preheat the oven to 350°F.
Prepare a 9×13 inch baking dish by lightly greasing with non-stick cooking spray and lining it with parchment paper. Set aside.
Combine the vanilla wafer crumbs and melted salted butter in a medium bowl and mix well to combine.
Create the crust by pressing the vanilla wafer mixture into the bottom of the prepared baking dish. There is no need to go up the sides, just create an even layer on the bottom of the pan.
Sprinkle the quick oats evenly over the crust.
Add a layer of the milk chocolate chips followed by the peanut butter chips. Disperse these as evenly as possible as well.
Sprinkle the coconut flakes on top of the chips.
Pour the sweetened condensed milk evenly over the top and finish with the chocolate eggs.
Bake in the oven for 18 to 20 minutes or until the coconut flakes start to brown and the chocolate eggs split open.
Remove from the oven and let cool completely.
When ready to serve, pull the dessert out with the parchment paper to make it easier to cut into bars. Serve at room temperature.
Notes
Storage Information:
Cover these tightly and store at room temperature for 2 to 3 days. After that, they need to go in the refrigerator and will last for about 7 days.
To Freeze: Cut into individual bars and wrap in plastic wrap and then transfer to a freezer-safe ziploc bag. They will last up to 3 months and can be thawed at room temperature.
Nutrition
The post Whimsical Easter Magic Bars first appeared on Fitgag.