Pillowy Soft Parker House Rolls
Parker House Rolls: Your Ultimate Guide to Soft, Buttery Perfection
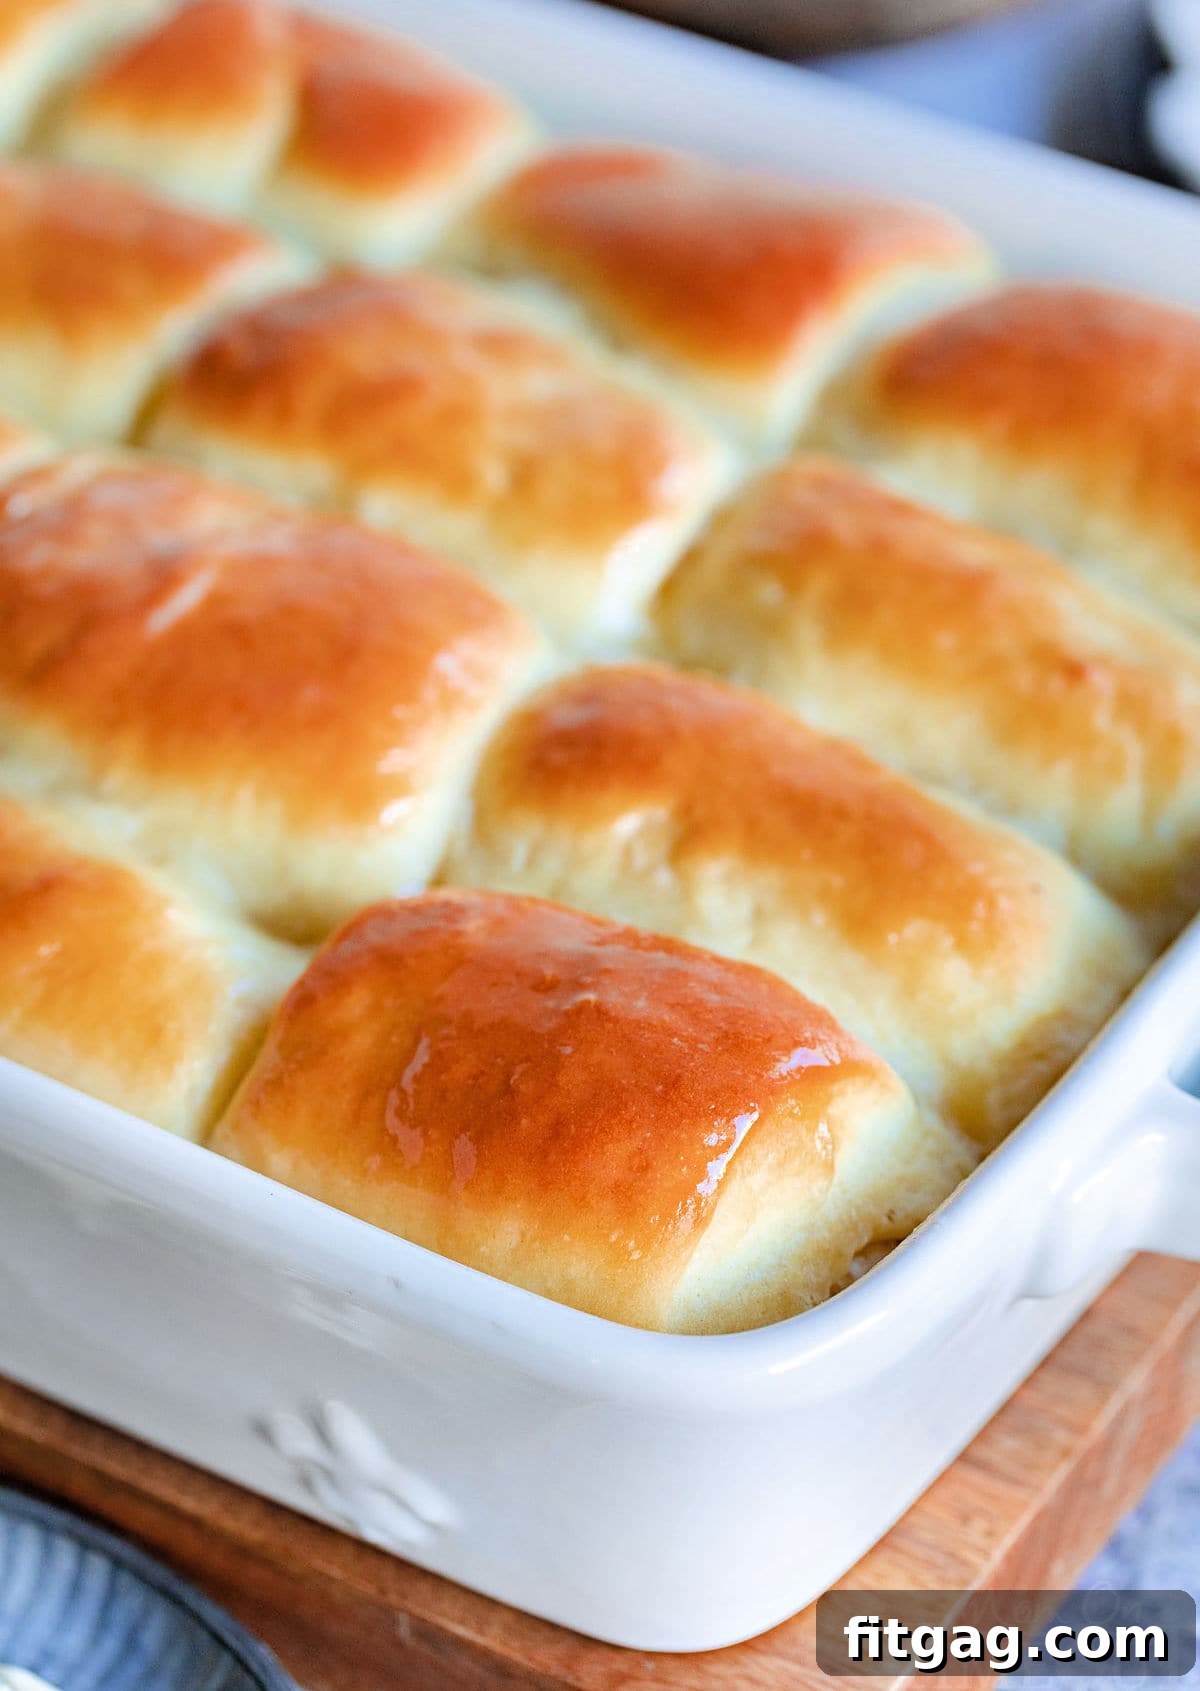
Imagine biting into a roll that’s so incredibly soft, fluffy, and rich with buttery flavor, it practically melts in your mouth. That’s the magic of Parker House Rolls! These iconic dinner rolls are more than just a side dish; they’re a centerpiece, a conversation starter, and an absolute delight that elevates any meal. Whether you’re hosting a grand holiday feast or a simple weeknight dinner, these rolls are guaranteed to impress. And for those glorious post-holiday leftover sandwiches, after the Thanksgiving turkey or Christmas ham, they provide the perfect tender foundation.
To truly enhance the experience, consider pairing these exquisite rolls with a homemade spread. Transform your rolls into an even sweeter treat with a dollop of Brown Sugar Cinnamon Butter or the classic sweetness of Honey Butter. As the seasons change, embrace the flavors of autumn with a creamy, spiced Pumpkin Butter. Each offers a unique way to enjoy these already irresistible rolls.
This post is proudly sponsored by Challenge Dairy.
The Enduring Charm of Parker House Rolls
For every bread lover, the search for the perfect dinner roll often feels like a lifelong quest. Look no further, because these Soft, Light, Fluffy, and Buttery Pull-Apart Parker House Rolls are truly in a league of their own. Often affectionately called “purse rolls” due to their distinct folded middle that resembles a small pocketbook, they bring an elegant touch to the table. In our home, my boys have even coined them “already-been-buttered rolls,” a testament to their inherent richness, though that certainly doesn’t stop us from adding a little extra butter – because can you ever really have enough?
While holiday gatherings often see savory side dishes stealing the spotlight, these delightful rolls are poised to become the star of your spread. Forget the convenience of store-bought frozen options; nothing compares to the unparalleled joy of a batch of homemade Parker House Rolls, fresh from the oven. The aroma alone is enough to transport you, and the taste is pure bliss. There’s a profound satisfaction in baking them from scratch that simply can’t be matched by pre-packaged alternatives. So go ahead, pass the butter, and experience homemade bread perfection.
Why This Parker House Rolls Recipe Stands Out
There are countless reasons to adore these delicious dinner rolls, but here are just a few that make this recipe a consistent favorite:
Effortlessly Rewarding: Some recipes demand significant time and effort, only to deliver a lackluster result. This is not one of them! The process of making Parker House Rolls is genuinely enjoyable, and the payoff is always worth it. Each bite confirms that every minute spent in the kitchen was an investment in pure culinary happiness.
Simple, Accessible Ingredients: You won’t need to hunt for obscure or specialized ingredients. This recipe relies on common pantry staples, meaning you can whip up a batch of these incredible rolls with what you likely already have on hand. No special bread flour required, though it works beautifully if you prefer it!
Aromatic Bliss: There’s nothing quite like the comforting aroma of freshly baked bread filling your home. These rolls not only taste amazing but also create an inviting atmosphere that makes every occasion feel a little more special.
Versatile Pairing: Parker House Rolls complement virtually any meal, from a casual family dinner to an elaborate holiday feast. Their delicate flavor profile means they pair well with a wide range of main courses and side dishes, enhancing rather than overpowering.
Serving Suggestions: The Proper Way To Enjoy a Parker House Roll
Parker House Rolls are ingeniously designed for maximum enjoyment. Their signature fold means they are practically “pre-buttered” and easily split open, creating the perfect pocket for your favorite fillings. While they are phenomenal simply slathered with more butter and perhaps a touch of jelly, as demonstrated below, their versatility truly shines with both sweet and savory combinations.
For a sweet indulgence, consider homemade fruit preserves or a drizzle of honey. For a truly memorable holiday experience, fill them with a spoonful of tangy cranberry sauce, a generous scoop of savory cornbread stuffing, and a few tender slices of slow-cooked turkey breast, all generously dunked in the richest turkey gravy. Truly, you can’t go wrong no matter how you choose to personalize these amazing rolls.
My boys call them already-been-buttered rolls but that doesn’t stop any of us from adding a little more…
Elevate Your Holiday Table with These Tasty Side Dishes
While Parker House Rolls are undeniably a showstopper, they pair wonderfully with an array of classic holiday side dishes. Here are some tried-and-true recipes that will complete your festive spread:
Sweet Potato Casserole: A creamy, sweet, and comforting dish with a delightful pecan topping.
Cornbread Dressing: A savory, aromatic staple that brings incredible texture and flavor.
Creamed Corn: Rich, decadent, and incredibly easy to make, a family favorite.
Green Bean Recipe: Simple yet flavorful, these green beans offer a fresh contrast to richer dishes.
Mashed Potatoes: Creamy, dreamy, and utterly essential for soaking up gravy.
For this Parker House Rolls recipe, I exclusively used Challenge butter, and here’s why: it simply delivers the BEST results. Challenge has been my trusted brand for years, renowned for its consistent quality. Made with 100% real cream, it’s my go-to choice for all baking and cooking endeavors. The richness and pure flavor of Challenge butter truly elevate these rolls, making them exceptionally tender and delicious.
For an extra layer of flavor on your freshly baked rolls, try Challenge’s innovative Seasoned Butters. The Challenge Everything Butter Snack Spread and Challenge Garlic Parmesan with Herbs Butter Snack Spread are both incredibly flavorful options that add a unique twist to a classic!
Essential Ingredients for Perfect Parker House Rolls
Parker House Rolls have earned their legendary status since their debut in 1855, and once you make your own, you’ll understand why they’ve remained a dinner table staple. Crafting them from scratch allows you to experience their exquisite taste and texture firsthand. As always, the full printable recipe with comprehensive instructions is available in the recipe card at the end of this post. Let’s dive into the key ingredients you’ll need to create these culinary masterpieces:
Whole Milk: The foundation of our tender dough. Ensure your milk reaches a precise temperature of 110°F (43°C). This warmth is crucial for activating the yeast properly, leading to a perfect rise and fluffy texture.
Active Dry Yeast: This is the leavening agent responsible for those beautiful pockets of air and the irresistible soft, pull-apart texture. If you opt for rapid rise yeast (a convenient choice I often make), simply swap it into the recipe. Be aware that rise times will be slightly reduced, and you won’t need to let the yeast sit and bloom; just combine all ingredients and begin mixing immediately.
Unsalted Butter: The secret to that luxurious, buttery flavor. Use softened, but not melted, unsalted butter. You’ll need butter at three distinct stages in this recipe: first, incorporated directly into the dough for richness; second, brushed onto the dough before folding and the second rise; and finally, brushed generously over the rolls immediately after baking for a glorious, golden finish. Using unsalted butter gives you control over the overall saltiness of the rolls.
Granulated Sugar: Divided for various uses. Sugar plays a dual role: it acts as food for the yeast, helping it activate efficiently, and it imparts a subtle sweetness to the rolls, balancing the savory notes beautifully.
Fine Sea Salt: A critical flavor enhancer. Opt for fine sea salt or kosher salt for even distribution throughout the dough. Avoid coarse salt, which might not dissolve properly and could create pockets of intense saltiness.
Eggs: This recipe calls for one whole large egg plus one egg yolk, both at room temperature. Eggs contribute significantly to the richness, color, and structure of the rolls, making them incredibly tender and moist. Room temperature eggs also integrate more smoothly into the dough.
All-Purpose Flour: I adore that this recipe yields spectacular results with readily available all-purpose flour, eliminating the need for special bread flour. However, having experimented extensively, I can confirm that this recipe performs exceptionally well with bread flour if that’s your preference, producing a slightly chewier texture. The key is to use the least amount of flour possible to keep the dough soft and manageable.
Mastering the Art of Parker House Rolls: A Simplified Guide
Having dedicated years to perfecting Parker House Rolls, I’ve transformed a once “traditional,” overly complicated process into a beautifully streamlined method. While these are indeed homemade rolls and require a touch of dedication, I’ve eliminated unnecessary steps without compromising on quality or flavor. The results speak for themselves: these Parker House Rolls are worth every single second of your time! Let’s walk through the steps to create these unbelievably delicious rolls:
Step 1: Crafting the Perfect Dough
Activate the Yeast: In a large mixing bowl or the bowl of your stand mixer, combine the active dry yeast, the measured warm milk (at 110°F / 43°C), and 2 tablespoons of the granulated sugar. Gently whisk these ingredients together until well combined. Allow the mixture to rest for approximately 5 minutes; you’ll know it’s ready when a light, foamy layer appears on the surface, indicating the yeast is active and thriving.
Initial Mixing: To the foamy yeast mixture, add 2 ½ cups of the all-purpose flour, the fine sea salt, the softened unsalted butter, the whole egg, and the egg yolk. Attach the paddle attachment to your electric mixer. Begin mixing on the lowest speed, allowing all the ingredients to slowly incorporate. Periodically scrape down the sides of the bowl to ensure everything is evenly combined. Once incorporated, increase the speed to medium-low and continue mixing for an additional 2 minutes until the dough starts to come together.
Developing the Dough: Switch from the paddle attachment to the dough hook. Add ½ cup of flour to the bowl. Mix on the lowest speed until the flour is almost fully combined into the dough. Then, increase the speed to medium-low and continue mixing for a total of 2 minutes. This step helps develop the gluten, giving the rolls their signature structure.
Final Flour Addition and Dough Consistency: Add another ½ cup of flour and repeat the mixing process: low speed until combined, then medium speed for 2 minutes. At this point, a soft, cohesive ball of dough should form. The dough should still be slightly sticky to the touch and cling gently to the bottom of the bowl, but it should be pulling away cleanly from the sides. If necessary, you can add an additional tablespoon or two of flour, but remember the golden rule: use the least amount of flour possible to keep the dough tender.
First Rise: Lightly coat a clean bowl with nonstick cooking spray. Transfer the dough into this greased bowl. Cover the bowl tightly with a clean kitchen towel or plastic wrap. Place the bowl in a warm, draft-free area at room temperature and allow the dough to rise until it has visibly doubled in size. This crucial step typically takes anywhere from 45 to 90 minutes, depending on the warmth of your kitchen.
Deflate the Dough: Once the dough has doubled, gently remove the cover. Using your fist, carefully punch down the dough to release the accumulated gases. This step helps create a finer texture in the final rolls. Divide the dough into two equal halves.
Step 2: Shaping the Iconic Rolls
Prepare Your Surface: Lightly flour a clean work surface. Remember our golden rule: use minimal flour to avoid toughening the dough. Place one half of the divided dough onto this surface.
Roll into a Rectangle: Using a rolling pin, roll or gently pat out the dough into a neat rectangular shape, approximately 8 inches by 12 inches. A standard piece of printer paper (8.5 x 11 inches) can serve as a helpful visual guide for size.
Butter generously: Take 2 tablespoons of your softened unsalted butter and brush it evenly across the entire surface of the dough rectangle. Ensure it’s a light, consistent coating, similar to how you would butter dough for cinnamon rolls. Using softened butter, rather than melted, makes this step much neater and easier to manage. If your butter isn’t spreading easily, microwave it for just a few seconds until it’s almost melted but still holds its shape.
The Signature Fold: Cut the buttered dough rectangle in half lengthwise, resulting in two pieces, each roughly 4 inches by 12 inches. Now, take one of these narrower rectangles and fold it lengthwise. The trick is to fold it so that one edge almost meets the other, leaving about ½ an inch of the bottom edge exposed. This creates the classic “purse” or “pocketbook” appearance. Repeat this folding technique with the second rectangle.
Cut into Individual Rolls: Once both rectangles are folded, cut each folded rectangle in half, and then in half again. This will yield four roughly 3-inch pieces from each folded rectangle, giving you a total of 8 individual dough pieces from this first half of the dough.
Arrange in Baking Dish: Lightly grease a 9×13 inch baking dish. Carefully transfer the shaped rolls into the dish, placing them with the folded side facing down. Arrange them in neat rows of four, ensuring the longer sides of the rolls align with the longer sides of the baking dish.
Repeat for Second Half: Repeat the entire shaping process (steps 1 through 6) with the second half of your dough. By the end, you should have a total of 16 beautifully shaped Parker House Rolls nestled in your baking dish.
Step 3: Baking and the Final Buttery Touch
Second Rise: Once all the rolls are arranged in the baking dish, cover the dish again with a clean kitchen towel or plastic wrap. Allow the rolls to undergo their second rise for approximately one hour, or until they have visibly puffed up and nearly doubled in size. This secondary rise contributes to their ultimate lightness and fluffiness. As the rolls approach their full rise, preheat your oven to 350°F (175°C).
Bake to Golden Perfection: Remove the cover from the baking dish. Carefully place the dish into the preheated oven. Bake for 20 to 25 minutes, or until the rolls achieve a gorgeous golden-brown hue on top and feel set to the touch. Keep an eye on them towards the end of the baking time to prevent over-browning.
Final Butter Brush and Serve: As soon as you remove the hot rolls from the oven, brush their tops generously with the remaining softened butter. The warmth of the rolls will melt the butter, creating a lustrous sheen and infusing them with an irresistible aroma. Allow them to cool slightly before pulling them apart and serving them warm. Enjoy the fruits of your labor!
My Golden Rule for Exceptional Bread and Roll Making
When it comes to baking truly tender and delicious bread and rolls, there are many valuable tips, but one stands supreme: **always use the absolute least amount of flour possible.** Your goal is a dough that is soft and just barely manageable, with a slight stickiness. Over-flouring is a common pitfall that leads to tough, dense bread and rolls, robbing them of their desired lightness. Err on the side of a slightly stickier dough, adding only a tablespoon or two of extra flour at a time if absolutely necessary to handle it.
Storage and Freezing Information for Parker House Rolls
To ensure your homemade Parker House Rolls stay fresh and delicious, proper storage is key:
Store any leftover baked rolls in an airtight container at room temperature for up to 3 days. This will help maintain their softness and prevent them from drying out.
For longer preservation, these rolls freeze beautifully. Once completely cooled, place the baked rolls in a freezer-safe container or a heavy-duty freezer bag. They can be frozen for up to 3 months. To enjoy them later, simply thaw the rolls at room temperature, then gently reheat them in the oven (around 300-325°F or 150-160°C for 10-15 minutes, or until warm through) before serving.
You can also freeze the dough! Complete the entire process up through the second rise. Instead of baking, place the rolls (in their baking pan) in the freezer for about 8 hours, or until solid. Once frozen, transfer the solid dough balls to a freezer-safe container, separating layers with wax paper, and store for up to 3 months. When ready to bake, thaw the dough at room temperature until soft, then proceed with the baking instructions as directed in the recipe.
Parker House Roll Frequently Asked Questions (FAQs)
These distinguished rolls gained their fame from the historic Parker House Hotel in Boston, where they originated around 1855. Legend has it that a baker, in a fit of frustration, threw a batch of unfinished, folded dough into the oven. What emerged was a unique, buttery, and incredibly popular roll. The accidental shape and baking method quickly caught on, leading these iconic rolls to grace dinner tables and esteemed restaurants for well over two centuries, solidifying their place in culinary history.
Absolutely! Parker House Rolls are excellent candidates for freezing, both baked and as dough. For baked rolls, simply allow them to cool completely after baking, then store them in an airtight, freezer-safe container for up to 3 months. When you’re ready to enjoy them, thaw at room temperature and then warm them in the oven for a freshly baked experience. If you prefer to freeze the dough, prepare the rolls all the way through the second rise. Freeze them in their baking pan for approximately 8 hours until solid, then transfer to a freezer-safe container with wax paper between layers, storing for up to 3 months. Thaw the dough to room temperature before baking as directed.
Yes, these rolls are perfect for preparing in advance! If you wish to bake them the following day, follow the recipe instructions up until the second rise. Instead of allowing the rolls to rise again at room temperature, cover the baking dish tightly with plastic wrap and place it in the refrigerator overnight, or for up to 12 hours. The cold temperature will slow down the yeast activity. On the day you plan to bake, remove the rolls from the refrigerator and let them come to room temperature (this might take an hour or two) before proceeding with the baking instructions.
Trish’s Expert Tips and Tricks for Parker House Rolls
Achieving bakery-quality Parker House Rolls at home is easier than you think with these insider tips:
Flour Wisely: As emphasized in our golden rule, resist the urge to add excessive flour. When handling the dough, lightly flour your hands or even lightly grease them with a neutral oil instead. This ensures the dough remains wonderfully soft and tender, preventing a tough texture in your finished rolls.
Softened Butter is Key: For brushing the dough and the finished rolls, always opt for truly softened butter over melted butter. Softened butter spreads easily and adheres beautifully without creating a greasy mess. If your butter isn’t soft enough, microwave it for a few seconds until it’s almost, but not quite, liquid.
Optional Sea Salt Finish: Some enthusiasts enjoy a delicate sprinkling of fine sea salt over the baked, buttered rolls just before serving. This is entirely optional but can add a delightful contrast and enhance the buttery flavor.
Patience with Rising: Don’t rush the rising process. Yeast activity can vary based on ambient temperature and humidity. Allow the dough ample time to double in size for both rises; this patience will be rewarded with incredibly light and airy rolls.
Uniformity in Shaping: While homemade rolls have rustic charm, striving for consistent sizing when rolling and cutting the dough will ensure that all your rolls bake evenly, preventing some from burning while others are undercooked.
Explore More Biscuits and Rolls Recipes
If you’ve fallen in love with homemade bread, here are more delightful biscuit and roll recipes to expand your baking repertoire:
The Best Dinner Rolls: A classic recipe for reliably perfect, fluffy dinner rolls.
Perfect Biscuits Every Time: Achieve light, flaky biscuits with this foolproof recipe.
Pumpkin Dinner Rolls: A seasonal twist, perfect for fall gatherings, with a hint of warm spice.
Homemade Crescent Rolls: Buttery, golden, and wonderfully flaky, these are a true treat.
Angel Biscuits: A unique hybrid combining the best of rolls and biscuits—light as air!
Parker House Rolls Recipe Card
Parker House Rolls
Parker House Rolls are soft, fluffy, buttery and incredibly delicious! They’re the perfect roll to complement any dinner or holiday gathering. Plus, they make great options for sandwiches after cooking up those Thanksgiving turkeys or Christmas hams! Light and fluffy, these rolls are sure to be the best thing on your plate.
Ingredients
1 ¼ cup whole milk (110°F)
3 teaspoons active dry yeast
6 tablespoons unsalted butter, softened
4 tablespoons granulated sugar, divided
1 ½ teaspoons fine sea salt
1 large egg plus 1 egg yolk, room temperature
3 ½ to 4 ¼ cups all-purpose flour
5 tablespoons unsalted butter, softened, for brushing on dough, divided
Instructions
Combine yeast, 2 tablespoons granulated sugar, and warm milk in a large mixing bowl or the bowl of a stand mixer. Gently whisk together to combine. Let sit until foamy, about 5 minutes.
Add 2 ½ cups of flour, salt, 4 tablespoons butter, remaining 2 tablespoons of sugar, egg, and egg yolk. Attach the paddle attachment and turn the mixer to the lowest speed and mix until ingredients are incorporated, scraping down the sides of the bowl as necessary. Increase the speed to medium-low and continue to mix for 2 minutes.
Change the attachment to the dough hook, add ½ cup flour and incorporate the flour at the lowest speed, increasing to medium-low when the flour is mostly incorporated, mixing for a total of 2 minutes.
Add another ½ cup flour and repeat, mixing at medium speed for another 2 minutes until a ball of dough is formed. Add additional flour as necessary, a couple tablespoons at a time. The dough should be sticky and soft and pulling away from the edge of the bowl but still sticking to the bottom of the bowl. The rule of thumb with bread and rolls is to add the LEAST amount of flour possible and still be able to handle the dough. Flour your hands or lightly grease if necessary.
Transfer the dough to a lightly greased bowl (I simply sprayed with nonstick cooking spray) and cover with a towel or plastic wrap. Let rise at room temperature in a draft-free space until doubled in size, about 45 to 90 minutes.
Remove the towel or plastic wrap and punch the dough down gently.
Divide your dough in half and transfer to a very lightly floured surface. We want to add very minimal flour to the rolls.
Roll or pat out the dough into a rectangle measuring approximately 8” x 12” (a piece of printer paper is 8½ x 11 so I use that as a guide).
Brush the dough all over with 2 tablespoons of the softened butter, a light coating, much like you would do for cinnamon rolls. I like to use softened instead of melted butter so it makes less of a mess. If you have a hard time brushing on your butter, it’s likely not quite soft enough so put it in the microwave for a couple of seconds until it’s so soft it’s almost melting.
Cut the dough in half lengthwise so you have two 4″ x 12″ rectangles. Fold one rectangle lengthwise so it almost meets the other edge but not quite. You want about 1/2″ of the other edge showing. The rectangle should now be roughly 2 ¼″ x 12″. Repeat with the other rectangle.
Cut each of the rectangles in half and then in half again so you have (4) 3″ pieces. Repeat for the other rectangle (you’ll now have 8 rolls cut).
Turn the rolls over and place the rolls with the folded side down in a lightly greased 9 x 13 inch baking dish, four in a row, with the longer sides matching the longer side of the baking dish. (Refer to video or post above if needed.)
Repeat the entire process with the second half of the dough. You should have 16 rolls in all.
Cover the baking dish with plastic wrap or a light towel and let the rolls rise until not quite doubled in size but nice and puffy, about 45 minutes to 1 hour. As you see the rolls getting close to ready, preheat the oven to 350°F.
Remove the towel or plastic wrap and bake the rolls for 20 to 25 minutes, until they’re golden brown and feel set.
Remove them from the oven, and brush with the remaining 1 tablespoon softened butter. Pull them apart to serve.
Notes
Storage Information. Store leftover rolls in an airtight container for up to 3 days. You can also freeze these rolls in a freezer-safe container for 3 months. Thaw at room temperature, heat in the oven and serve.
Using rapid rise yeast. Want to use rapid rise yeast instead of active dry yeast? No problem. Just swap it in the recipe and expect the rise times to be reduced a bit. You don’t have to let the yeast sit at all either, just add all of the ingredients in and start mixing.
To make ahead of time. If you want to make the rolls the day before, make the rolls up until the second rise. Instead of letting the rolls rise again, cover and place in the refrigerator overnight or for up to 12 hours. Let rolls come to room temperature and then bake as directed.
To freeze. Bake as directed, let them cool, then store the baked rolls in a freezer-safe container for up to 3 months. Thaw at room temperature, heat in the oven and serve. You can also freeze the dough. Go through the process all the way through the second rise. You’ll want to freeze them in the pan for about 8 hours, then store in a freezer-safe container in between layers of wax paper for up to 3 months. Thaw the dough to room temperature and bake as directed above.
Nutrition
The post Pillowy Soft Parker House Rolls first appeared on Fitgag.