Easy Homemade Slow Cooker Yogurt
Have you ever dreamed of making your own fresh, creamy yogurt right in your kitchen? It’s much simpler than you think, and you don’t need expensive equipment. All you truly need is a trusty slow cooker!
Master the Art of How to Make Yogurt in a Slow Cooker!
Why Choose Homemade Yogurt? The Benefits Are Abundant!
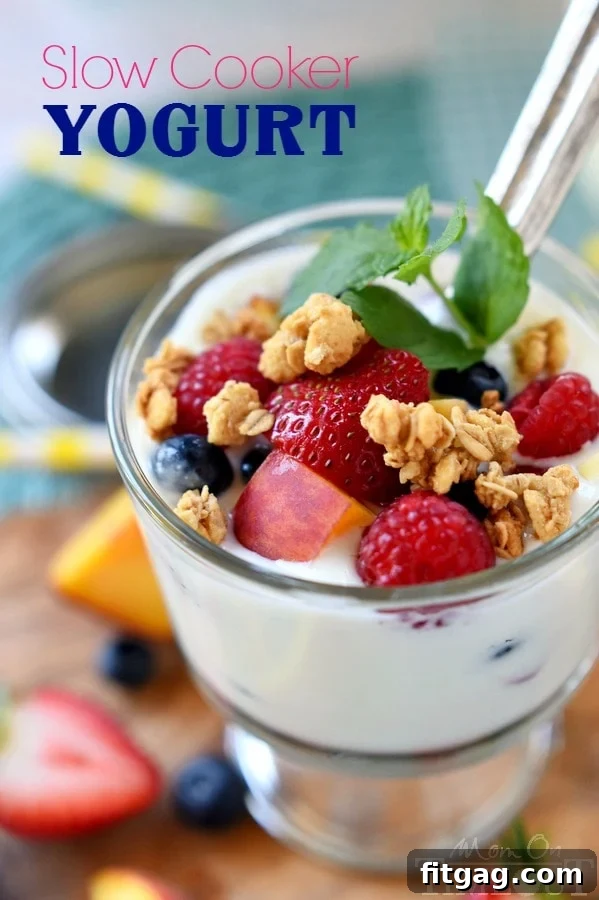
In our household, yogurt is a staple. Whether it’s served in vibrant breakfast parfaits, which we affectionately call “energy bowls,” or packed as a nutritious snack for busy Saturday swim meets, it’s a constant presence. But beyond convenience, making your own yogurt offers a multitude of compelling advantages that store-bought options simply can’t match.
Firstly, making your own yogurt is incredibly cost-effective. Regular yogurt consumption can quickly add up, but with just a gallon of milk and a small amount of starter, you can produce several batches for a fraction of the price. Secondly, it provides unparalleled control over ingredients. You dictate what goes into your yogurt, meaning no artificial sweeteners, preservatives, or stabilizers. This allows you to tailor it perfectly to your dietary needs and preferences, ensuring a healthier and purer product for you and your family.
Moreover, milk, the primary ingredient, is a powerhouse of nutrition. It contains 9 essential nutrients, including 8 grams of high-quality protein per 8-ounce serving, vital B vitamins for energy, protein for lean muscle development, vitamin A for a robust immune system, and bone-building nutrients like calcium and vitamin D. By transforming milk into yogurt at home, you harness these benefits in a delicious, digestible form. The versatility of milk also opens up endless possibilities for creating not just yogurt, but also homemade cheeses or ice cream to suit any craving. Ready to embark on this rewarding culinary journey? Let’s get started!
Your Step-by-Step Guide to Slow Cooker Yogurt Perfection
I’m going to guide you through each step with care, as the first attempt always benefits from a little extra support and clear instructions. Don’t worry, this recipe is incredibly forgiving, making it perfect for beginners!
Step 1: Scalding the Milk
Begin by pouring a half-gallon of your chosen milk into your slow cooker. Turn the slow cooker to its ‘High’ setting. Our goal here is to bring the milk’s temperature to between 180°F and 185°F. This crucial step, known as scalding, serves two main purposes: it denatures the milk proteins, which contributes to a thicker yogurt, and it kills any unwanted bacteria that might compete with your starter culture. While a precise temperature is ideal, this recipe is remarkably forgiving. I’ve personally made successful batches where the milk reached as high as 210°F. Typically, it takes my slow cooker about 2 to 2.5 hours to reach the optimal temperature. Using a food thermometer is highly recommended for accuracy.
For this recipe, I opted for whole organic milk, knowing it would be enjoyed by my boys. However, you can use any type of dairy milk with any fat content – skim, 2%, or whole milk all work beautifully. The fat content primarily influences the yogurt’s final thickness; more fat typically results in a creamier, richer yogurt. Regardless of your choice, remember that milk is a naturally nutrient-rich food, providing essential vitamins and minerals for a healthy diet.
Step 2: Cooling the Milk
Once your milk has reached the target temperature of 180°F, turn off your slow cooker. Now, it’s time to let the milk cool down to a specific range: between 110°F and 120°F, with 115°F being the sweet spot. This cooling phase is critical because excessively hot milk will kill the delicate live cultures in your yogurt starter, preventing fermentation. Simply turn off the appliance and allow it to cool naturally. To aid in a more controlled cooling and prevent excessive condensation from dripping back into your milk, I suggest slightly cracking the lid or placing a clean paper towel between the lid and the slow cooker insert. This trick helps absorb steam, ensuring the water doesn’t dilute your developing yogurt. If a thin skin forms on the surface of your milk during cooling, don’t worry – simply scoop it out gently and discard it.
Step 3: Preparing the Yogurt Starter
While your milk is cooling, take out one-third cup of plain yogurt from the refrigerator. This will be your starter culture. I typically use Greek yogurt, but any plain yogurt containing live and active cultures will work perfectly. The key is to let it come closer to room temperature. This minimizes the temperature shock when it’s introduced to the warm milk, helping to maintain the ideal environment for the beneficial bacteria to thrive and multiply. These cultures are the magic behind yogurt, transforming milk into a tangy, thick delight.
Step 4: Introducing the Starter Culture
Once your milk has cooled to approximately 110°F, it’s time to introduce the yogurt starter. This step requires a gentle touch. Scoop out about one cup of the warm milk from the slow cooker and combine it with your room-temperature yogurt in a separate small bowl. Stir this mixture very gently and lovingly until it’s smooth. The goal is to incorporate the live cultures without disturbing them excessively. Next, carefully drizzle this yogurt-milk mixture over the top of the milk in the slow cooker. This is important: DO NOT STIR IT IN! Through various trials, I’ve found that not stirring yields the best results, allowing the cultures to spread naturally and initiate the fermentation process.
Step 5: Incubation – The Magic Happens Overnight
Now comes the pivotal incubation phase, where the beneficial bacteria get to work transforming your milk into yogurt. This process requires a consistently warm environment for about 8 hours, ideally overnight. My preferred method for achieving this consistent warmth is ingenious yet simple: wrap your slow cooker in a large towel for insulation, then carefully transfer it to your oven. Ensure your oven rack is positioned low enough to comfortably accommodate the slow cooker (or at least its insert and lid) without jostling. Crucially, turn on your oven light. The small amount of heat generated by the oven light is usually enough to maintain the perfect low, stable temperature needed for the cultures to ferment the milk successfully. Leave it undisturbed for at least 8 hours, or even up to 12 hours for a tangier yogurt. This long, slow fermentation is where the magic truly happens, turning milk into the creamy yogurt you crave.
Step 6: Chilling and Setting
After its overnight incubation, your yogurt will emerge from the oven. At this stage, it will still be quite loose. The next crucial step is chilling. Transfer the entire slow cooker insert (or carefully pour the yogurt into clean containers) into the refrigerator and chill for a minimum of four hours. This refrigeration period is vital for two reasons: it halts the fermentation process, preventing the yogurt from becoming too tart, and more importantly, it allows the yogurt to set and firm up properly, achieving a more desirable consistency.
Achieving Your Desired Thickness: The Art of Straining
By this point, you have delicious homemade yogurt! If you are content with its current consistency – perhaps a bit thinner than store-bought Greek yogurt – then you’re done! Simply transfer it to airtight containers and store it in the fridge. However, if you, like us, prefer a thicker, richer yogurt, similar to Greek yogurt, then let’s move on to the optional but highly recommended step: straining.
The Superior Straining Method: Coffee Filters
Many recipes suggest using cheesecloth to strain the whey, which is the yellowish liquid that separates from the yogurt and contributes to a thinner consistency. While cheesecloth can work, I’ve found it to be less than ideal. Even when layering it multiple times, some of the precious yogurt solids often escape along with the whey. This is where coffee filters shine!
You don’t even need a coffee machine that uses filters; a large pack is incredibly inexpensive. Here’s how to do it: Place a colander over a large mixing bowl. Line the colander thoroughly with coffee filters. Start with one at the bottom, then overlap others along the sides as needed to completely cover the straining surface. Carefully transfer portions of your chilled yogurt into the filter-lined colander. Allow the whey to drip out for about 30 minutes. The beauty of coffee filters is their fine pore size, which allows only liquid (whey) to pass through, keeping all your thick, creamy yogurt safely in the colander. Additionally, scraping the thickened yogurt from a coffee filter is significantly easier and less messy than from cheesecloth.
For best results and to maximize the amount of whey removed, I recommend straining your yogurt in batches. Depending on your quantity, dividing it into two or three batches, or even using multiple colanders simultaneously, can speed up the process. The liquid you’ll collect at the bottom is the whey.
While I typically discard the whey, it is a nutrient-rich byproduct. Some people use it in smoothies, for baking, or as a liquid in fermenting vegetables. After straining, what you are left with is a wonderfully thick, naturally sweet, and incredibly versatile yogurt, ready for your creative touches!
Storage, Serving, and Enjoying Your Homemade Creation
From a half-gallon of milk, you can typically yield about 6 cups of homemade yogurt (give or take a cup), with whey as the only byproduct. This makes it an incredibly efficient and satisfying process. I love portioning the finished yogurt into small mason jars for easy storage and grab-and-go convenience in the refrigerator.
The beauty of plain homemade yogurt is its adaptability. In the mornings, I often enhance it with fresh seasonal fruit, a sprinkle of crunchy granola, and a drizzle of honey for a touch of natural sweetness. My husband frequently takes these customized jars to work for a healthy, satisfying meal. But the possibilities don’t stop there!
Creative Ways to Enjoy Your Homemade Yogurt:
Smoothies: Blend with your favorite fruits and a splash of milk for a creamy, protein-packed drink.
Dips and Dressings: Use it as a base for savory dips (like tzatziki) or tangy salad dressings, replacing mayonnaise or sour cream for a lighter option.
Marinades: The acidity in yogurt makes it an excellent tenderizer for meats, especially chicken, infusing them with flavor.
Baking: Substitute yogurt for buttermilk or sour cream in recipes for muffins, quick breads, or cakes to add moisture and a slight tang.
Desserts: Layer it with fruit and granola for a quick trifle, or even freeze it into healthy yogurt pops.
Your homemade yogurt will stay fresh in airtight containers in the refrigerator for up to a week. Always remember to save a portion of your current batch to use as a starter for your next one – this keeps the cycle of delicious, fresh yogurt going!
While the process of making yogurt might seem a bit lengthy when outlined, the actual hands-on work involved is surprisingly minimal. The satisfaction of knowing exactly what you’re feeding your family, combined with the pure, nutrient-rich goodness of homemade dairy, makes every minute worth it. I genuinely encourage you to give this easy slow cooker yogurt recipe a try. You’ll be amazed at how simple and rewarding it is!
Print Recipe
Pin Recipe
How To Make Yogurt In A Slow Cooker!
Discover the simplicity of making delicious homemade yogurt without a fancy machine! All you need is a slow cooker for a cost-effective and healthy alternative to store-bought yogurt.
Course: Breakfast
Cuisine: American
Keyword: slow cooker yogurt, homemade yogurt, easy yogurt
Prep Time: 5 minutes
Cook Time: 12 hours
Total Time: 12 hours 5 minutes
Servings: 6 cups
Calories: 201 kcal
Author: Trish – Mom On Timeout
Ingredients
1/2 gallon milk (I used whole milk)
1/3 cup yogurt (room temperature, I used Greek)
Instructions
Pour a half gallon of milk into a slow cooker and turn it on high. Bring the temperature to between 180°F-185°F. This should take somewhere between 2 and 2 1/2 hours.
After the milk has been brought to 180°F, turn off the slow cooker and allow the temperature to drop to around 115°F. Anywhere between 110°F and 120°F is ideal.
Set out one-third cup of yogurt on the counter to bring it to room temperature.
To mix the yogurt with the 110°F milk, scoop out about 1 cup of the milk and gently combine it with the yogurt in a small bowl. Drizzle this yogurt-milk mixture over the top of the milk in the slow cooker. DO NOT STIR IT IN.
Wrap the slow cooker in a large towel and carefully transfer it to your oven. Ensure the rack is low enough for the slow cooker to fit. Turn on the oven light to maintain a warm temperature. Leave the milk undisturbed for at least 8 hours or overnight.
Remove the yogurt from the oven and refrigerate for at least four hours to allow it to set up firmly.
If you desire a thicker yogurt, proceed to the straining step.
Place a colander over a large bowl and line it with coffee filters, ensuring the sides are covered as needed.
Transfer portions of the yogurt to the colander and allow the whey to strain out for about 30 minutes. Repeat in batches for best results.
Transfer the finished yogurt into airtight containers and store in the refrigerator for up to a week.
Nutrition
Calories: 201kcal | Carbohydrates: 16g | Protein: 10g | Fat: 11g | Saturated Fat: 6g | Cholesterol: 33mg | Sodium: 142mg | Potassium: 437mg | Sugar: 17g | Vitamin A: 525IU | Calcium: 373mg | Iron: 1mg
More Delicious Milk-Based Recipes to Explore:
Monster Cookie Dough Ice Cream
Rocky Road Pudding Pops
Banana Pudding Pie – from scratch!
Connect with Me for More Recipes and Tips!
You can also find me linking up at some of these fantastic parties.
Disclosure: This post is sponsored by MilkPEP. All opinions expressed herein are, as always, 100% my own. Thank you for supporting the brands that I love and that make Mom On Timeout possible!
The post Easy Homemade Slow Cooker Yogurt first appeared on Fitgag.