Velvet White Chocolate Raspberry Bliss
Indulge in the sublime pleasure of our **White Chocolate Raspberry Cheesecake**, a truly exquisite dessert that perfectly marries rich, creamy textures with vibrant, tangy flavors. This show-stopping cheesecake features a velvety smooth white chocolate base, lusciously layered and crowned with a swirling raspberry ripple, all resting gracefully upon a satisfyingly crunchy OREO cookie crust. Every single bite delivers a delightful symphony of sweet and tart, making it an irresistible masterpiece destined to impress at any gathering or elevate an ordinary evening into something special.
For fellow cheesecake aficionados, our repertoire extends beyond this heavenly creation. We invite you to explore more of our beloved cheesecake recipes, each offering a unique journey for your palate. Discover the bright zest of our Lemon Blueberry Cheesecake, the classic elegance of Lemon Meringue Cheesecake, or the effortless decadence of our Chocolate Chip No Bake Cheesecake. Each recipe promises a memorable dessert experience!
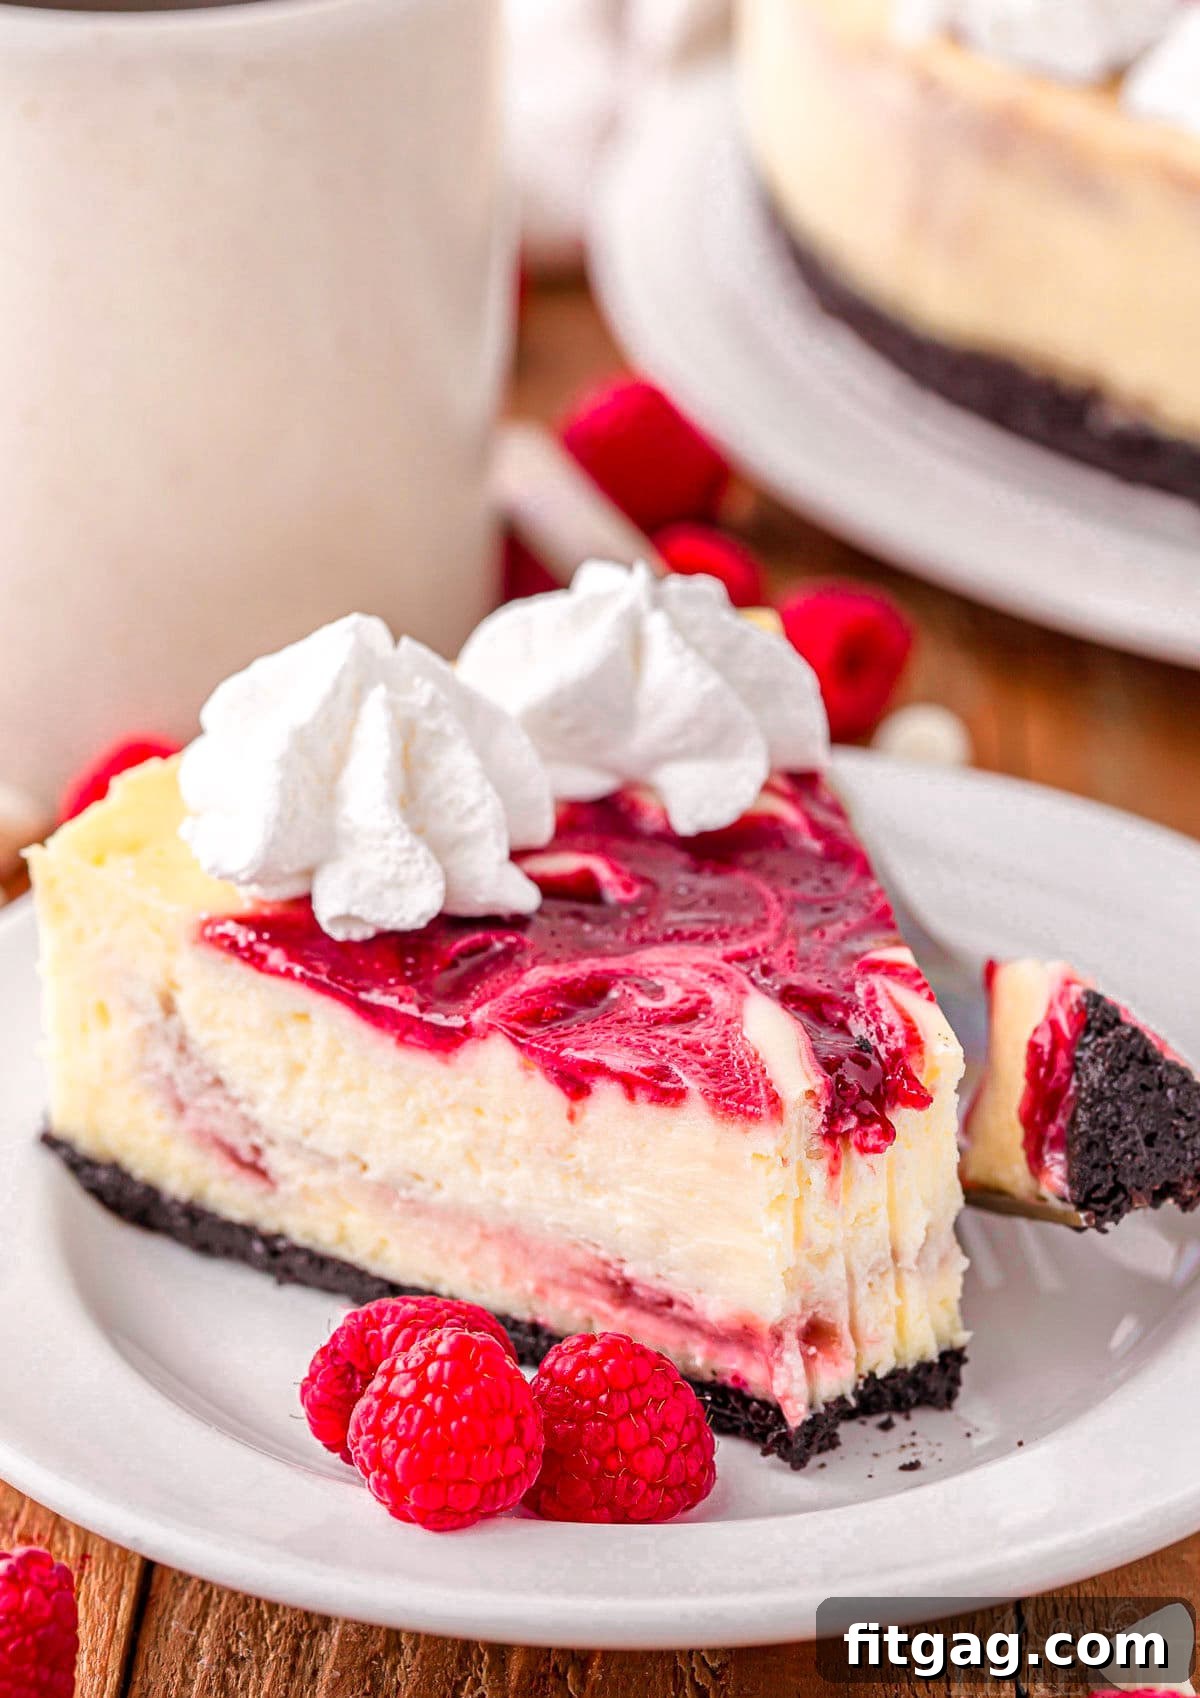
A delectable slice of White Chocolate Raspberry Cheesecake, ready to be savored.
The Ultimate White Chocolate Raspberry Cheesecake Recipe
Prepare to be enchanted by what is arguably one of the most decadent and visually stunning cheesecakes you’ll ever encounter. This white chocolate raspberry cheesecake recipe is a true marvel, as breathtaking in appearance as it is in taste. The luxurious, velvety texture of the white chocolate cheesecake filling provides the perfect canvas for the bright, tangy burst of fresh raspberries, all grounded by the rich, crumbly crunch of an OREO crust. Whether you’re planning a grand celebration, a romantic dinner, or simply wish to treat your family to an extraordinary dessert on a quiet Wednesday night, this cheesecake is guaranteed to leave a lasting impression of delight and sophistication.
The secret to this cheesecake’s unparalleled richness and silken texture lies in the incorporation of a homemade white chocolate ganache, meticulously blended into the cheesecake filling. This exquisite addition elevates the dessert, infusing it with a depth of flavor and an irresistible creaminess that sets it apart. Complementing this indulgence is a vibrant raspberry sauce, crafted from sweet raspberry preserves and either fresh or frozen raspberries. This tangy sauce is thoughtfully swirled through the center of the cheesecake and generously drizzled on top, ensuring that every forkful delivers that essential tart contrast against the sweet white chocolate. This dynamic flavor interplay creates a harmonious balance that is truly addictive.
For the ultimate presentation and flavor enhancement, finish your cheesecake with extra raspberry sauce, a generous dollop of freshly made whipped cream, and a scattering of whole raspberries!
Why This White Chocolate Raspberry Cheesecake Will Be Your New Favorite
Cheesecake holds a special place in the hearts of dessert lovers, and for good reason. It’s a classic that evokes comfort and celebration. This particular white chocolate raspberry cheesecake takes that beloved classic to an entirely new level, making it impossible to resist. With its luxurious raspberry swirl and sophisticated flavor profile, it’s a dessert that transcends expectations and creates an unforgettable experience. Here’s why you’ll fall head over heels for this recipe:
A Symphony of Tart and Sweet: The masterful combination of vibrant, slightly tart raspberries with the creamy, sweet indulgence of white chocolate creates a flavor profile that is perfectly balanced. Neither flavor overpowers the other; instead, they dance in exquisite harmony, delivering a complex and utterly satisfying taste experience that will leave you craving more.
Irresistible Textural Contrast: Beyond its incredible taste, this cheesecake offers a captivating interplay of textures. The foundation is a delightfully crunchy OREO crust, providing a satisfying bite. This perfectly contrasts with the remarkably smooth and rich white chocolate cheesecake filling, which boasts an almost silken creaminess. Finally, the tangy raspberry swirl introduces a subtle fruitiness and a delicate textural counterpoint, making each mouthful a multi-sensory delight.
A Showstopper Appearance: This isn’t just a dessert; it’s a work of art. The bright, vivid hues of the raspberry swirl against the pristine white chocolate create a stunning visual appeal that is guaranteed to turn heads. Its elegant presentation ensures that this cheesecake will be the undisputed star of any dessert table, making it perfect for special occasions, holidays, or simply when you want to create a memorable moment with food.
Perfect for Any Occasion: While it looks and tastes incredibly gourmet, this cheesecake is surprisingly achievable for home bakers. It’s versatile enough to be served at elegant dinner parties, birthday celebrations, or enjoyed as a comforting treat during a cozy evening at home. Its universal appeal ensures it’s always a crowd-plepleaser.
Make Ahead Friendly: Cheesecake is one of those fantastic desserts that actually benefits from being made ahead of time. This allows the flavors to meld and the texture to set perfectly. This aspect makes it ideal for entertaining, reducing stress on the day of your event.
See the incredible layers of flavor, from the OREO crust to the creamy filling and vibrant raspberry topping.
Essential Ingredients for Your White Chocolate Raspberry Cheesecake
Crafting this decadent dessert involves four primary components: the irresistible OREO crust, the vibrant raspberry sauce, the rich white chocolate cheesecake filling, and any delightful garnishes you choose to add. Each element plays a crucial role in creating the overall symphony of flavors and textures. Let’s take a closer look at the key ingredients you’ll need for this truly special dessert. Remember, for precise measurements and detailed instructions, refer to the full printable recipe card conveniently located at the end of this post.
For the Signature OREO Crust
OREO Cookies: These iconic chocolate sandwich cookies form the perfectly crunchy, chocolatey base for our cheesecake. I find that using a food processor makes quick work of turning the cookies, including their creamy filling, into fine, uniform crumbs. This ensures a consistent and sturdy crust. If you don’t have a food processor, simply place the cookies in a sturdy ziploc bag and crush them thoroughly with a rolling pin until finely crumbled.
Salted Butter: Melted butter acts as the binding agent for the OREO crumbs, helping them hold their shape and become a firm crust. I prefer using salted butter as its subtle salinity beautifully balances the sweetness of the OREO cookies and the overall cheesecake, adding a depth of flavor. If you only have unsalted butter on hand, simply add a small pinch of fine salt to the crumb mixture to achieve a similar effect.
For the Tangy Raspberry Sauce
Raspberry Preserves: These serve as the foundational element for our sauce, providing a concentrated burst of tart, tangy raspberry flavor. Preserves offer a wonderful depth and natural sweetness that complements the richness of the cheesecake, cutting through it with a refreshing fruitiness.
Fresh or Frozen Raspberries: To enhance the vibrant berry flavor and add textural interest, we incorporate additional raspberries. Both fresh and frozen raspberries work exceptionally well in this recipe. If using frozen, there’s no need to thaw them beforehand; they’ll cook down beautifully in the saucepan.
For the Luxurious White Chocolate Cheesecake Filling
White Chocolate and Heavy Cream: This dynamic duo forms the essential white chocolate ganache that is the heart of our cheesecake’s flavor. While white chocolate chips are convenient and work well, if you can find high-quality white chocolate bars, they will yield an even silkier, more intensely flavored ganache. The heavy cream melts the white chocolate into a smooth, glossy emulsion, contributing to the cheesecake’s incredible richness and delicate sweetness.
Cream Cheese: Without a doubt, this is the star ingredient of any cheesecake, providing its characteristic silky smooth texture and tangy base. For the absolute best results, invest in full-fat, block-style cream cheese of the highest quality you can find. It’s crucial that your cream cheese is at room temperature before mixing. This ensures it beats smoothly and completely, preventing any unwanted lumps in your finished cheesecake batter.
Powdered Sugar: Also known as confectioners’ sugar, this ingredient adds a refined sweetness to the cheesecake. Its fine texture blends effortlessly with the cream cheese, ensuring a perfectly smooth batter without any graininess.
Sour Cream: A touch of sour cream is vital for adding a lovely tanginess to the cheesecake, which beautifully offsets the sweetness of the white chocolate. It also contributes to the cheesecake’s incredibly creamy, melt-in-your-mouth texture. If sour cream isn’t available, full-fat Greek yogurt makes an excellent, equally tangy substitute. Ensure it’s also at room temperature.
Large Eggs: Eggs are essential for providing structure to the cheesecake, helping it to set properly while baking, and contributing to its velvety consistency. For optimal blending and to prevent over-mixing, the eggs should be added one at a time, ensuring each is fully incorporated into the batter before adding the next. Like all other dairy, eggs should be at room temperature.
Delightful Garnishes (Optional, but Highly Recommended!)
Extra Raspberry Sauce and Fresh Raspberries: For a stunning finish and an extra burst of flavor, reserve some of the luscious raspberry sauce and fresh raspberries. These make the perfect garnish, enhancing both the visual appeal and the overall taste experience of this luxurious cheesecake.
Homemade Whipped Cream: While store-bought whipped cream can work in a pinch, I wholeheartedly advocate for making your own homemade whipped cream. I know it might sound a bit “snobby,” but trust me – the difference in taste and texture is SO worth the minimal effort! It takes mere minutes to whip up, offering a much thicker, richer, and fresher flavor than anything from a can. It’s the ideal light, airy contrast to the dense, creamy cheesecake.
Effortlessly serving a perfect slice of homemade perfection.
Storage and Freezing Information for Your Cheesecake
To ensure your White Chocolate Raspberry Cheesecake remains fresh and delicious, proper storage is key. This section provides detailed guidance on how to store leftovers and even how to freeze your cheesecake for future enjoyment, allowing you to savor its delightful flavors over an extended period.
Refrigerator Storage: Any leftover cheesecake should be stored in an airtight container or tightly wrapped with plastic wrap. This prevents it from absorbing odors from other foods in your refrigerator and keeps it from drying out. When stored correctly, your cheesecake will remain fresh and delicious for up to 4 days in the refrigerator. Always bring it to room temperature for about 15-20 minutes before serving for the best texture and flavor.
Freezing Instructions: This cheesecake freezes beautifully, making it an excellent make-ahead dessert. To freeze, ensure the cheesecake is completely cooled and, ideally, undecorated. First, wrap the entire cheesecake (or individual slices) tightly in several layers of plastic wrap, making sure to eliminate as much air as possible. Next, add a layer of heavy-duty aluminum foil for extra protection against freezer burn. Transfer the wrapped cheesecake to a freezer-safe, airtight container. It can be safely stored in the freezer for up to 2 months.
Thawing Frozen Cheesecake: When you’re ready to enjoy your frozen cheesecake, simply transfer it from the freezer to the refrigerator and allow it to thaw overnight. Avoid thawing at room temperature, as this can affect its delicate texture. Once thawed, you can add any desired garnishes like fresh raspberry sauce, whipped cream, or fresh berries before serving.
Trish’s Expert Tips for a Flawless Cheesecake
This White Chocolate Raspberry Cheesecake is a true labor of love, designed to deliver an unforgettable dessert experience. To ensure you achieve the absolute best results—a creamy, crack-free masterpiece every time—follow these expert tips. These small details make a significant difference in the final outcome, guaranteeing you’ll fall even more in love with this perfect combination of flavors.
Room Temperature is Key: This is perhaps the most crucial tip! Ensure all your cold ingredients, especially the cream cheese, sour cream, and eggs, are at true room temperature. This allows them to blend smoothly and seamlessly, creating a uniform, lump-free batter. Cold ingredients will result in a lumpy batter and may require over-mixing, which can introduce air.
Avoid Over-Mixing the Batter: Once you’ve added the eggs, mix on the lowest speed possible and only until just combined. Over-mixing incorporates too much air into the batter, which can cause the cheesecake to puff up dramatically during baking and then inevitably crack as it cools. Gentle mixing is essential for a smooth, dense, and crack-free cheesecake.
Embrace the Water Bath (Bain-Marie): Setting up a water bath is a game-changer for cheesecake baking. This technique provides a moist, even heat environment, which is paramount in preventing cracks and ensuring your cheesecake bakes uniformly to an ultra-creamy consistency. Follow my easy steps (detailed below and in the recipe card) for setting up an effective water bath.
Cool Slowly and Patiently: Sudden temperature changes are a cheesecake’s worst enemy. Once baked, resist the urge to immediately remove the cheesecake from the oven. Instead, turn off the oven, crack the door open, and let the cheesecake cool gradually inside for an hour. Then, transfer it to a cooling rack to come to room temperature. This slow cooling process helps prevent drastic shrinkage and cracks.
Choose Full-Fat, Block-Style Cream Cheese: For the most superior texture, richness, and classic cheesecake flavor, always opt for full-fat cream cheese sold in blocks, not the whipped or spreadable kind in tubs. The higher fat content is vital for that dense, creamy mouthfeel.
Line Your Springform Pan with Parchment Paper: If you plan to transfer your cheesecake to a serving platter after baking, line the bottom of your springform pan with a circle of parchment paper. This simple step makes removal incredibly easy and ensures the crust stays intact.
Prevent Over-Baking: An over-baked cheesecake is a dry, cracked cheesecake. The ideal doneness for this particular cheesecake is when the edges are set and a slight jiggle remains in the very center when the pan is gently moved. Remember, the cheesecake continues to cook from residual heat after it’s removed from the direct oven heat.
Garnishes Just Before Serving: For the freshest appearance and texture, hold off on adding the additional raspberry sauce, fresh berries, and especially the homemade whipped cream until just before you plan to serve the cheesecake. This ensures the whipped cream remains fluffy and the berries look vibrant.
Don’t Panic About Cracks: If, despite your best efforts, your cheesecake develops a small crack, don’t despair! That’s what generous dollops of raspberry sauce, whipped cream, or fresh fruit are for. They’re excellent for decoratively concealing any imperfections, and no one will ever know!
For Perfectly Clean Slices: Achieve bakery-worthy slices by using a sharp, thin-bladed knife. For each cut, dip the knife in very hot water and wipe it dry with a clean towel before slicing. This technique ensures a smooth, clean cut through the creamy cheesecake.
Pro Tip for Doneness: Use a digital thermometer to accurately check when your cheesecake is done. You are aiming for an internal temperature of 150°F (65°C) in the center. Due to the addition of white chocolate, this cheesecake will have a slightly more pronounced “wiggle” than a typical cheesecake, so a thermometer provides the most reliable way to ensure it’s perfectly cooked without being over-baked.
The finished White Chocolate Raspberry Cheesecake, a masterpiece of flavor and presentation.
Frequently Asked Questions About This Cheesecake
To help you perfect your White Chocolate Raspberry Cheesecake, we’ve gathered some common questions and provided detailed answers to guide you through the process and ensure your dessert turns out perfectly every time.
Is it okay to use frozen raspberries for the raspberry sauce?
Absolutely! Frozen raspberries are perfectly suitable for the raspberry sauce. Since the sauce is cooked down, any extra moisture from the frozen berries will simply evaporate during the simmering process. Both fresh and frozen raspberries will yield a delicious, vibrant sauce, so feel free to use whichever is most convenient or available to you.
Do I need to strain the raspberry sauce?
Straining the raspberry sauce is highly recommended, especially if you prefer a silky-smooth sauce free of seeds. Passing the cooked sauce through a fine-mesh strainer will remove most of the tiny raspberry seeds, resulting in a more refined texture. However, if you don’t mind the seeds and enjoy a more rustic texture, you can certainly skip this step.
How do I know when the cheesecake is done baking?
Determining doneness can be tricky with cheesecakes, but there are key indicators. The edges of the cheesecake should appear set and may have just started to turn a very light, golden brown. The center, however, should still have a slight “jiggle” when the pan is gently nudged, but it should not appear liquid or watery. For this particular white chocolate raspberry cheesecake, the most reliable method is to use a digital thermometer: the internal temperature in the center should reach 150°F (65°C). Since the added white chocolate can make the center seem a bit more fluid than a traditional cheesecake, a thermometer provides crucial accuracy.
What are the best ways to prevent my cheesecake from cracking?
Preventing cracks is a common goal for cheesecake bakers, and it’s achievable by following a few critical steps. Ensure all your ingredients are at room temperature to create a smooth batter without lumps. Avoid over-mixing the cheesecake batter, as this incorporates excess air that can lead to cracks. Most importantly, always use a water bath (bain-marie) during baking to provide a moist, even cooking environment, and allow the cheesecake to cool slowly and gradually within the oven after baking. These combined techniques significantly reduce the likelihood of cracks.
Do I really have to chill the cheesecake for so long?
Yes, chilling the cheesecake is a non-negotiable step for optimal results! While a minimum of 4 hours in the refrigerator is essential for the cheesecake to fully set and firm up, ideally, it should be chilled overnight. This extended chilling period not only ensures a perfectly set and sliceable cheesecake but also allows the flavors to fully meld and deepen, resulting in a much richer and more delicious dessert. Patience truly is a virtue when it comes to cheesecake!
Understanding and Utilizing a Water Bath (Bain-Marie) for Cheesecake
The water bath, also known as a bain-marie, is an invaluable technique in cheesecake baking. Its primary purpose is to create a gentle, moist, and consistent heat environment around the cheesecake, which is crucial for achieving a perfectly smooth, creamy texture and significantly minimizing the risk of cracks. When a cheesecake bakes without a water bath, the direct, dry heat of the oven can cause the edges to cook and set much faster than the center. This uneven cooking often leads to the center rising and then cracking as it cools and contracts.
To effectively set up a water bath, you’ll need a large roasting pan or baking dish that is significantly larger than your springform pan, allowing at least an inch or two of space on all sides. Before placing your springform pan into the water bath, it is absolutely essential to tightly wrap the exterior of the springform pan with several layers of heavy-duty aluminum foil. This acts as a barrier, preventing any water from seeping into your cheesecake crust and making it soggy. Alternatively, you can use specialized baking bags designed for water baths. Once the foil-wrapped springform pan is nestled into the larger roasting pan, carefully pour boiling or very hot water into the roasting pan. Ensure the water level comes up at least one to two inches around the sides of the springform pan, reaching about halfway up its height. This envelops the cheesecake in steam, allowing it to bake gently and evenly, resulting in that coveted ultra-creamy, crack-free finish.
A tantalizing bite of creamy, dreamy cheesecake.
More Irresistible Cheesecake Recipes To Explore
If you’ve enjoyed this White Chocolate Raspberry Cheesecake, you’ll love diving into our other fantastic cheesecake creations. Each recipe offers a unique flavor profile and a delightful baking adventure.
Decadent Peanut Butter Cheesecake
Effortless Instant Pot Cheesecake
Classic Oreo Cheesecake
Simple No Bake Raspberry Cheesecake
Rich Espresso Cheesecake
Print Recipe
Pin Recipe
White Chocolate Raspberry Cheesecake
Ingredients
Oreo Crust
20 OREO cookies
4 tablespoons salted butter melted
Raspberry Sauce
1 cup raspberry preserves
2 cups raspberries frozen or fresh
Cheesecake
11 ounces white chocolate chips or white chocolate
¾ cup heavy cream
24 ounces cream cheese room temperature
¾ cup powdered sugar
½ cup sour cream or Greek yogurt, room temperature
3 large eggs room temperature
Optional Garnish
fresh raspberries
whipped cream
Instructions
OREO Crust
Raspberry Sauce
Cheesecake
Notes
Storage Information
Refrigerator Storage: Leftover cheesecake should be stored tightly covered in an airtight container for up to 4 days.
Freezing: To freeze, wrap the cheesecake tightly in plastic wrap and then aluminum foil. Transfer to a freezer-safe, airtight container and freeze for up to 2 months. Thaw overnight in the refrigerator. Freeze without any garnishes.
Doneness Tip: Use a digital thermometer to check doneness – you are looking for 150°F (65°C). The cheesecake might have more of a wiggle than a typical cheesecake because of the added white chocolate, so using a thermometer will ensure the cheesecake does not get overbaked, maintaining its creamy consistency.
Nutrition
|
Carbohydrates: 63g
|
Protein: 9g
|
Fat: 44g
|
Saturated Fat: 25g
|
Polyunsaturated Fat: 3g
|
Monounsaturated Fat: 13g
|
Trans Fat: 0.2g
|
Cholesterol: 142mg
|
Sodium: 343mg
|
Potassium: 293mg
|
Fiber: 2g
|
Sugar: 48g
|
Vitamin A: 1239IU
|
Vitamin C: 8mg
|
Calcium: 149mg
|
Iron: 3mg
The post Velvet White Chocolate Raspberry Bliss first appeared on Fitgag.