Luscious Banoffee Poke Cake
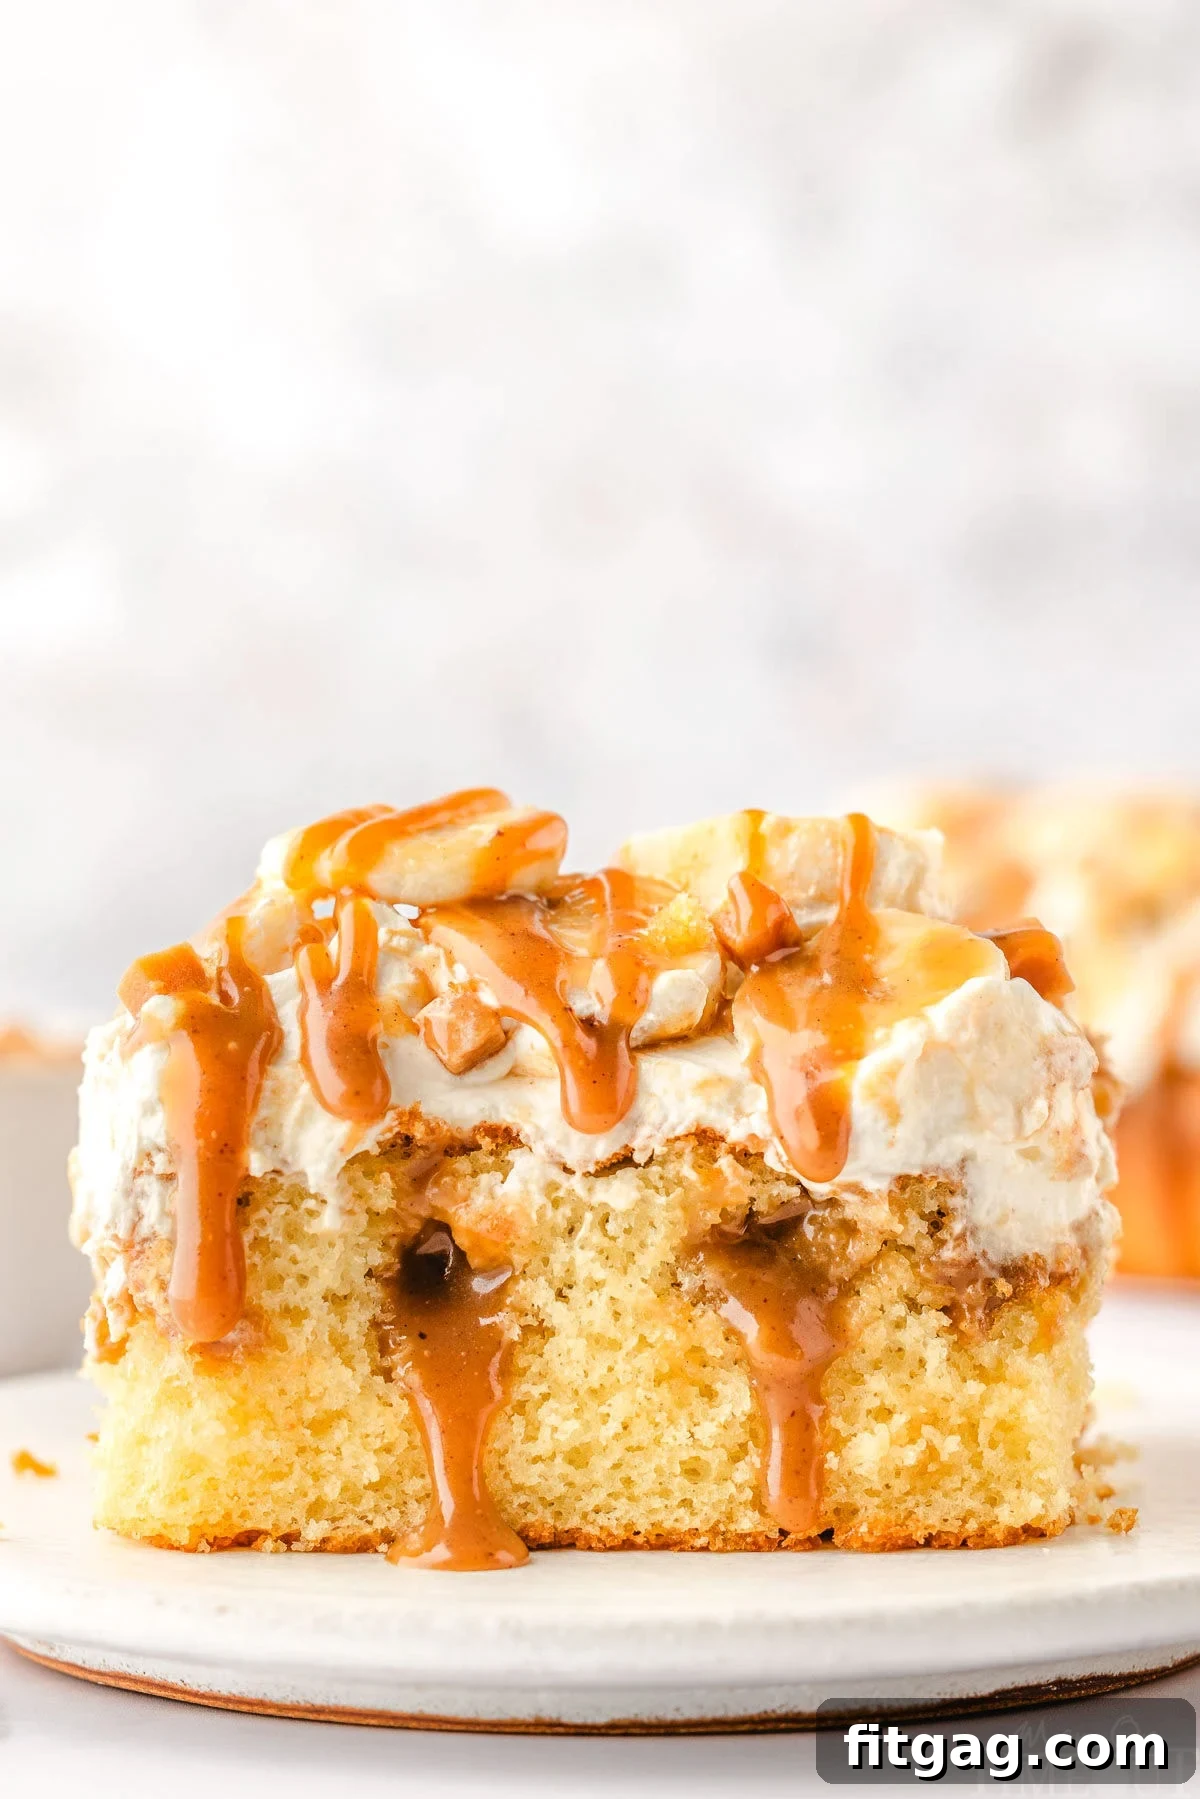
Welcome to the ultimate guide for creating a truly unforgettable dessert: the **Banoffee Poke Cake**. This sensational cake masterfully blends the beloved British banoffee flavors with the delightful ease of a poke cake, resulting in a treat that is both visually stunning and incredibly delicious. Imagine a moist, fluffy yellow cake generously soaked with luscious dulce de leche, then crowned with a cloud of freshly whipped cream, sweet ripe bananas, and a sprinkle of crunchy toffee bits. Every forkful offers a symphony of textures and flavors – rich, creamy, sweet, and wonderfully comforting. Whether you’re a seasoned baker or a kitchen novice, this recipe promises to be a showstopper for any gathering and a guaranteed crowd-pleaser that will have everyone asking for seconds.
If you’re on the hunt for more extraordinary cake creations, be sure to explore my decadent Carrot Cake, the velvety smooth Red Velvet Cake, and the irresistibly sweet Caramel Cake!
Indulge in the Ultimate Banoffee Poke Cake Experience
Prepare to add this incredible Banoffee Poke Cake to your baking repertoire immediately – you absolutely will not regret it! This dessert is not just simple to assemble; it consistently delivers a wow factor that makes it suitable for any event, from casual family dinners to grand celebrations. Our easy-to-follow recipe brings together the deep, caramelized notes of **Dulce de Leche** with a tender, fluffy yellow cake, light-as-air whipped cream, and the natural sweetness of fresh bananas. It’s a harmonious blend of textures and tastes, creating an irresistible confection that will delight every palate. This cake stands out as a true crowd-pleaser, ensuring smiles and satisfied sighs with every bite.
One of my favorite aspects of this particular recipe is how quickly it comes together, especially when I’m pressed for time but still want to serve something spectacular. For those who prefer to bake entirely from scratch, I’ve included detailed variations in the comprehensive recipe card at the end of this post. These include instructions for making a delightful homemade yellow cake from scratch, as well as a simple method for crafting your own creamy dulce de leche, perfect for when store-bought options are unavailable or you simply crave that authentic, homemade touch.
Understanding “Banoffee”: A Delicious British Legacy
The intriguing word “Banoffee” is a charming portmanteau, ingeniously combining “banana” and “toffee.” It refers to a classic British dessert renowned for its sublime blend of fresh bananas, rich whipped cream, and a decadent toffee sauce. Traditionally, this toffee is created by boiling sweetened condensed milk until it transforms into a thick, golden caramel – precisely what we know and love as **Dulce de Leche**. The most iconic incarnation of this flavor profile is the Banoffee Pie, a quintessential dessert featuring a buttery biscuit base, generous layers of this homemade toffee, fresh banana slices, and a lavish topping of whipped cream.
Over time, the captivating combination of bananas and toffee (or dulce de leche) became so popular that “banoffee” evolved into a widely recognized term for any dessert showcasing these signature ingredients. This evolution has inspired countless culinary creations, from cheesecakes to muffins, and, of course, leading to the ingenious and utterly delicious Banoffee Poke Cake we’re celebrating today. The poke cake format allows the rich dulce de leche to thoroughly permeate the cake, creating an even more integrated and delightful banoffee experience.
Why You’ll Fall in Love with This Banoffee Poke Cake Recipe
This Easy Banoffee Poke Cake truly offers the best of all worlds. It begins with a tender, buttery yellow cake that acts as a perfect sponge, eagerly soaking up the warm, sweet Dulce de Leche. This creates an incredibly moist and flavorful foundation, which is then generously blanketed with light, ethereal whipped cream and finished with slices of fresh banana and delightful toffee pieces. The genius of this recipe lies in its flexibility: opting for a boxed cake mix and canned Dulce de Leche transforms it into a wonderfully convenient and fast dessert without compromising on its irresistible decadence. Here’s why this Banoffee Poke Cake will quickly become a cherished favorite:
Decadently Delicious: The star of the show, dulce de leche, is inherently rich and sumptuously creamy, infusing every bite with a deep, caramelized sweetness that is utterly luxurious. Paired with the light, airy whipped cream and fresh bananas, it creates a dessert that feels incredibly indulgent yet surprisingly balanced. The flavors are complex and satisfying, making it an instant favorite for anyone who loves caramel and banana combinations.
Perfect for Any Occasion: This cake’s universal appeal makes it an ideal choice no matter the celebration. From festive holidays like Thanksgiving or Christmas to joyful birthdays, casual family get-togethers, potlucks, or even just a sweet ending to a weeknight meal – this cake consistently proves to be a real crowd-pleaser. Its inviting appearance and delightful flavor profile guarantee it will be the centerpiece of any dessert table.
Semi-Homemade or Completely from Scratch: We understand that bakers have varying levels of time and desire for complexity. That’s why this recipe shines with its adaptable approach. You can choose the convenient semi-homemade route, utilizing a quality box mix and store-bought dulce de leche for a quick yet impressive treat. Or, for those who relish the art of baking from the ground up, we’ve provided comprehensive options to prepare both the yellow cake and the dulce de leche entirely from scratch. This flexibility ensures that anyone can enjoy creating this wonderful dessert, regardless of their baking experience or time constraints. See the detailed instructions in the recipe card at the end of this post for both options.
Essential Ingredients for Your Banoffee Poke Cake
Creating this irresistible Banoffee Poke Cake requires only a handful of readily available ingredients, which you can easily find at your local grocery store. Let’s take a closer look at what you’ll need to assemble this delightful dessert. As always, for precise measurements and detailed instructions, **you can find the full, printable recipe card at the very end of this post**.
Yellow Cake Mix: This serves as the incredibly soft and fluffy base for our cake. A quality yellow cake mix ensures a consistent texture that is perfect for soaking up the rich dulce de leche, making every bite moist and flavorful. You can also opt for a vanilla or butter cake mix for a subtle variation in flavor.
Dulce de Leche: This sweet, caramelized milk is the heart and soul of the banoffee flavor. It imparts a deep, rich caramel taste and adds essential sweetness and moisture to the cake. While I’ve used a convenient store-bought dulce de leche for ease, the recipe card includes simple instructions on how to make your own from sweetened condensed milk, offering an even richer, homemade touch.
Heavy Whipping Cream: This is whipped into a light, airy topping that provides a beautiful contrast to the cake’s richness. It adds a delicate creaminess and a refreshing quality that balances the intense caramel notes. Ensure it’s very cold for best whipping results.
Vanilla Extract: A splash of high-quality vanilla extract is added to the whipped cream, enhancing its flavor with a subtle warmth and aroma that perfectly complements both the yellow cake and the dulce de leche.
Bananas: Freshly sliced, ripe bananas are crucial for authentic banoffee flavor and texture. Their natural sweetness and soft texture pair exquisitely with the caramel notes of the dulce de leche and the fluffy cake. Choose ripe but firm bananas to avoid mushiness.
Toffee Pieces: While completely optional, I highly recommend adding these! They introduce a delightful crunch and an extra layer of buttery, caramelized flavor that elevates the entire dessert. You can use pre-packaged toffee bits or chop up your favorite toffee bar.
Homemade Yellow Cake Option
Prefer the unparalleled taste of a cake made completely from scratch? No problem at all! I’ve included a truly simple and utterly delicious homemade yellow cake recipe within the comprehensive recipe card at the end of this post, designed to seamlessly replace the box mix and elevate your Banoffee Poke Cake to artisanal heights!
Step-by-Step Guide: Crafting Your Banoffee Poke Cake
Creating this Banoffee Poke Cake is surprisingly straightforward, making it an approachable recipe for bakers of all skill levels. I’m going to walk you through each step, ensuring you achieve a perfectly moist, flavorful, and beautiful cake. Remember, for a quick reference and to print, **you’ll find the full printable recipe card with all details at the end of this post**.
1. Bake the Cake Foundation
First things first: prepare your yellow cake. Whether you’re opting for the convenience of a box mix or the satisfaction of our homemade yellow cake recipe (detailed in the recipe card below), bake it according to the package or recipe directions. Once baked, allow the cake to cool in its pan for about 10 to 15 minutes. This crucial resting period allows the cake to firm up slightly. After this initial cooling, use the handle of a wooden spoon or a round utensil to evenly poke holes all across the top surface of the cake. These holes are essential as they will become channels for the luscious dulce de leche. Finally, let the cake cool completely to room temperature, which typically takes about 30 minutes, before moving to the next step.
2. Infuse with Dulce de Leche
Once your cake is fully cooled and generously poked, it’s time for the star infusion: Dulce de Leche. Transfer your Dulce de Leche to a microwave-safe bowl or a glass measuring cup. Warm it gently in the microwave in short bursts (e.g., 15-30 seconds), stirring in between, just until it reaches a smooth, pourable consistency. Be careful not to overheat it. Once warm, pour the dulce de leche evenly over the entire surface of the poked cake. Use a spatula to gently spread it around, ensuring it seeps into all the holes, permeating the cake with its rich, caramel goodness. This step is key to the cake’s incredible moisture and signature flavor.
3. Prepare the Whipped Cream Topping
In a clean, chilled mixing bowl, combine the cold heavy whipping cream and vanilla extract. Using an electric whisk or a stand mixer fitted with a whisk attachment, beat the cream on medium-high speed. Continue whipping until soft peaks form and the cream holds its shape beautifully. Be vigilant and avoid over-whipping, as this can turn the cream grainy. Once ready, carefully spread this light and airy whipped cream evenly across the top of your dulce de leche-soaked cake, creating a fluffy white cloud. Cover the cake loosely and chill it in the refrigerator for at least 30 minutes, or until you are ready to serve. Chilling allows the cream to set and prevents it from melting too quickly.
4. Final Touches: Toppings and Serving
The final flourishes truly bring this Banoffee Poke Cake to life. Just before serving, thinly slice your fresh bananas. Arrange these golden slices decoratively over the top of the whipped cream. Next, sprinkle a generous amount of crunchy toffee bits across the cake, adding a wonderful textural contrast and an extra burst of buttery caramel flavor. For an ultimate presentation and an even richer experience, drizzle a bit of extra warm dulce de leche over the finished toppings. Slice into generous portions and serve immediately to enjoy the freshest, most vibrant flavors and textures. Each bite promises a harmonious blend of sweet, creamy, soft, and crunchy delights!
Optimal Storage for Your Banoffee Poke Cake
To ensure your Banoffee Poke Cake remains at its absolute best, proper storage is key. This delightful cake is truly best enjoyed within the first 48 hours after assembly, when the whipped cream is perfectly fresh and the bananas are at their prime. You can keep it covered in an airtight container or tightly wrapped with plastic wrap in the refrigerator for up to 3 days. Beyond 72 hours, you may notice that the freshly whipped cream starts to “weep” or become slightly watery, and the beautiful banana slices will begin to oxidize and turn brown. While still edible, the aesthetic and texture will diminish. Due to the fresh bananas and delicate whipped cream, I do not recommend freezing this cake, as it will significantly compromise the texture and overall quality upon thawing.
Exciting Variations to Elevate Your Banoffee Poke Cake
This Banoffee Poke Cake recipe is wonderfully versatile, offering plenty of opportunities to customize it to your taste preferences or dietary needs. Don’t hesitate to get creative and experiment with these delicious variations:
Embrace the Dark Side with Chocolate: For a truly decadent twist, consider using a rich chocolate cake mix or a homemade chocolate cake as your base. The deep, bittersweet notes of chocolate create an incredible synergy with the sweet caramel of dulce de leche and the fresh bananas, offering a more sophisticated and intensely flavored dessert.
A Pinch of Sea Salt Magic: Sprinkle a delicate pinch of flaky sea salt over the top of the cake just before serving. The subtle saltiness wonderfully enhances and contrasts with the sweetness of the dulce de leche and whipped cream, bringing out deeper caramel notes and creating a more complex flavor profile.
Fruitful Swaps: While bananas are traditional, you can easily swap them out for other fresh fruits to create a different flavor experience. Sliced strawberries or raspberries can add a delightful tartness and vibrant color, while perfectly ripe peaches or grilled pineapple slices could introduce a summery, tropical twist.
Caramel Alternatives: If dulce de leche is hard to find or you simply prefer another option, feel free to use your favorite store-bought caramel sauce instead. Opt for a high-quality, thick caramel sauce that will seep nicely into the cake and provide that rich, buttery sweetness.
Thoughtful Allergy-Friendly Adaptations
For those navigating dietary restrictions or allergies, this Banoffee Poke Cake can still be enjoyed with a few simple modifications:
Gluten-Free: Easily make this cake gluten-free by choosing a reliable gluten-free yellow cake mix. If you opt for the homemade cake recipe, ensure you use a high-quality 1:1 gluten-free all-purpose flour blend designed for baking to maintain the desired texture and moisture.
Dairy-Free: To create a dairy-free version, look for readily available coconut or almond-based whipped creams in the refrigerated section or freezer aisle (thaw frozen whipped topping if using). For the caramel component, substitute with a store-bought dairy-free caramel sauce, which often uses coconut milk or other plant-based ingredients to achieve a similar rich flavor.
Nut-Free: If nut allergies are a concern, it’s important to **ensure that your toffee pieces are certified nut-free**, or simply omit them entirely. As a delightful nut-free crunchy alternative, consider garnishing the cake with chocolate shavings, finely crushed pretzels, or even some toasted coconut flakes (if not allergic to coconut).
Frequently Asked Questions About Banoffee Poke Cake
Here are some common questions to help you perfect your Banoffee Poke Cake:
Q: Can I make this cake homemade instead of using a box mix?
A: Absolutely! For those who prefer to bake from scratch, I’ve included a quick, easy, and incredibly delicious homemade yellow cake recipe in the comprehensive recipe card at the end of this post. It’s a wonderful alternative that adds an extra layer of love to your dessert.
Q: What if I can’t find dulce de leche at my local store?
A: Dulce de leche is becoming increasingly common and is often found in the baking aisle right next to sweetened condensed milk, or sometimes in the international foods section. If you still can’t locate it, many online retailers carry it. Alternatively, and quite simply, you can make your own! The recipe card at the end of this post provides detailed instructions for crafting homemade dulce de leche from sweetened condensed milk using a slow cooker, which is surprisingly easy and yields a wonderfully rich result.
Q: Can I make this Banoffee Poke Cake ahead of time?
A: Yes, you can prepare the cake base and infuse it with dulce de leche a day in advance. Cover it tightly and refrigerate. However, for the freshest appearance and best texture, I highly recommend preparing and adding the whipped cream, fresh banana slices, and toffee bits no more than a few hours before serving, or ideally, just before serving. This prevents the bananas from browning and the whipped cream from losing its peak freshness.
Q: What kind of baking pan is best for this recipe?
A: A standard 9×13 inch (23×33 cm) rectangular baking dish is perfect for this poke cake recipe. It provides ample surface area for poking holes and layering, and ensures even baking. Using a lighter-colored metal pan usually yields a more evenly baked cake compared to dark pans, which can sometimes lead to over-browning on the edges.
Q: How do I prevent my bananas from browning on top of the cake?
A: The best way to keep bananas from browning is to slice them and add them to the cake just before you plan to serve it. If you need to add them a little earlier, you can lightly brush the sliced bananas with a tiny amount of lemon juice, pineapple juice, or a citrus-based fruit preservative (like Fruit-Fresh). This will slow down the oxidation process, preserving their fresh appearance.
Q: How can I ensure my cake isn’t soggy?
A: To avoid a soggy cake, ensure your cake is completely cooled before you pour the warm dulce de leche over it. A warm cake will absorb too much liquid too quickly. Also, don’t over-poke the cake; evenly spaced holes (about an inch apart) are sufficient for the dulce de leche to penetrate without saturating the cake excessively.
Trish’s Expert Tips for Banoffee Poke Cake Success
Allow the Cake to Cool Properly: It is absolutely essential to allow the cake to cool in its pan for at least 15 minutes before you begin poking holes with a wooden spoon handle. Attempting to poke holes in a cake that is too hot can cause it to collapse or tear, compromising its structure. After poking, ensure the cake is completely cooled to room temperature before applying the whipped cream. A warm cake will instantly melt the delicate whipped cream, resulting in a runny mess.
Optimize Whipping Cream: For the best, most stable whipped cream, always use heavy whipping cream that is very cold. Cold cream whips up more easily, holds its shape better, and achieves those beautiful soft peaks much faster than room-temperature cream. You can even chill your mixing bowl and whisk attachment in the freezer for 10-15 minutes before whipping for optimal results.
Dulce de Leche Consistency: When warming the dulce de leche, aim for a pourable but still slightly thick consistency. This ensures it flows into the poked holes and saturates the cake beautifully without making it overly liquidy. If it gets too hot and thin, let it cool for a few minutes before pouring.
Alternative Caramel Options: If canned dulce de leche is elusive, and you’re short on time to make it from scratch with sweetened condensed milk, don’t fret! You can simply swap in your favorite high-quality caramel sauce. Look for a thick, rich gourmet caramel sauce for the best flavor.
Elevate Box Mixes: If you’re using a box cake mix for convenience, enhance its flavor and texture by replacing the water called for in the package directions with an equal amount of whole milk. This simple swap adds richness and moisture, yielding a more tender and flavorful cake that tastes almost homemade.
Even Hole Distribution: When poking holes in your cake, try to make them as evenly spaced as possible, about 1 inch apart. This ensures that the dulce de leche is distributed uniformly throughout the cake, so every slice is equally moist and flavorful.
Whip Cream Just Before Topping: While you can make the cake and dulce de leche layer ahead, prepare your whipped cream closer to the assembly time. Freshly whipped cream has the best texture and volume, which can diminish if made too far in advance.
Generous Garnishing: Don’t be shy with the toppings! A generous layer of fresh banana slices and a good sprinkle of toffee bits not only makes the cake look stunning but also ensures that every bite is packed with the signature banoffee flavors and contrasting textures.
More Delicious Cakes to Delight Your Taste Buds
If you loved this Banoffee Poke Cake, be sure to explore these other fantastic cake recipes that are sure to impress!
Limoncello Cake – A bright and zesty cake perfect for citrus lovers.
Chocolate Pound Cake – A rich, dense, and utterly satisfying chocolate experience.
Strawberry Poke Cake – Another delightful poke cake, bursting with fresh strawberry flavor.
Creamsicle Cake – A nostalgic flavor combination in cake form, light and refreshing.
Raspberry Vanilla Cake – A delicate balance of sweet vanilla and tart raspberries.
Print
Pin
Banoffee Poke Cake
Ingredients
Cake
13.25 ounces yellow cake mix (1) box + ingredients used to make cake according to package directions (eggs, oil, etc.) See notes below to make a homemade cake.
2 cups Dulce de Leche canned, See notes below to make your own
2 cups heavy whipping cream
1 teaspoon vanilla extract
Topping
2 to 3 medium bananas
¼ cup toffee pieces chopped
Dulce de Leche for drizzling
Instructions
Notes
Homemade Yellow Cake
This is an easy yellow cake recipe that makes the perfect substitute for the box mix in this recipe.
2 1/2 cups all purpose flour
2 1/2 teaspoons baking powder
1/2 teaspoon salt
3/4 cup butter, room temperature for 30 minutes
1 3/4 cups granulated sugar
3 eggs, room temperature
2 teaspoons vanilla extract
1 1/4 cups whole milk
Lightly grease and flour a 9x 13 baking dish. Create a parchment sling by laying a piece of parchment in the baking dish and up the sides. Preheat oven to 375°F.
Whisk together flour, baking powder and salt in medium bowl.
Beat butter with in a large mixing bowl or the bowl of a stand mixer for about 1 minute.
Add sugar gradually, beating until well combined, scraping the sides of the bowl as needed. When all sugar has been added, beat on medium speed for an additional two minutes.
Add eggs, one at a time, beating until combined before adding the next egg.
Beat in vanilla extract.
Add 1/3 of the flour mixture followed by 1/3 of the milk beating on low speed just until combined. Repeat twice more.
Spread batter in to the prepared baking dish and bake for 25 to 30 minutes or until an inserted toothpick comes out clean.
Continue with the recipe as written above.
Crockpot Dulce de Leche
(2) 14 ounces cans sweetened condensed milk (not evaporated milk)
(3) 8 ounce canning jars with rings and lids (or (4) 6 ounce jars) – shorter jars work best
Evenly divide the sweetened condensed milk amongst the jars and seal the jars with clean rings and lids. Make sure the lids are closed tightly.
Place the jars in your slow cooker with space in between.
Fill the slow cooker insert with enough water to cover the jars by 2 inches
Place the lid on and cook on low for 10 hours.
Remove the jars with tongs and cool to room temperature.
Leftover dulce de leche can be refrigerated for up to 3 weeks.
Nutrition
The post Luscious Banoffee Poke Cake first appeared on Fitgag.